Page 16
Simple Scan to Email Setup Guide
May 2004
NOTE:
If the CSV file only contains names and email Internet fax addresses, the file
may map automatically.
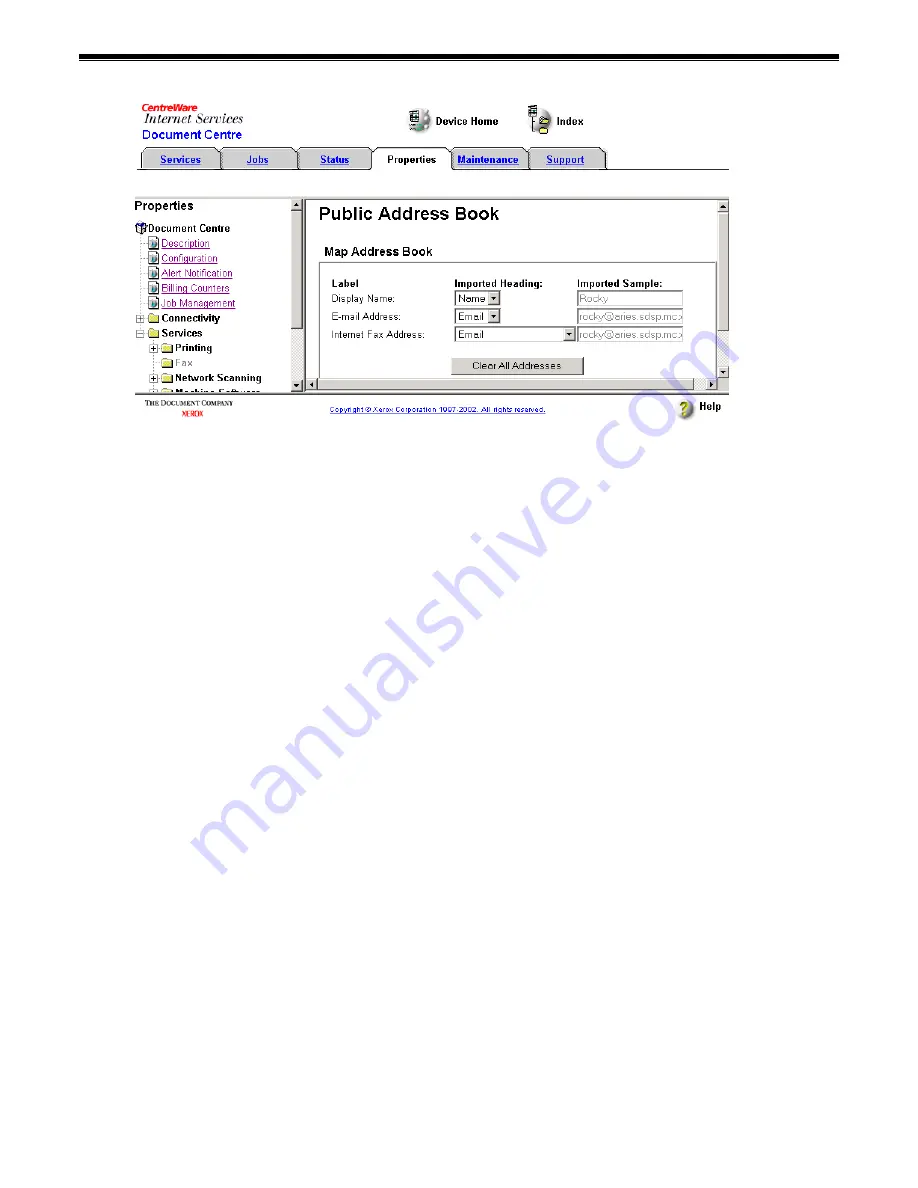
7. Use the
Imported Heading
drop down menu to select the heading that corresponds to
the data you wish to use as
Display Name
in the public address book. The
Imported
Sample
box shows you the data you selected.
8. Use the
Imported Heading
drop down menu to select the heading that corresponds to
the data you wish to use as
E-mail Address
in the public address book. The
Imported
Sample
box shows you the data you selected.
NOTE:
If your file does not contain a heading row, the Imported Heading drop-down
menus contain information from the first line of data in the file. For correct public
address book operation, the Display Name must map to a user name and the email and
Internet fax addresses must map to an SMTP format email address.
9. Click
Apply New Settings
NOTE:
The
Clear All Addresses
button removes all entries from the current public
address book (disabling the feature). The
Import New Address Book
link allows you to
select a different CSV file.
10. When prompted, enter
admin
(lower case) in the
User Name
field. Enter
1111
or the
current password in the
Password
field and click
OK
.
11. When prompted, enter
admin
(lower case) in the
User Name
field. Enter
1111
or the
current password in the
Password
field and click
OK
.
Use CentreWare Internet Services to Set Up the Authentication Server
NOTE:
If you do not wish to set up authentication for the DC 555/545/535 you can skip this
section.
1. When the DC 555/545/535's home page is displayed, select the
Properties
link.
Expand the
Authentication Server
folder and select
General
.