


User Guide: XenData X2500-USB LTO-6 Archive System
9
3. Tape Drive Operation
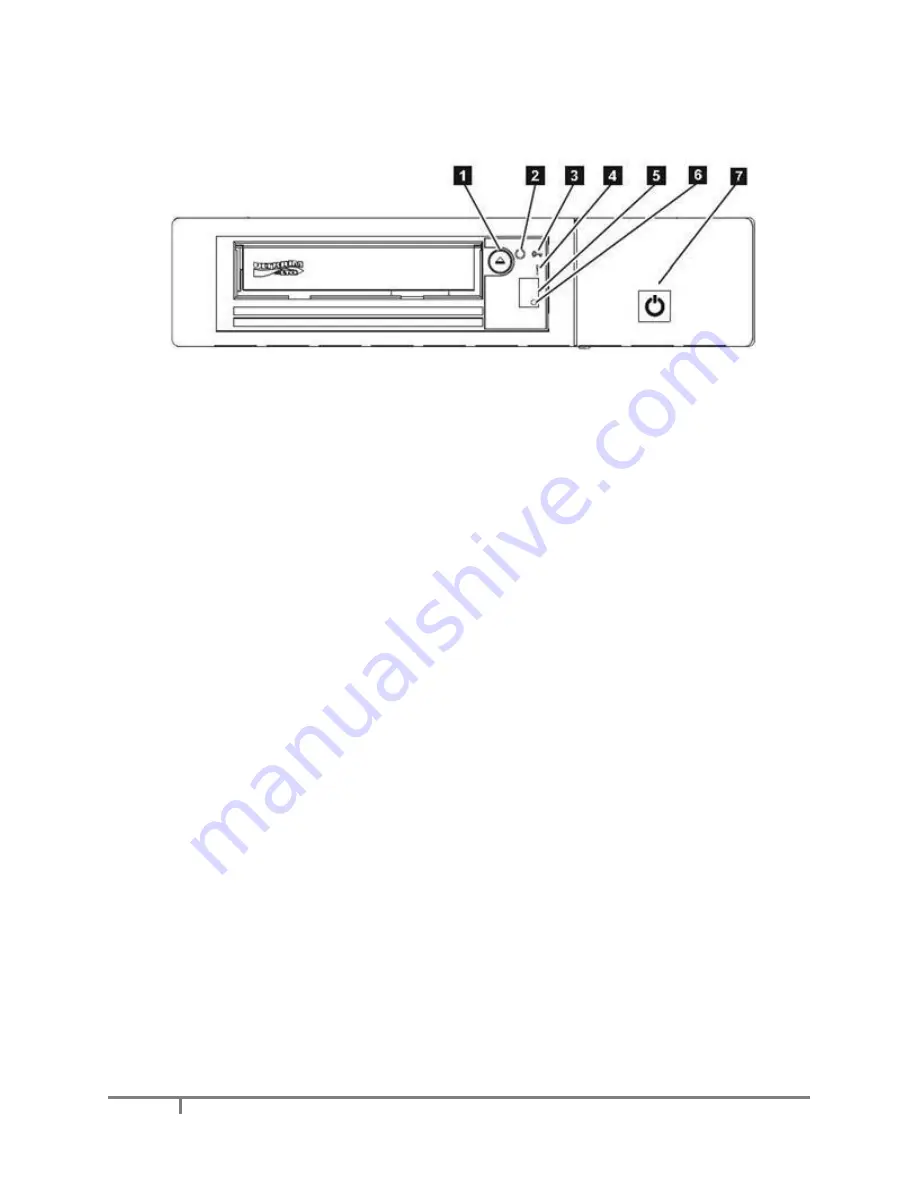
3.1 Tape Drive Front View
1. Cartridge Unload Button
2. Ready Light (green)
3. Encryption Light (white)
4. Fault Light (amber)
5. Single Character Display - SCD
6. SCD Dot
7. Drive Power Button
3.2 Powering on and connecting the LTO Drive
Connect power to the rear of the unit and press the Drive Power Button. The drive will first perform
self tests, which typically takes about two minutes. Wait until the drive becomes idle. This is
indicated by a steady green Ready Light. Connect the drive to a USB port on your computer using
the supplied USB cable.
3.3 Removing Power from the LTO Drive
Wait until the drive becomes idle, as indicated by a steady green Ready Light. If the drive has an
LTO cartridge in it, eject the cartridge. Then press the Drive Power Button.
To ensure reliable operation, do not remove power from the drive during read, write, fast search,
load and unload activities. Power should only be removed when the Ready Light shows steady
green and it does not contain an LTO cartridge.
It is especially important to avoid removing power when files are being written to an LTO cartridge.
This will put the cartridge into an
‘alert state’ which may prevent further files being written to that
tape.


