Solid Green - Charged
Breathing Green - Charging
Solid Amber - Low
Solid Green - Charged
Breathing Green - Charging
Solid Amber - Low
Solid Green - Charged
Breathing Green - Charging
Solid Amber - Low
Charging Indicator
Solid Amber – Low Charge
Breathing Green – Charging
Solid Green – Fully Charged
8
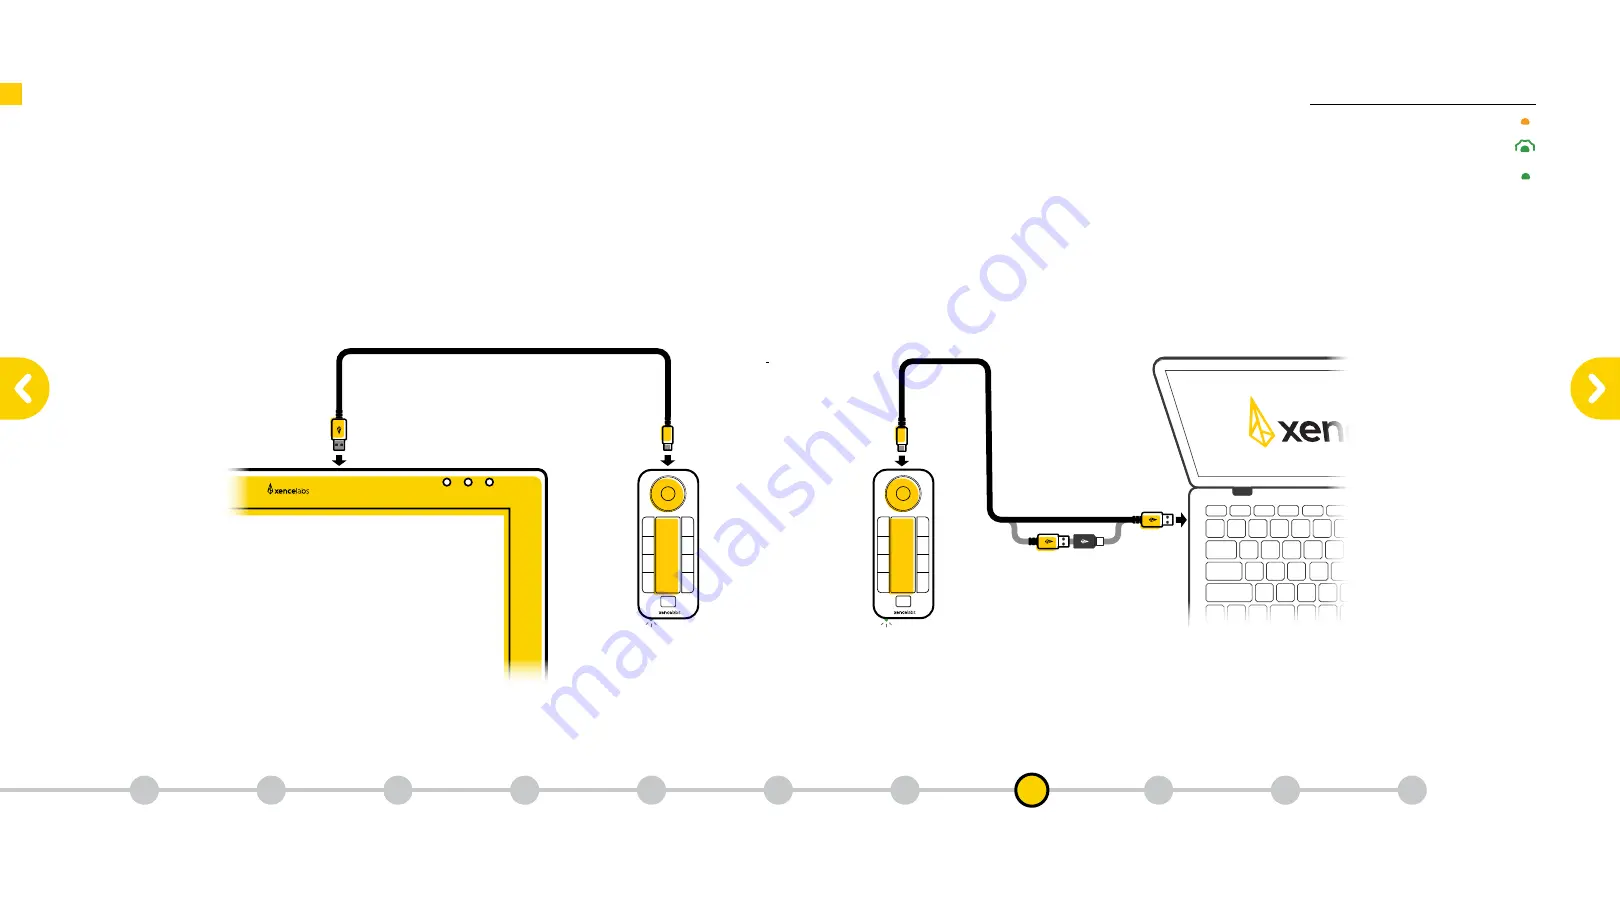
Use the USB-A Ports at the top of the Pen Display to charge
the Quick Keys via the included short cable (0.6m USB-C to
USB-A 3.0).
You can also charge the quick keys through your computer,
using the USB-A to USB-C Adapter if necessary.
Power Indicator
Power Indicator
Solid Amber – Low Charge
Breathing Green – Charging
Solid Green – Fully Charged
Power Indicator
Power Indicator
Solid Amber – Low Charge
Breathing Green – Charging
Solid Green – Fully Charged
Power Indicator
Power Indicator
Solid Amber – Low Charge
Breathing Green – Charging
Solid Green – Fully Charged
Power Indicator
Power Indicator
Solid Amber – Low Charge
Breathing Green – Charging
Solid Green – Fully Charged
Power Indicator
Power Indicator
Solid Amber – Low Charge
Breathing Green – Charging
Solid Green – Fully Charged
Power Indicator
Power Indicator
Solid Amber – Low Charge
Breathing Green – Charging
Solid Green – Fully Charged
Power Indicator
Power Indicator
Solid Amber – Low Charge
Breathing Green – Charging
Solid Green – Fully Charged
Power Indicator
Power Indicator
Solid Amber – Low Charge
Breathing Green – Charging
Solid Green – Fully Charged
Charging the Quick Keys
Xencelabs Pen Display 24
What is in
the box
1
Getting
Started
2
Key Features of the
Pen Display 24
3
Connecting the
Pen Display 24
4
Download
the Driver
5
Key Features of
the Quick Keys
6
Connecting
Quick Keys
Wirelessly
7
Key Functionality
of the
Pen Display 24
9
Key Functionality
of the
Quick Keys
10
Register Your
New Product
11
Charging the
Quick Keys
8


