background image

17

The 12V – 14V outlets are suitable to charge most size lead 

acid type car batteries while the appliance outlet will run 

most 12V appliances fitted with the car cigarette type plug, 

rated up to 5A.

To use the appliance outlet

The appliance outlet will provide power to run most 

appliances which plug directly into the car cigarette socket 

up to a current rating of 5A. This includes spot lights up to 

around 55W, small car type air compressors, small type 

blowers and  some small refrigerators etc. The output 

voltage from the DC appliance outlet is between 12V and 

14.2V, the same as a car.

WARNINGS

Check the rating of the appliance prior to inserting the plug 

into the socket.
The plug  from the appliance should always be fitted with an 

internal fuse.

DO NOT

 attempt to insert a cigarette lighter into the socket.

1. Ensure the appliance to be connected is turned off.
2. Check the rating of the appliance is not above 5A or 60W.
3. Start the generator and allow the generator to warm up.
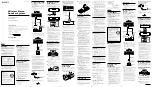
4. Open the cover on the 

appliance socket and insert 

the appliance plug (Fig. N).

5. Turn on the appliance.

Note.

 If the appliance does not 

operate, check the DC  

reset button on the generator 

control panel. Press the  

button to reset.

Note.

 The 12V appliance socket can also be used with  

the 240V AC outlets being used.

To use the battery charging outlet

The generator is fitted with 

a socket outlet specifically 

for connection to a lead acid 

battery for charging and also 

for an additional power supply 

(Fig. O).
The output voltage is between 

12 – 14.2V with a maximum 

output current of 5A.
The generator will charge lead 

acid batteries of various sizes, from small to large.

DO NOT

 charge the electric start battery mounted on the 

generator with the out put from the battery charging socket 

of the generator.

To charge a battery

WARNINGS. 

It is suggested to wear protective clothing, 

gloves and eye protection when handling and working with 

lead acid batteries.
For operators with pacemakers or similar medical devices 

and conditions, it is recommended not to attempt the 

following procedure.

DO NOT

 attempt to charge a lead acid battery in confined 

areas. Ensure the charging process takes place in an area 

where there is fresh air circulating.
Remove the battery from the car, boat or any other device. 

The battery MUST be totally isolated from any other circuitry.
1. Connect the supplied cables 

to the battery terminals. 

Using the colour coding, the 

clamps on the cable MUST 

be connected as follows. 

RED clip to the + Positive 

terminal on the battery, and 

Black Clip to the – negative 

terminal on the battery  

(Fig. P).  

O

P

N

Summary of Contents for X2300KS

Page 1: ...INSTRUCTION MANUAL X2300KS 254 2173 2300W PETROL GENERATOR...

Page 2: ...utlet 20 To use the DC appliance outlet or USB without the generator being operated 21 DC overload cut out 21 Carbon build up 22 Generator maintenance 22 Periodic maintenance 23 Storage 24 Spark plugs...

Page 3: ...ax 5 A USB output 5V Max 1 Amp Motor 5 5HP 4 stroke No load speed 3000 min 1 Fuel tank capacity 15L Fuel type Unleaded Oil type 4 Stroke Net weight 38 5kg Electric start Yes Items required for operati...

Page 4: ...ntangled cords increase the risk of electric shock When operating a power tool outdoors use an outdoor extension cord suitable for outdoor use Use of a cord suitable for outdoor use reduces the risk o...

Page 5: ...in the hands of untrained users Maintain power tools Check for misalignment or binding of moving parts breakage of parts and any other condition that may affect the power tool s operation If damaged...

Page 6: ...charge conductive surfaces in contact with the generator Place generator on low conductivity surface such as a concrete slab ALWAYS operate generator a minimum of 2 meters from any conductive surface...

Page 7: ...ngine speed has been factory set to provide safe operation Tampering with the engine speed adjustment could result in overheating of attachments and could cause a fire Never attempt to speed up the en...

Page 8: ...rator in clean dry well ventilated area Never operate unit in enclosed areas such as garages basements storage sheds or in any location occupied by humans or animals Keep children pets and others away...

Page 9: ...ng operation These parts are covered by guarding to prevent injury Never operate generator with guarding or cover plates removed Avoid wearing loose fitting clothing or jewellery which could be caught...

Page 10: ...ce Ensure the generator has oil Before commencing the generator ensure that the unit has been filled with SAE 30 4 stroke oil Never fill fuel tank indoors Never fill fuel tank when engine is running o...

Page 11: ...tery charging socket 10 DC appliance socket 11 USB power outlet 12 Electric start key start 13 Air filter cover 14 Choke lever 15 Spark plug 16 Fuel drain 17 Muffler 18 Exhaust spark arrestor 19 DC pl...

Page 12: ...nverter controls It is also recommended to use a surge protector on the outlets of the generators Preparing the generator It is important to check the generator before you commence operating the unit...

Page 13: ...check the oil level each time the generator is used Battery start connection When unpacked this generator is not fully connected to the starting battery 22 and will require the negative wire to be co...

Page 14: ...on Fig G Note When the motor is started for the very first time it may require a number of attempts to start until the fuel has travelled from the tank to the motor 5 Once you hear the motor operating...

Page 15: ...nerator 2 Turn the key start ignition 12 to the OFF position Fig J1 3 Turn the fuel lever anti clockwise to the off position Connecting apparatus to the generator Start the generator and allow the gen...

Page 16: ...of a some failed appliances and assisting to protect people against an electric shock Safety switch tripping If the circuit breaker 4 has tripped and cuts off the power it may be due to substantial o...

Page 17: ...e button to reset Note The 12V appliance socket can also be used with the 240V AC outlets being used To use the battery charging outlet The generator is fitted with a socket outlet specifically for co...

Page 18: ...if the battery was originally in a low level of charge the battery will take many hours to recharge fully The time frame will depend on the size of the battery As a guide a standard car battery of aro...

Page 19: ...the Appliance plug connected to the appliance socket in the generator is fitted with a fuse Using the lead acid car battery as the power source the following ratings should not be exceeded 12V applian...

Page 20: ...used for 4 hours run the generator for 1 hour at around 75 of rating This is only required if the generator has been used for less than 50 or rated load If the generator is being used for solely char...

Page 21: ...ace if necessary Valve clearance Check and adjust when engine is cold Fuel line Check fuel hose for crack or damage Replace if necessary Exhaust system Check for leakage Retighten or replace gasket if...

Page 22: ...K RN11YC Champion WR6DC Bosch Model G1100KU W7RBC Bosch RL87BC Champion BPR7HS NGK Engine oil replacement 1 Place the generator on a level surface and warm up the engine for several minutes The stop t...

Page 23: ...ter 24 prevents any dirt in the fuel from entering the fuel system The procedure for removing this filter in order to replace or clean it is given below Note the following procedure should be performe...

Page 24: ...here are no leaks between the tap and the tank and with the fuel tap turned on ensure there are no leaks where the fuel hose is fitted to the outlet of the tap Cleaning 1 Keep your machine clean The o...

Page 25: ...en fuel shut off valve 7 Unit loaded during start up 7 Remove load from unit 8 Spark plug wire loose 8 Attach wire to spark plug No electrical output 1 Faulty receptacle 1 Have service centre replace...

Page 26: ...loaded 1 Reduce load 2 Insufficient ventilation 2 Move to adequate supply of fresh air No DC Output 1 DC circuit overloaded 1a Remove DC load and reset cut out after 5 min 1b If Battery charging check...

Page 27: ......

Reviews: