background image

8

Radio Reception

When the TUNING/PRESET button is pressed momentarily (0.5
second or less), the frequency changes by a fixed step.

FM :  0.2 MHz steps
AM :  10 kHz steps

Press the TUNING/PRESET button repeatedly until the station
you want to listen to is found.

Pressing this button alternates between Stereo mode and
Mono mode.

Stereo

FM stereo broadcasts are received in stereo and the
"STEREO" indicator lights in the display. 

Mono

To compensate for weak FM stereo reception, select this
mode.  Reception will now be forced monaural, reducing
unwanted noise.

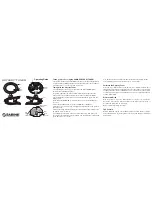
Press the POWER switch to turn the unit on.

1

Select the AM or the FM band by pressing the corresponding
button.

2

Press the DIRECT button to select the manual tuning mode.

3

Select the station you want to listen to.

<

"TUNED" is displayed when a broadcast is correctly tuned in.

Auto Selection

A

4

FM MODE Button

Example

To select FM 88.30 MHz : 8

q

8

q

3

To select AM 1220 kHz : 1

q

2

q

2

q

0

<

When no button is pressed for 3 seconds, the mode will be
cancelled.

1

3

2

4

3

2

4

TUNER 1

TUNER 2

FM MODE
(TUNER 1)

FM MODE
(TUNER 2)

Hold down the TUNING/PRESET button for 0.5 to 2 seconds.
When a station is tuned in, the tuning process will stop
automatically.

If you want to stop the tuning process, press the
TUNING/PRESET button.

Manual Selection 
(Selecting stations which cannot be tuned automatically)

B

Direct Tuning

Input the frequency numbers with the numeric buttons.

C

Summary of Contents for XDT77

Page 1: ...Thank you for choosing XANTECH Read this manual carefully to get the best performance from this unit XDT77 OWNER S MANUAL AM FM STEREO DUAL TUNER...

Page 2: ...the manufacturer or sold with the apparatus When a cart is used use caution when moving the cart apparatus combination to avoid injury from tip over 13 Unplug this apparatus during lightning storms or...

Page 3: ...trol unit and main unit decreases the batteries are exhausted In this case replace the batteries with new ones Precautions concerning batteries Be sure to insert the batteries with correct positive an...

Page 4: ...N Turn off the power of all the equipment before making connections Read instructions of each component you intend to use with this unit Be sure to insert each plug securely To prevent hum and noise d...

Page 5: ...surface fix the claw to the slot Connect the loop antenna s wires to the AM antenna terminals as shown How to connect Press the lever insert the end of the cord then release the lever Make sure it is...

Page 6: ...6 Names of Each Control C E F G H I D B J K K E F G H I D J A Buttons for TUNER 1 Buttons for TUNER 2 C J H E F G D I J H E F G D I...

Page 7: ...rned on it goes off POWER switch Press this switch to turn the unit on or off FM button AM button Use these buttons to select FM or AM FM MODE button Use this button to select stereo or monaural PRESE...

Page 8: ...ect the AM or the FM band by pressing the corresponding button 2 Press the DIRECT button to select the manual tuning mode 3 Select the station you want to listen to TUNED is displayed when a broadcast...

Page 9: ...nd by pressing the corresponding band button 1 Press the DIRECT button to select the manual tuning mode 2 Select the station you would like to store by scrolling through the station using the TUNING P...

Page 10: ...may be required Though the broadcast is stereo it sounds monaural ePress the FM MODE button Remote control doesn t work ePress the POWER switch to turn the unit on eIf the batteries are dead change th...

Page 11: ...Section Tuning Range 530 kHz 1 710 kHz 10 kHz steps Usable Sensitivity 64 dB m Total Harmonic Distortion 1 at 85 dB m Signal to Noise Ratio 40 dB at 85 dB m General Power requirements 120 V AC 60 Hz P...

Page 12: ...mmands T2B1F1070 cr would command tuner 2 to select band 1 AM and tune to frequency 1070 kHz T2L03 cr would command tuner 2 to set the currently tuned station in this example AM 1070 as AM preset 3 Qu...

Page 13: ...AM FM STEREO DUAL TUNER This appliance has a serial number located on the rear panel Please record the model number and serial number and retain them for your records Model number Serial number Xante...

Reviews: