5
AUDIO OUT
Connect the component with RCA pin cords. Make sure to
connect :
white plug
w
white jack(L:left)
red plug
w
red jack(R:right)
Power cord (AC)
Be sure to connect the power cord to an AC outlet which
supplies the correct voltage.
Hold the power plug when plugging or unplugging the power
cord.
REMOTE
Used for a wired remote control unit (optional).
RS-232
Used for a wired RS-232 standard remote control unit
(optional).
F
E
D
C
FM Antenna
Connect an outdoor FM antenna to the FM 75
Ω
socket.
Generally, a 3-element antenna will be sufficient; if you live
in an area where the FM signals are particularly weak, it
may be necessary to use one with 5 or more elements.
If standard FM broadcast frequencies are available via your
cable service, you may connect your 75 ohm FM antenna
jack to your cable system. Please contact your cable
service to discuss this option.
AM Indoor Loop Antenna
The high-performance AM loop antenna provided with this
unit is sufficient for good reception in most areas.
To stand the loop antenna on a surface, fix the claw to the
slot.
Connect the loop antenna's wires to the AM antenna
terminals as shown.
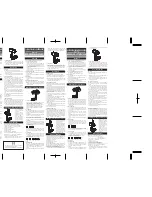
How to connect
Press the lever, insert the end of the cord, then release the
lever. Make sure it is fastened securely by pulling the cord
lightly. Make sure only the bare, stripped wire is inserted in
the jack and that no plastic insulation is preventing contact
between the antenna wire and terminal.
Place the antenna on a shelf, for example, or hang it on a
window frame, etc., in the direction which gives the best
reception, as far away as possible from the entire system,
speaker cords and the power cord, to prevent unwanted
noise.
1
2
B
A
<
If the AM loop antenna provided does not deliver sufficient
reception (often due to being too far from the transmitter or
in a concrete building, etc.), it may be necessary to use an
outdoor AM antenna.
Use either a high quality commercial AM antenna or, if not
available, an insulated wire more than 15 ft (5 m) long, strip
one end, and connect this to the terminal as shown.
The antenna wire should be strung outdoors or indoors near
a window. For better reception, connect the GND terminal to
a reliable ground.
Note:
Even when using an outdoor AM antenna, do not disconnect
the AM loop antenna.