9
99
99
8
88
88
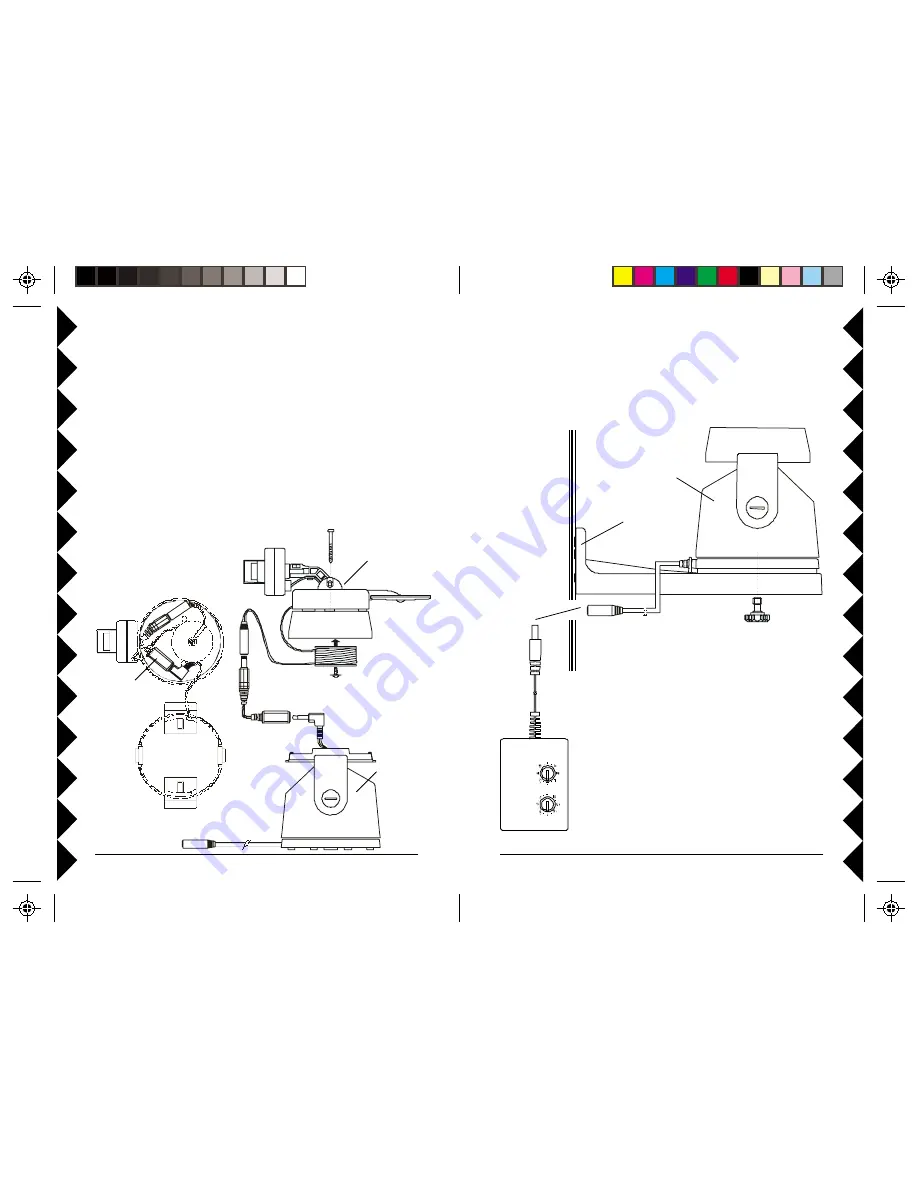
6. Attach the Pan 'n Tilt base to the mounting bracket.
7. Install the complete assembly in a suitable location. If you install it
outdoors, run the jack through a hole in the wall, or through a window, so
you can plug the power supply into an AC outlet indoors.
8. Plug the power supply’s jack into the cable on the
Pan 'n Tilt Base.
9. Plug the power supply into any 120V AC outlet.
10. Set the Housecode dial to a letter between A and P
that matches the Housecode dial on the X10 remote
controls you want to use it with. Set the Unit Code
dial to a number between 1 and 4. This lets you turn
the camera connected to the XM14A on and off by
remote control, using the CR14A remote.
(Transceiver required).
Outdoors
Mounting
Bracket
Pan 'n Tilt
Base
Indoors
XM14A
FR
O
N
T
FR
O
N
T
For
XCam 2
cameras, models XX11A and XX13A (sold separately):
1. Remove the top from the Pan ‘n Tilt base, position the camera with its
cable at the front of the top housing (where the notch for the cable is)
and attach the camera to the housing using the screws provided.
2. Remove the spindle attached on the inside of the top housing, neatly coil
the camera wire into the spindle.
3. Put the coiled spindle back into the top housing and use the supplied
washer head screw to attach it in the housing.
4. Plug the power jack from camera and jack on the pan ‘n tilt base into the
supplied adapter, and put the jacks into the top housing. Use the adapter
only for non Instant-On cameras (models XX11A and XX13A).
5. Attach the top housing to the Pan ‘n Tilt base, make sure the front of the
housing goes to the front of the Pan ‘n Tilt base.
XCam2
camera,
(sold separately)
ZC15A
Pan 'n Tilt
Base
Adapter for non
Instant-On cameras
Adapter for non
Instant-On cameras


