


7
77
77
6
66
66
FR
O
N
T
FR
O
N
T
C
ONNECTING
U
P
ZC15A
Pan 'n Tilt
Base
XCam2
Instant
On camera, (sold
separately)
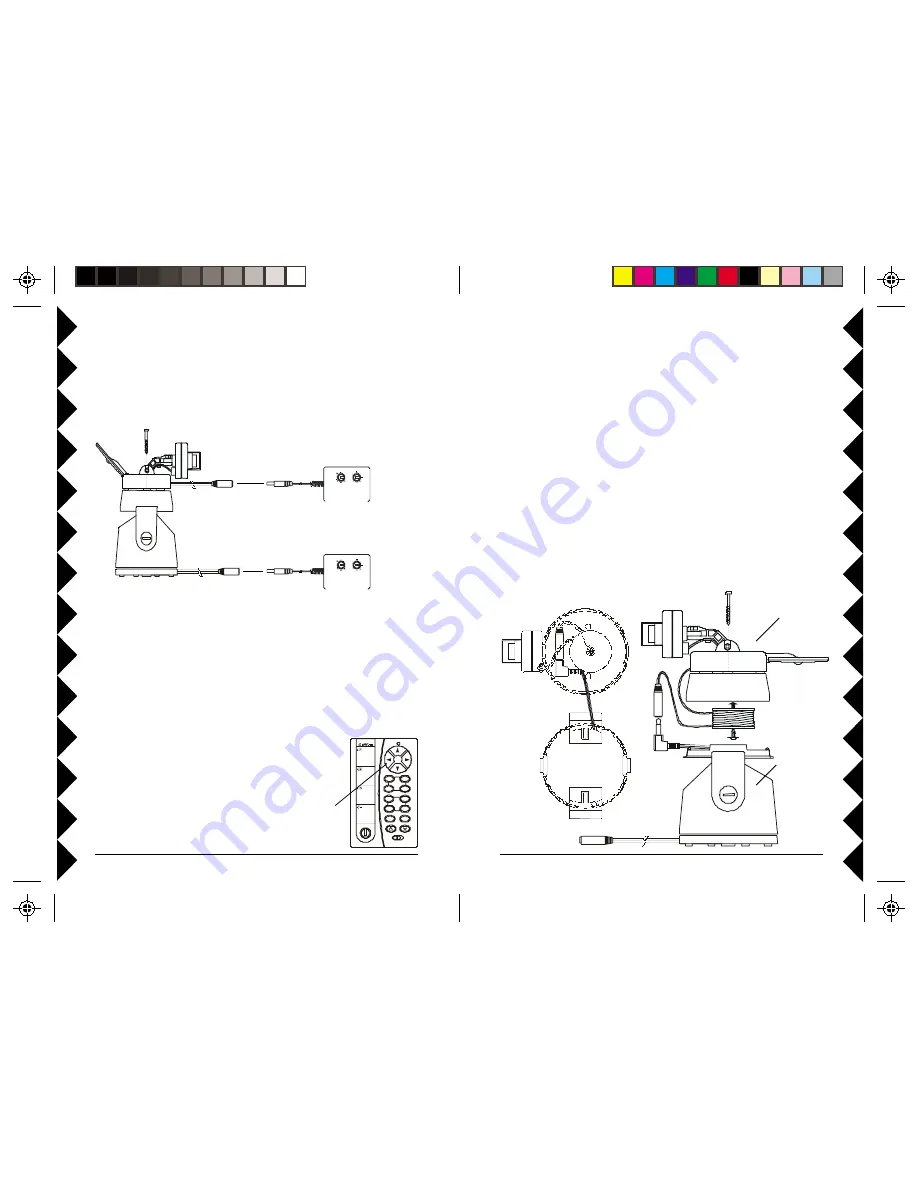
For
Instant-On
cameras, models XX16A and XX17A (sold separately):
1. Remove the top from the Pan ‘n Tilt base, position the camera with its
cable at the front of the top housing (where the notch for the cable is)
and attach the camera to the housing using the screws provided.
2. Remove the spindle attached on the inside of the top housing, neatly coil
the camera wire into the spindle.
3. Put the coiled spindle back into the top housing and use the supplied
washer head screw to attach it in the housing.
4. Plug the power jack from camera into the jack on the Pan ‘n Tilt base,
and put the jacks into the top housing. (Only Instant-On cameras fit,
adapter required for non Instant-On cameras, see next page).
5. Attach the top housing to the Pan ‘n Tilt base, make sure the front of the
housing goes to the front of the Pan ‘n Tilt base.
Q
UICK
S
ETUP
Before you continue it is recommended that you follow the steps below to
give the system a quick try. Later (pages 7 and 8) you can see how to
connect the camera’s cord inside the top of the Ninja so you only need one
power supply.
Plug camera into power supply
included with it, and plug power
supply into an AC outlet.
Plug Ninja into power supply
included with it, and plug power
supply into an AC outlet.
Attach camera to top of
Ninja with screws provided.
!
"
#
Now connect the Receiver to your TV (see page 11).
●
Point the “pip” on the Camera’s antenna and the “squares” on the
Receiver’s antenna towards each other for the best reception.
●
If you experience interference, try setting the Camera and Receiver to a
different letter channel (A, B, C, or D) - use the same letter on each.
Pr o gr a m
SC A N
Sw e e p
C e nt er
N o rm a l
A
C
E
G
I
K
M
O
.
.
.
.
.
.
.
.
C A MER A
C2
C4
PO SITI O N
P3
P2
C3
C1
P1
P4
Now try it out!
●
Insert 4 AAA alkaline batteries (not included) in the
Remote Control.
●
Press the blue buttons at the top of the remote to pan
the camera left and right, and tilt it up and down.
XM10A or
XM13A*
XM14A*
* IMPORTANT! Do not interchange
power supplies. Model XM14A must be
used only for the Ninja Pan ‘n Tilt base.


