background image


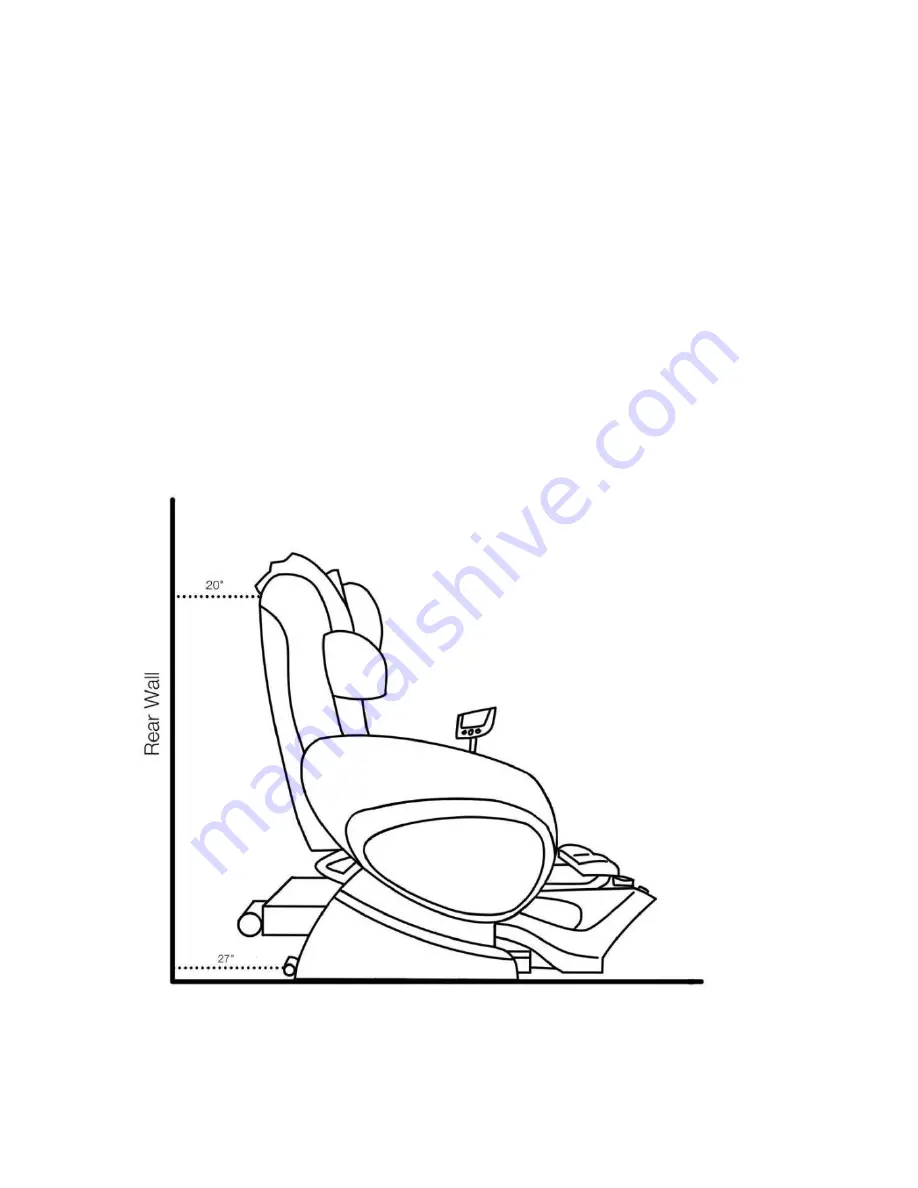
Unboxing and Wall Clearance 

When you receive your pallet from the truck, please do a thorough inspection for  damages to the outside of the box. Holes, 
scratches, scrapes, collapses, and missing boxes should be reported to the driver immediately and should be noted on the bill 
of lading prior to signing for the packages. 
 
When removing boxes from the pallet please remove with care as boxes are large and heavy, Start with removing the 4 thinner 
boxes on the side, you will need 2+ people to help remove the box from the top (Approx. 160lbs), the middle 2 boxes are the 
basins. Be careful not to drop or have anything dropped on these boxes as they are glass and fragile. 
 
Once  the  boxes  are  removed  from  the  pallet.  Carefully  remove  strap  on  massage  chair  box  and  lift  the carton  over  the  chair. 
Remove the rest of the packing foam and cardboard. 

Please see 9000 chair manual for arm and chair back installation instructions. Wall Clearance 

Please place spas with at least 20 inches away from the wall at during its most upright 
position. 


Summary of Contents for FIORI 9000

Page 1: ...OWNER MANUAL PLEASE SAVE THIS MANUAL FOR REFERENC 9000 2019 W S Industries Inc All rights reserved Design and Specifications are subject to change without notice ...

Page 2: ...al Limited Warranty 3 Safety and Precautions 4 Installation Utility Information 5 Spa Diagram and Measurements 6 Unboxing and Wall Clearance 7 Installation Diamond Base 8 10 Installation Crystal Base 11 13 Care and Maintenance 14 ...

Page 3: ...local plumbing electrical and building codes any damage resulting from standing in the basin or any other unintended stress to the basin any damage incurred during shipping and handling This limited warranty is also conditional upon the pedicure spa being installed by a licensed professional in accordance with WS installation instructions the proper use of cleaning and sanitizing solutions as per ...

Page 4: ...ng your pedicure spa installed Subsequent inspections and approvals that may be required are the responsibility of the purchaser See limited warranty regarding incidental or consequential exclusions WARNING RISK OF ELECTRIC SHOCK do not permit ANY electric appliance to be operated in close of this pedicure spa CAUTION Test the ground fault circuit interrupter protecting this appliance periodically...

Page 5: ...t and Basin Extended 68in X 34in X 54in Reclined and Basin Extended 81in X 34in X 40in Weight Capacity 350lbs Basin Capacity Diamond Bowl 5 25 Gallons Crystal Bowl 6 Gallons Plumbing Water Supply Lines Hot Cold supply lines are 1 2 with standard faucet fitting Drain Pipe Outlet 1 Schedule 40 PVC Coupler Gravity type drainage systems do not require back flow fitting Optional discharge pump wall dra...

Page 6: ...Pedicure Spa Diagram And Measurements ...

Page 7: ...t with removing the 4 thinner boxes on the side you will need 2 people to help remove the box from the top Approx 160lbs the middle 2 boxes are the basins Be careful not to drop or have anything dropped on these boxes as they are glass and fragile Once the boxes are removed from the pallet Carefully remove strap on massage chair box and lift the carton over the chair Remove the rest of the packing...

Page 8: ...nge see picture Please allow glue to fully set prior to use See directions on glue bottle Mounting the brackets The shorter flanged motor bracket is to be mounted in the center of the spa chair using the 3 rd and 5 th holes from the motor bracket see picture using the two 1 bolts The taller flanged drain pipe bracket is to be mounted to the left of the motor bracket using the same 3 rd and 5 th ho...

Page 9: ...s pin and clip Connect the 2 wiring harnesses 1 black and 1 white to the spa chair Turn on spa chair and push and hold the left arrow button to send the push rod forward until it stops Install Bearing Block Guide using the 4 longer 1 bolts and Allen wrench tool provided ...

Page 10: ...n and clip Run the hot and cold supply lines underneath control box and fasten the drain pipe to the threaded drain on the rear of the spa Mount the rear of the drain pipe to the drain mounting bracket using the smaller clevis pin and clip If extension cords are required please be sure to use a 12 gauge cord ...

Page 11: ...ture Please allow glue to fully set prior to use See directions on glue bottle Mounting the brackets The shorter flanged motor bracket is to be mounted in the center of the spa chair using the 2nd and 4th holes from the motor bracket see picture using the two 1 bolts The taller flanged drain pipe bracket is to be mounted to the left of the motor bracket using the same 2nd and 4th holes also with t...

Page 12: ...d until it stops Push basin under chair and align the push rod assembly to the rear of the basin attach using large clevis pin and clip Run the hot and cold supply lines underneath control box and fasten the drain pipe to the threaded drain on the rear of the spa Mount the rear of the drain pipe to the drain mounting bracket using the smaller clevis pin and clip If extension cords are required ple...

Page 13: ...al connections for cracks leaks ordamage Wipe down chair basin with damp cloth to preventstains Dust clean control box with dry cloth or duster to preventoverheating Periodic Maintenance Inspection lubrication of massage roller and track is required every 6 months to ensure proper function and long service life Prior to inspection please ensure that the unit is off andunplugged To get to massage r...

Page 14: ...WWW WSNAILS COM W S INDUSTRIES INC 14063 BORATE ST SANTA FE SPRINGS CA 90670 TEL 1 714 799 9882 FAX 1 174 890 0383 EMAIL INFO WSNAILS COM ...

Reviews: