background image

1.Ready:

1.1 Explosion-proof pump is designed for hydraulic torque wrench. There is a 2-way, 4-position

solenoid operated direction control valve on the pump, port A is high pressure point, it can export

the oil at the high pressure, and port B is low pressure point which can output the oil at the low

pressure.

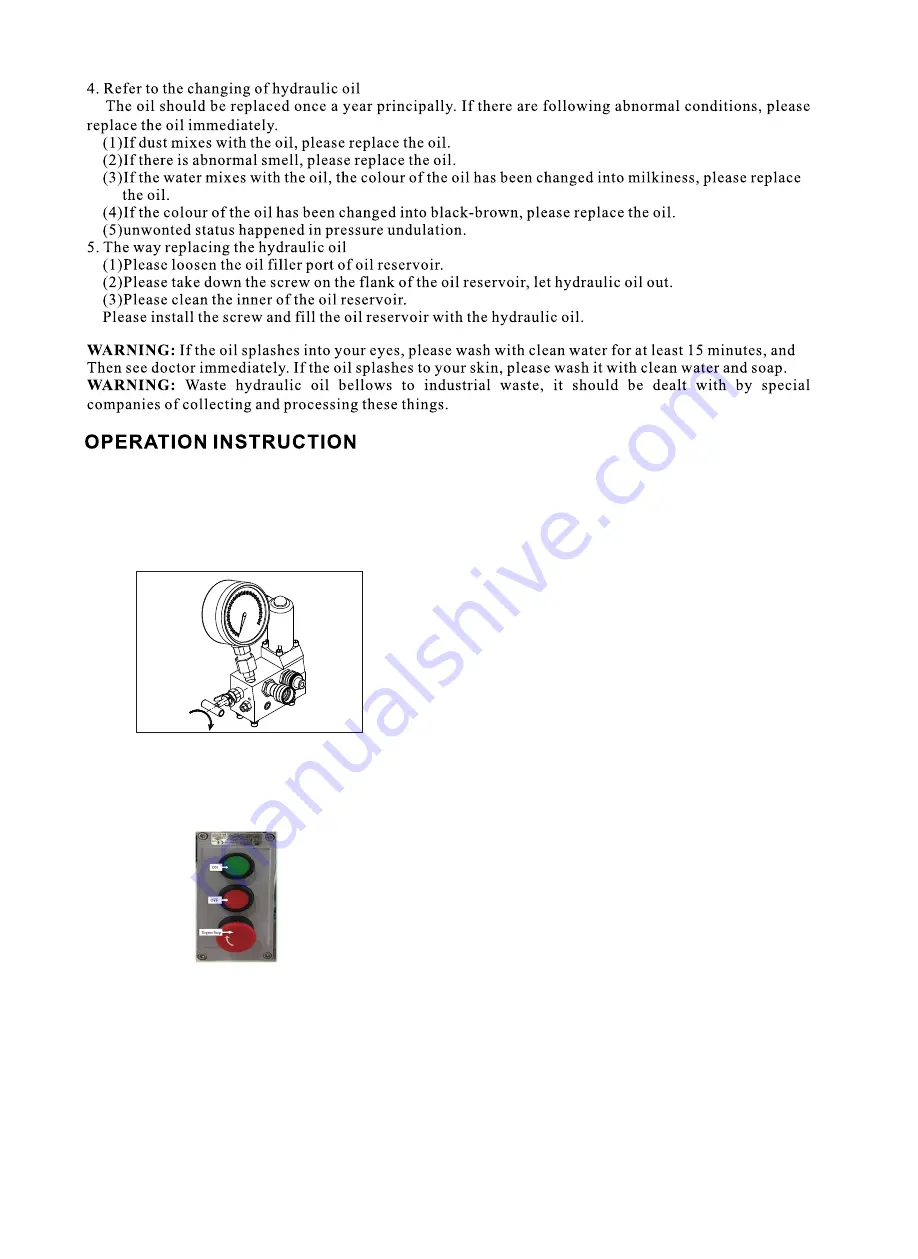
1.2 Please loosen the high-pressure valve for adjusting pressure before operating.

2.Adjust the pressure:

     2.1 Please connect the power and push the switch at the position of “ON”. Then press the lock

     button make the power pack working, then the power pack will output the low-pressure.

     2.2 Please press the retract button on the controller and adjust the pressure unit the working

     Plessure reach to what you need, and then loosen the retract button on the controller.

3. Operation:

3.1 Please press down the retract button on the controller, the pump output. The high pressure,

torque wrench works;Loosen from the retract button, the pump output the low pressure, the

torque wrench retracts; press down the lock button, the button retracts, the pump stops.

3.2 After operating, please turn off the power. Then press the rubber button on the top of solenoid

operated direction control valve in order to release the pressure in hoses and equipments,then you

can take down the hose and cover the safety cap for the quick couplers.

Attention: First time to use or after service, please try several time to operate without any

loading, this ca eliminate the in system.

Adjust

pressure

5

Summary of Contents for KLW4010 EX

Page 1: ...KLW4010 EX Operation And Maintenance Manual Of KLW4010 Explosion proof Hydraulic Pump Explosion proof...

Page 2: ...ll be out of our warranty Range 10 Please do not fill the pump reservoir with too much oil otherwise the pressure of the reservoir will increase and the oil will spill over so the reservoir will be br...

Page 3: ...WREN 8 Release oil port G1 4 9 Control system the integrated electric equipment of the pump 10 Cover plate for oil tank seal the oil tank and install the parts of power pack 11 Solenoid valve Its func...

Page 4: ...AND DESCRI PT I ON OF PARTS Item Description Item Description 1 Electrical control system 5 Pump Head Assembly 2 Motor 6 Oil pipe Assembly 3 Pressure gauge 7 Oil return pipe Assembly 4 Oil tank Assem...

Page 5: ...8 6 1 1 117 And cover on the dust cap 380 4 2 2 690 520 476cm with 1 EX KL 1...

Page 6: ...ntroller and adjust the pressure unit the working Plessure reach to what you need and then loosen the retract button on the controller 3 Operation 3 1 Please press down the retract button on the contr...

Page 7: ...1 Check Valve Assembly 1 4 3 O Ring 4 11 1 Check Valve 1 4 4 Retaining Ring 2 11 2 Retaining Ring 1 4 5 O Ring 2 11 3 O Ring 1 4 6 O Ring 2 11 4 O Ring 1 5 Steel Ball 5 12 Low Pressure Valve Assembly...

Page 8: ...valve 2 7 1 Check Valve 1 set 7 2 Retaining ring 1 set 7 3 O ring 1 set 7 4 O ring 1 set 7 5 Retaining ring 1 set 8 Release valve 2 1 8 1 Relief Valve 1 set 8 2 Retaining ring 1 set 8 3 O ring 1 set...

Page 9: ...system Repeat operating the system with no load for several times to eliminate air The leaking valve may be frayed Replace it please High pressure leaking valve may not be tightened Tighten it please...

Page 10: ...HYDRAULIC PRINCIPLE 700Bar 9 700Bar 1000Bar...

Page 11: ...om 2 Explosion proof button box BZC8050 Warom 3 Explosion proof plug device BCZ85 380V 16A Warom 4 Explosion proof line tube BNG 6M Warom 5 Explosion proof line tube BNG 5M Warom 6 Explosion proof lin...

Page 12: ...draulic pump noise value 70db 2 Hydraulic pump transport information 1 Handle with care 2 The shipment should be vertical upward as shown in the figure 9 1 FIG 9 1 3 Product handling generally using p...

Page 13: ...ment WARNING Do not exceed equipement ratings the pimps are designed for a max pressure of 10 000Psi 700Bar Do not connect a jack or cylinder to pump with a higher pressure rating Never set the relief...

Reviews: