background image

proVEOS Installation Guide

          53 


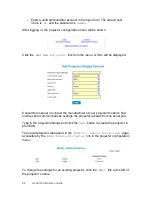
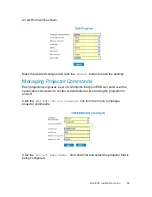
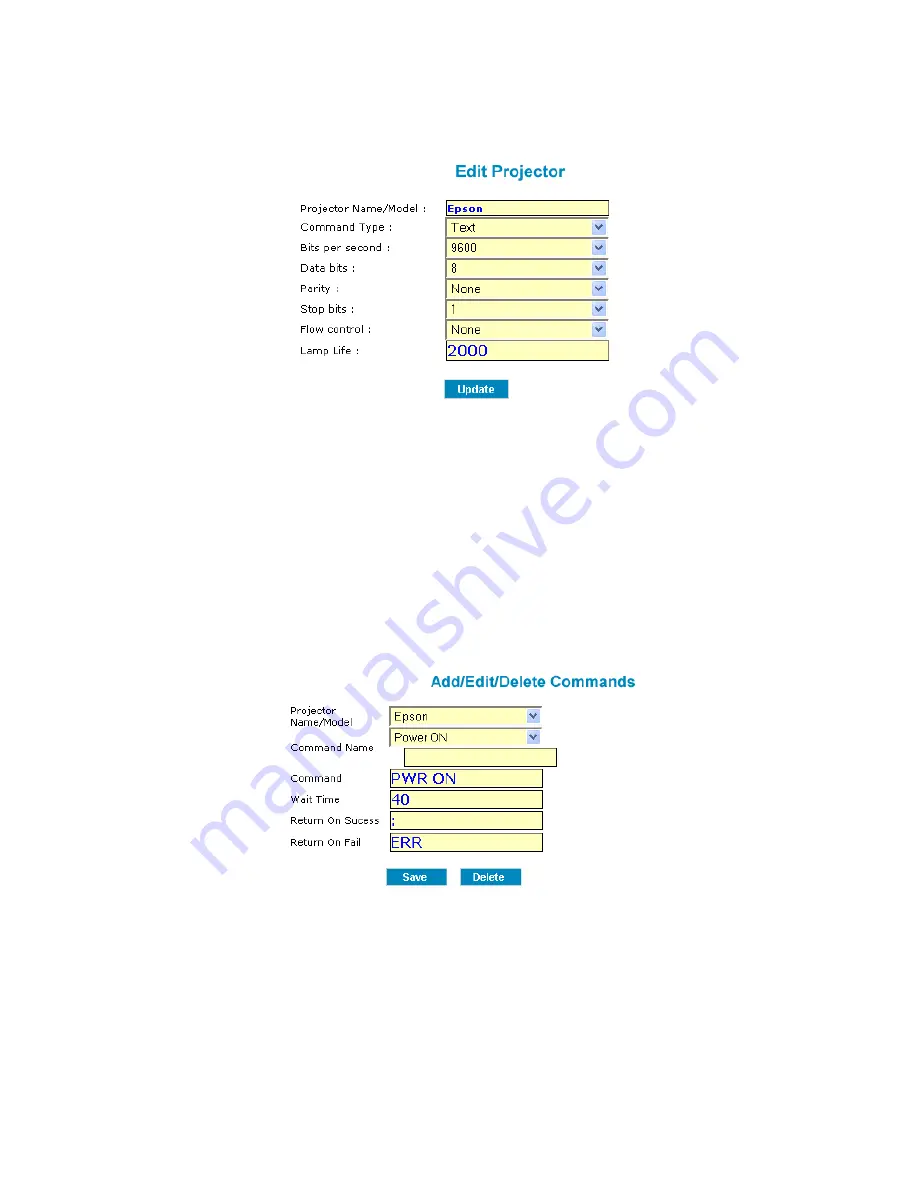
An edit form will be shown: 


Make the desired changes and click the

 Update 

button to save the settings. 

Managing Projector Commands 

Each projector recognizes a set of commands that proVEOS can send over the 
serial cable connection to control certain features, like turning the projector on 
and off. 

Click the

 Add/Edit/Delete Commands 

link from the menu to manage 

projector commands. 


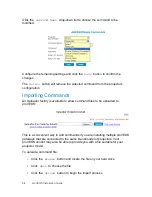
Click the

 Project Name/Model 

drop-down list and select the projector that is 

being configured. 

Summary of Contents for proVEOS

Page 1: ...Installation Guide ...

Page 2: ......

Page 3: ...ient 29 Configuring the Firewall 30 Installing the proVEOS Client 33 Testing the proVEOS Client 44 Configuring Projectors 49 Selecting a Projector 50 Adding and Editing Projectors 51 Activating proVEOS 57 Demo Activation 58 Full Activation 58 Importing an Activation Key 61 Troubleshooting 63 Projector Has No Image 64 Projector Cannot Be Controlled 64 Clients Cannot Connect 64 Display Me Shows a Bl...

Page 4: ......

Page 5: ...Welcome ...

Page 6: ...ionality and cost savings Send any laptop display to the projector wirelessly without the hassle of passing around VGA cables and configuring display settings Participants can interact with one another with the chat and whiteboard sharing features Present video and audio files in HD quality Easily integrate with an existing projector setup Eliminate costly matrix switches touch panels VGA connecti...

Page 7: ...Overview ...

Page 8: ...oVEOS Installation Guide A proVEOS setup consists of several components 1 proVEOS Wireless Presentation Gateway 2 Projector 3 Speakers 4 Local area network 5 Presentation laptop with proVEOS client software ...

Page 9: ...working to receive presentation screens media files and other information captured and sent from the proVEOS client software Video received by proVEOS is sent to the projector via an analog VGA or digital DVI or HDMI video cable Audio from proVEOS is sent to a speaker system via stereo mini jack analog audio cables optional audio cable is not provided proVEOS is also connected to the projector via...

Page 10: ......

Page 11: ...Setting Up the Hardware ...

Page 12: ...ial cable Provides a data communication link between proVEOS and the projector to exchange commands VGA DVI or HDMI video cables converters Sends the video output by proVEOS to the projector Note The included cables and converters may differ depending on the model of the proVEOS gateway AC power adapter Supplies power to proVEOS ...

Page 13: ...allation Guide 13 AC power cord Supplies AC power to the AC power adapter Wireless antenna For Wi Fi capable models only Installation discs manuals Note Actual items may differ based on the model you have purchased ...

Page 14: ... Connect the AC power cord to outlet power Connect the AC power adapter s round DC plug to the matching DC power connector behind proVEOS Screw on the wireless antenna if your unit comes with Wi Fi functionality Next connect proVEOS to the projector Using the provided video cables and or converters VGA DVI or HDMI connect proVEOS to the VGA DVI HDMI input on the projector Connect the provided RS 2...

Page 15: ...microphone to the pink microphone input mini jack Note Volume levels need to be configured correctly before sound can be heard over the speakers See Step 3 Volume Configuration on page 26 to find out how to configure the proVEOS mixer Lastly connect to the network to allow clients to connect to proVEOS to make presentations For wired connections connect an Ethernet cable from the LAN port behind p...

Page 16: ...OS Installation Guide This diagram below shows a proVEOS top and the ports that are connected to the projector bottom power adapter network and external speakers Note The back panel of your projector may differ ...

Page 17: ...Installing the proVEOS System ...

Page 18: ...m software installer loads up type proveos and press Enter to start the installation The following hardware should be connected to proVEOS before it is powered up for installation A display capable of at least 1024x768 resolution connected to the VGA DVI port USB keyboard USB mouse Once the display keyboard and mouse are connected proVEOS can be powered on Booting the proVEOS System CD ROM When pr...

Page 19: ... system software CD ROM and begin installation This option is usually labeled USB CDROM Once the setting is made save the BIOS settings and proVEOS will restart itself When it starts up again proVEOS will boot from the system software CD ROM and automatically install the proVEOS system software The installation will take approximately 20 minutes Note The BIOS screenshots pictured may be different ...

Page 20: ...nd is ready for use Troubleshooting Display Problems If the screen above does not show up after proVEOS is turned on it is most likely caused by the display s inability to support the required 1024 x 768 resolution output by proVEOS Some older projectors may only support resolutions up to 800 x 600 To resolve this connect proVEOS to another display capable of at least 1024 x 768 resolution ...

Page 21: ...Configuring proVEOS ...

Page 22: ...he first time an installation wizard automatically begins to guide you through all the settings required to configure proVEOS for use Complete all steps in the installation process before using proVEOS Click Continue to proceed to the first installation step ...

Page 23: ...he proVEOS gateway on the network The default is proVEOS IP address Unique fixed IP address for the proVEOS gateway on the network The default is 192 168 1 1 Subnet mask Enter the subnet mask matching the subnet that the specified IP address belongs to The default is 255 255 255 0 Default Gateway IP address of an available gateway on the network This is usually the IP address of a router DNS serve...

Page 24: ...lank Note Incorrect configuration of IP settings may cause latency in the network connection and may result in jerky images and HD media playback Please consult your network administrator for the correct settings Once the settings are confirmed click Continue to save them and go to the next step Step 2 Date Time Configuration This step configures the date and time of proVEOS to ensure that schedul...

Page 25: ...proVEOS Installation Guide 25 Set the date month year and day and current time in 24 hour format Click the Time Zone tab and select a country ...

Page 26: ...the settings Click Continue in the wizard to proceed to step 3 Step 3 Volume Configuration This step configures the volume of the sound output from proVEOS A software mixer appears with three visible sliders Use the horizontal scrollbar to reveal more sliders ...

Page 27: ...t mini jack behind proVEOS Line in Volume level of the audio from the blue line in mini jack behind proVEOS All unused sliders should be muted to minimize noise and hiss from the speakers To mute a slider click the speaker icon below the slider A red x will appear above the speaker icon indicating that it is muted Note Do not mute the Master and PCM sliders Once the sliders are set correctly click...

Page 28: ...onfiguration and settings window Network Setting Date Time Screen Resolution and Volume Control Provides access to similar setting windows used during the wizard installation process ReConfigure Start the wizard installation procedure again Reboot Restart proVEOS Shut Down Power off proVEOS Note HQ Setting is unused in proVEOS ...

Page 29: ...Presenting from a Client ...

Page 30: ...cting to and communicating with proVEOS The most common connection problems are caused when users configure firewall software to prevent programs from making outgoing connections to other devices on the network Windows Firewall If you are using Windows Firewall available in the Control Panel of Windows XP Service Pack 2 and above configure it to allow exceptions Click on the Windows Firewall item ...

Page 31: ...tec Endpoint Protection To configure Symantec Endpoint Protection to allow connections to proVEOS Run the Symantec Endpoint Protection program in the Start Menu Click Change settings in the left menu Click the Configure Settings button in the Network Threat Protection section ...

Page 32: ...n Under the Unmatched IP Traffic Settings section select the Allow IP traffic radio button Click the OK button to save the settings For other firewall software please consult the user manual online technical support forums or contact the vendor for further assistance ...

Page 33: ...ss is usually an internal domain name allocated by the system administrator e g projector company com or an internal IP address e g 10 x x x or 192 168 x x New proVEOS units are configured with a default IP address of 192 168 1 1 The subnet mask is 255 255 255 0 Note The proVEOS Windows client requires ActiveX for installation which is only available in Internet Explorer The proVEOS web page is lo...

Page 34: ...p 2 installs the proVEOS client software described from page 35 onwards Bypassing the ActiveX Security Warning In most default IE configurations the security level is set such that it will display a security warning whenever a web site attempts to install and run an unknown ActiveX control A bar at the top of the web page will appear prompting you to click it Click the bar and a context menu will ...

Page 35: ...the Install button to continue installing the ActiveX control Installing the Client IE will attempt to download an installer file to your computer Click the Run button IE will download the installer to a temporary area on your computer and automatically run it to begin the installation process ...

Page 36: ...S Installation Guide Before the installation can proceed IE will display another security warning for your confirmation Click the Run button to start the setup wizard Click Next to start the installation process ...

Page 37: ...pt the license agreement by selecting the first radio button Click Next to continue Select the checkboxes if you wish to install additional shortcut icons to start the proVEOS software from the desktop or Quick Launch bar Click Next to continue ...

Page 38: ...erformed during installation is shown Click Install to begin the installation A hardware driver will be installed in Windows to allow it to make presentations to proVEOS Windows XP top and Windows Vista bottom will ask if you wish to continue installing the driver ...

Page 39: ...allation Guide 39 Click the Continue Anyway button Windows XP or Install this driver software anyway Windows Vista to proceed Once the installation is complete the release notes are displayed Click Next to continue ...

Page 40: ...nge the IP Address to the address assigned to the proVEOS gateway Location can also be changed to another name for easy reference in future Click OK to save the settings Installing the Microsoft NET Framework This section covers the steps to install the NET Framework manually if the ActiveX installation method described in the previous section fails Note This section can be skipped if you already ...

Page 41: ...l installation instructions to launch the NET Framework installer The browser will display a security warning before downloading the installer Click Run to download the installer to a temporary location on your computer and run it Click Run to accept the security warning ...

Page 42: ...42 proVEOS Installation Guide Accept the license agreement and click Install to begin The installation is in progress ...

Page 43: ...proVEOS Installation Guide 43 Once the installation is complete click Finish to close the installer ...

Page 44: ...to reach the IP address of proVEOS gateway via its connected network After installation a shortcut is added to the Start Menu under WOW Vision proVEOS Launch proVEOS Client Click the shortcut to launch the proVEOS software If you have opted to install an icon to the Windows desktop you may also use it to launch the proVEOS software Next provide participant credentials to gain access to the proVEOS...

Page 45: ...splay a warning prompt It is recommended to choose the option that will allow the proVEOS client software to always be able to make such connections without any future prompting If the Windows Firewall in Windows XP Service Pack 2 and above is used a Windows Security Alert window will pop up Click Unblock to allow the proVEOS client to make outgoing connections to the proVEOS gateway in future Not...

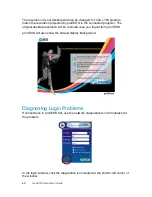
Page 46: ...ected projector The original desktop resolution will be restored once you logout from proVEOS proVEOS will also show the default display background Diagnosing Login Problems If connections to proVEOS fail use the network diagnostics tool to troubleshoot the problem In the login window click the diagnostics icon located at the bottom left corner of the window ...

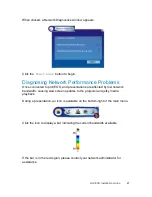
Page 47: ...proVEOS and presentations are affected by low network bandwidth causing slow screen updates to the projector and jerky media playback During a presentation an icon is available on the bottom right of the main menu Click the icon to display a bar indicating the current bandwidth available If the bar is in the red region please contact your network administrator for assistance ...

Page 48: ......

Page 49: ...Configuring Projectors ...

Page 50: ...lable for selection create a new projector configuration in proVEOS Skip to the Adding and Editing Projectors section on page 51 for instructions Note proVEOS is factory installed with support for Panasonic and Epson projectors Selecting a Projector To select a projector access the web admin in proVEOS Start a web browser Type the IP address of proVEOS Click the Administrator login link Enter a va...

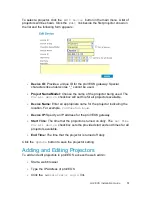
Page 51: ... for all projectors available Device Name Enter an appropriate name for the projector indicating the location For example Conference Room Device IP Specify an IP address for the proVEOS gateway Start Time The time that the projector is turned on daily The Set Time for all device checkbox sets the provided start and end times for all projectors available End Time The time that the projector is turn...

Page 52: ...al or contact the manufacturer of your projector model to find out the serial communications settings the projector accepts from its serial port Type in the projector settings and click the Save button to create the projector in proVEOS The saved projector will appear in the Modify Delete Projectors page accessible by the Edit Delete Projector link in the projector configuration menu To change the...

Page 53: ... Commands Each projector recognizes a set of commands that proVEOS can send over the serial cable connection to control certain features like turning the projector on and off Click the Add Edit Delete Commands link from the menu to manage projector commands Click the Project Name Model drop down list and select the projector that is being configured ...

Page 54: ...n Uploader facility is available to allow command files to be uploaded to proVEOS This is a convenient way to add commands if you are installing multiple proVEOS gateways that are connected to the same brand model of projectors Your proVEOS vendor may also be able to provide you with a file suitable for your projector model To upload a command file Click the Browse button and locate the file on yo...

Page 55: ...re entered in the following sequence separated by commas 1 Project Name Model 2 Command Name 3 Command 4 Wait Time 5 Return On Success 6 Return On Fail Note Avoid spaces before and after the comma separating the settings For example Epson Power ON PWR ON 40 ERR Epson Power OFF PWR OFF 40 ERR Note Ensure that the capitalization of each setting is accurate as shown in the Command Name drop down list...

Page 56: ......

Page 57: ...Activating proVEOS ...

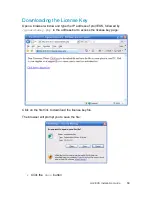
Page 58: ...number of client connections To enable this 1 Locate the demo activation key file in the included CD ROM The filename should end with a wpg extension 2 Upload the activation key file to proVEOS for activation If you wish to extend the demo period please contact WOW Vision Full Activation To enable the full feature set activate proVEOS with these steps 1 Download a license key file from proVEOS to ...

Page 59: ... Open a browser window and type the IP address of proVEOS followed by generatekey php in the address bar to access the license key page Click on the first link to download the license key file The browser will prompt you to save the file Click the Save button ...

Page 60: ...e the license key file wpgLicense key to a known location on your local hard drive Email the license key to WOW Vision at support wow vision com WOW Vision will reply with an activation key file to be imported to proVEOS for activation ...

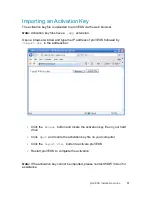
Page 61: ...and type the IP address of proVEOS followed by import php in the address bar Click the Browse button and locate the activation key file on your hard drive Click Open and locate the activation key file on your computer Click the Import File button to activate proVEOS Restart proVEOS to complete the activation Note If the activation key cannot be imported please contact WOW Vision for assistance ...

Page 62: ......

Page 63: ...Troubleshootin g ...

Page 64: ...cted to proVEOS and the projector Ensure that the correct projector is selected in the web admin see page 50 Clients Cannot Connect Clients are unable to connect to proVEOS to make presentations Client Firewall This can be caused by firewall software in the client computer preventing the proVEOS client from making an outgoing network connection to proVEOS To confirm that this is caused by the fire...

Page 65: ... license it may have expired Contact WOW Vision to renew your demo license Display Me Shows a Blank Screen Clicking the Display Me button in the proVEOS client results in a blank screen on the projector This is caused by certain ports being firewalled such that the captured display information could not be sent to proVEOS successfully To confirm that this is caused by the firewall Disable the fire...

Page 66: ...age 57 proVEOS Client Windows Installer Does Not Appear Clicking the link to download and install the proVEOS client does not work For Windows installations Internet Explorer is required Ensure that Internet Explorer s settings are not configured to disallow ActiveX components If all else fails the proVEOS client can be manually installed by following the instructions as described in Installing th...

Page 67: ...Double click the Default entry and an Update existing location dialog box will appear Change the IP address to point to the one configured for proVEOS and click OK to save the settings The client should be able to connect to proVEOS ...

Page 68: ...s manual are provided as is without warranty of any kind proVEOS is a trademark of WOW Vision Pte Ltd Windows Internet Explorer and Microsoft are registered trademarks of Microsoft Corporation Apple Mac and Macintosh are trademarks of Apple Inc Other company and product names mentioned in this manual are trademarks of their respective owners WOW Vision Pte Ltd reserves the right to make changes wi...

Reviews: