17
EN
INSTALLATION
It is recommended you carefully follow these installation instructions to properly install your Landroid. In addition to the manual, you
can access comprehensive video tutorials on our YouTube Channel (Worx Tools)*.
* This information is provided for your convenience but the video information provided online does not replace the instruction manual
and the safety instructions that need to be read and understood.
EVERY MINUTE SPENT IN PLANNING SAVES YOU 10 MINUTES IN EXECUTION
Installing Landroid is even easier if you have made a clear plan of what you need to do. Proper planning will also help you avoid
mistakes or having to rework the installation once it’s done.
1. On the surface or buried?
Landroid’s boundary wire is designed to stay on the surface of your lawn. Nearly invisible from the first day, it will be engulfed
in the soil in a few weeks. If you will want to bury the wire, it is recommended to first peg it down and test the installation
is successful by running Landroid over the perimeter. This allows you to easily test that the installation is successful and, if
necessary, change the layout before burying the wire. Bury the wire no more than a few centimetres below ground level, so that
the wire maintains a good signal.
2. Plan for the charging station
The charging station is where your Landroid goes to have its battery recharged. It’s also the home where it rests in between
mowing sessions.
Locate a proper position for it, bearing in mind:
A. It needs to be powered, so it should be no more than 32 ft. away from an AC outlet. Using a GFCI outlet is recommended.
B. If possible, choose a shaded area to prevent the battery and charger from over-heating in direct sunlight. *Landroid Garage
accessory available for purchase.
C. It should be placed on flat, level ground to ensure effective docking.
D. Avoid places close to irrigation sprinklers.
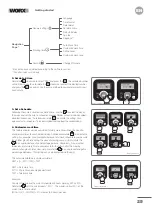
Plan out your
installation
Lay the
boundary
wire
Power up
Landroid.
Test and get
ready to mow
Connect
charging
station to AC
Install the
charging
station
Getting started
Summary of Contents for Landroid WR147
Page 1: ...Owner s manual WR165 WR147 WR155 ...
Page 2: ......
Page 3: ...Owner s manual Manuel utilisateur Instrucciones de usuario P04 P37 P70 EN F ES ...
Page 103: ......
Page 104: ......


