


14
Warning:
The display comes pre-configured specifically for your bike. Incorrect settings could cause damage to the
bike components and also result in a bike that is not UK road legal. Any modifications made to the control-
ler configuration will void your warranty with immediate effect.
Turning Control Module On/Off
To turn on the control module press and hold the top (Mode) button. Press and hold the same button to
turn off the module and disable all electric features of the bike.
Turning Backlight On/Off
To turn on the display backlight, press and hold the “Up” button, press and hold the same button to turn it
off.
Varying Pedal Assist Level
To alter the level of assistance provided simply press the Up/Down arrows to cycle through the 5 levels of
assistance. Level 1 offers the least assistance while level 5 offers the greatest assistance.
Speed Display Mode
There are three different modes for the speed display, these are current speed, average speed and maxi-
mum speed. To switch between these modes, press and hold the “Up and Mode” buttons for approx. 1
second to cycle through the modes.
Walking Mode/Start-Aid
The bike also supports a walking mode which is basically a very slow mode allowing you to walk next to
the bike at approx. 6m/h. This is activated by pressing and holding the “Down” button. As soon as the but-
ton is released, the bike will stop. This can also be used to get you started if you find it hard to get going.
Display Mode
To switch between Odo (overall distance travelled) and Trip mode (current trip distance travelled), press
the “Mode” button. To reset the trip computer, press and hold both the top and bottom buttons.
Control Module—Advanced
The display has many advanced features and modes, these include a back-lit display (for night riding), in-
dicator options for max speed, average speed and current speed and a battery –level indicator. It also fea-
tures a walking/start-assist mode which is used when you want to wheel/push the bike or if you need help
starting off, this is basically a very low speed mode which can be activated by pressing and holding the
minus (-) button.
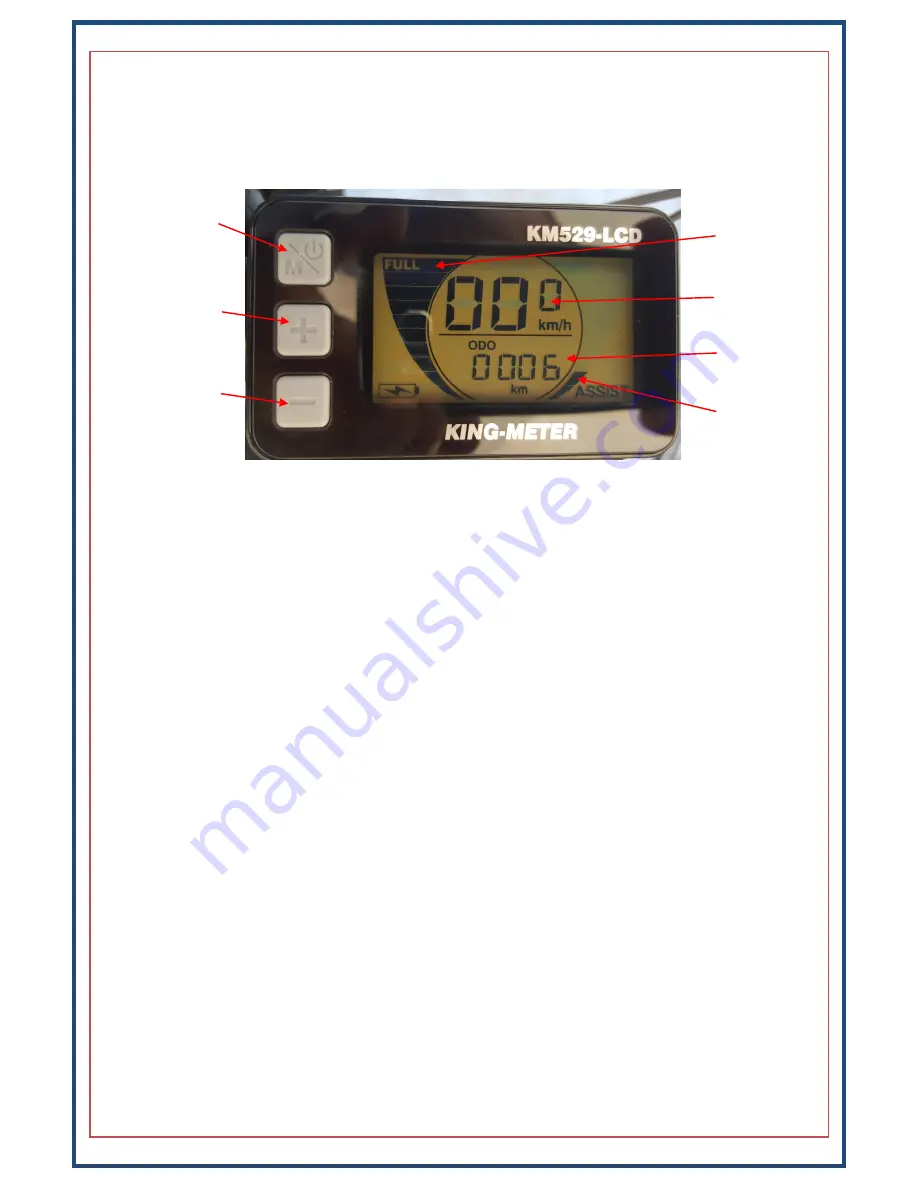
On/Off/Mode button
(+) or UP Button
(-) or Down Button
Battery Level
Speed
Odometer
Assistance Level


