14
A Very Safe Fence at a Very Low Cost
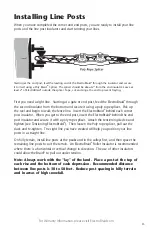
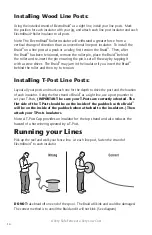
Installing Wood Line Posts:
Using the installed strand of ElectroBraid
®
as a sight line, install your line posts. Mark
the position for each insulator with your jig, and attach each line post insulator and each
ElectroBraid
®
Roller Insulator to all posts.
Note: The ElectroBraid
®
Roller Insulator will withstand a greater force from a
vertical change of direction than a conventional line post insulator. To install the
Braid
™
on a line post at a peak or a valley, first tension the Braid
™
. Then, after
the Braid
™
has been tensioned, remove the roller pin, place the Braid
™
behind
the roller and re-insert the pin ensuring the pin is set all the way by tapping it
with a screw driver. The Braid
™
may jam in the insulator if you insert the Braid
™
behind the roller and then try to tension.
Installing T-Post Line Posts:
Layout all your posts and mark each one for the depth to drive the post and the location
of each insulator. Using the first strand of Braid
™
as a sight line, use a post pounder to
set your T-Posts,
(IMPORTANT: be sure your T-Posts are correctly oriented. The
flat side of the T-Post should be on the inside of the paddock so the Braid
™
will be on the inside of the paddock when attached to the insulators.) Then
attach your T-Posts insulators.
Note: A T-Post Cap provides an insulator for the top strand and also reduces the
hazard of a horse being speared by a T-Post.
Running your Lines
Pick up the reel and walk your fence line. At each line post, fasten the strand of
ElectroBraid
®
to each insulator.
DO NOT
take braid off one end of the spool. The Braid will kink and could be damaged.
The correct method is to unroll the Braid and it will not kink. (See diagram)


