Sawmill Alignment
Complete Alignment Procedure
7
7-50
50HD07doc072310
Sawmill Alignment
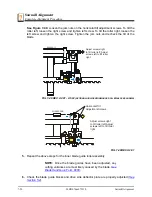
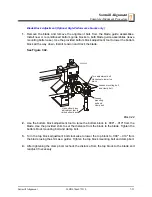
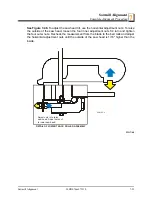
See Figure 7-40.
Loosen the jam nuts on the horizontal tilt adjustment screws. To tilt the
roller left, loosen the right screw and tighten left screw. To tilt the roller right, loosen the
left screw and tighten the right screw. Tighten the jam nuts and recheck the tilt of the
blade.
5.
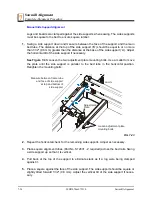
Repeat the above steps for the inner blade guide roller assembly.
NOTE:
Once the blade guides have been adjusted, any
cutting variances are most likely caused by the blade.
6.
Check the blade guide blocks and drive side deflector plate are properly adjusted (
).
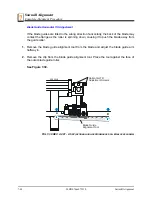
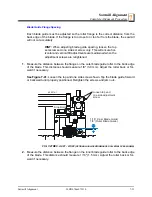
FIG. 7-40 REV. A2.01 - A5.02
(OPTIONAL HIGH-PERFORMANCE ROLLER/BLOCKS SHOWN)
FIG. 7-40REV. A2.01
600244-11
Adjust screws right
to tilt roller left; Adjust
screws left to tilt roller
right
3H0802-20B
Adjust screws right
to tilt roller left; Adjust
screws left to tilt roller
right
Horizontal Tilt
Adjustment Screws


