


Sawmill Setup
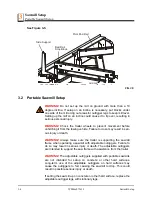
Portable Sawmill Setup
Sawmill Setup
WMdoc072619
3-5
3
1.
Unhitch the mill from the vehicle.
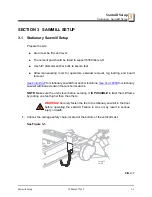
2.
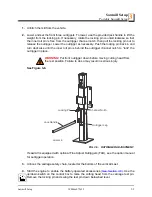
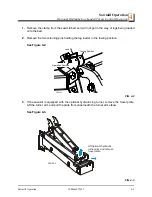
Lower and set the front three outriggers. To lower, use the provided jack handle to lift the
weight from the locking pin. If necessary, rotate the locking pin counterclockwise so that
the inner roll pin is free from the outrigger channel notch, then pull the locking pin out to
release the outrigger. Lower the outrigger as necessary. Push the locking pin back in and
turn clockwise until the inner roll pin is behind the outrigger channel notch to “lock” the
outrigger in place.
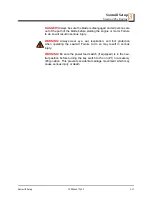
WARNING!
Put front outrigger down before moving cutting head from
the rest position. Failure to do so may result in serious injury.
See Figure 3-6.
If sawmill is equipped with optional Fine Adjust Outriggers (FAO), see the option manual
for outrigger operation.
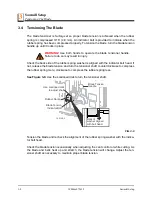
3.
Unhook the carriage safety chain, located at the bottom of the vertical mast.
4.
Start the engine to enable the battery-operated accessories (
). Use the
up/down switch on the control box to raise the cutting head from the carriage rest pin.
Remove the locking pin and swing the rest pin down below bed level.
FIG. 3-6. OUTRIGGER ADJUSTMENT.
SM0045B
Jack Handle
Outrigger Leg
Channel Notch
Locking Pin


