background image

Wolturnus Rex 350 User’s Manual 2019

Power Wheelchair

Cleaning and maintenance

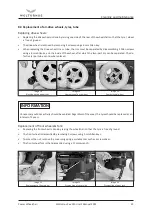
8.3 Replacement of air-drive wheels, tyres, tube

Replacing drive wheels:

•  Replacing the drive wheels is done by raising one side of the rear of the wheelchair so that the tyre / wheel 

is free of ground.

• 

The drive wheel is removed by removing 4 screws using a 6 mm Allen key.

• 

When replacing the drive wheel tire or tube, the rim must be separated by disassembling 5 Allen screws 

using a 6 mm Allen key on the inside of the wheel, after which the two-part rim can be separated. The de-

fective tyre or tube can now be replaced.

Replacement of front wheels & fork:

•  Replacing the front wheel is done by raising the wheelchair so that the tyre is free of ground.
• 

The front wheel is dismantled by removing 2 screws using 5 mm Allen keys. 

•  To access the nut, remove the cover plug using a suitable tool such as a screwdriver.
• 

The front wheel fork is then dismantled using a 17 mm wrench.


Unnecessary outdoor activity should be avoided. Regardless of the wear, the tyres should be replaced at an 

interval of 2 years. 

INFORMATION

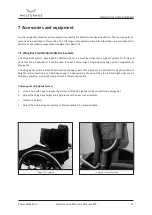
 Image 18  

Blocking up the wheelchair

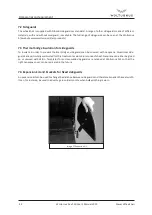
 Image 19 

Dismantling of drive wheel

 Image 20  

Dismantling of wheel

 Image 21  

Replacement of frontwheel

 Image 22 

Dismantling of cover plug

 Image 23  

Dismantling of front fork

25

Summary of Contents for Rex 350

Page 1: ...Wolturnus A S recommends that you read this manual before using the wheelchair GB User s Manual For Rex 350...

Page 2: ...Wolturnus Rex 350 User s Manual 2019 Power Wheelchair Content 2...

Page 3: ...ustment Set up 16 6 1 Adjustable featues 16 6 2 Tools 16 6 3 Adjusting back depth and form 17 6 4 Adjusting back height 18 6 5 Adjusting seat depth and form 18 6 6 Adjusting footrest height 19 6 7 Adj...

Page 4: ...e the text read up by a suitable computer program Keep this user manual throughout the lifetime of the wheelchair it contains information that can answer future questions and it contains guidelines fo...

Page 5: ...tomer service at 45 9671 7170 Wolturnus A S strives to provide full assistance to its customers in every respect and thus to ensure total satis faction with the wheelchair Wolturnus A S contact inform...

Page 6: ...o the original surface treatment Repairs or alterations to the wheelchair that are not carried out by Wolturnus A S All warranty repairs will be carried out by Wolturnus A S Incorrect use of the wheel...

Page 7: ...amiliar with and must comply with applicable regulations from professional associations on accident prevention and on environmen tal protection All information contained in this user manual must be co...

Page 8: ...sport in a vehicle Do not force the wheelchair along on hills or slopes of greater than 10 Do not park on hills or slopes of greater than 10 not even with the brake pad activated Do not modify your el...

Page 9: ...traffic and on roads The wheelchair should not be used on slippery surfaces e g ice or on very rough terrain e g on gravel or small stones When getting in and out of the wheelchair the user s full wei...

Page 10: ...elpers will receive instruction in use of the chair from Wolturnus authorised specialists 2 7 Type Labels A type label is attached to the wheelchair The type label includes the following information C...

Page 11: ...eating position and offers up to five different electrically seat adjustments e g elastic leg supports adjustable back angle and electric seat lift and tilt The sturdy electric wheelchair is classifie...

Page 12: ...can be tested by following the instructions in section 6 Troubleshooting see section 9 4 2 Preparation for use Before starting to use the wheelchair it must be inspected to ensure that it is complete...

Page 13: ...Wolturnus Rex 350 User s Manual 2019 Power Wheelchair Delivery and preparation for use Image 4 Main components 13 8 7 6 4 1 2 3 5 9...

Page 14: ...r Make sure the power is turned off before starting the transfer Make sure the casters are turning the direction of the transfer this will provide more stability to your trans fer Make sure armrests a...

Page 15: ...es move the chair in between or make sure you can cover up the wheelchair for long term storage INFORMATION Risk of damage due to overload When getting in and out of the chair the user must not place...

Page 16: ...ols image 5 are necessary for adjustments and settings described in this section 3 mm Allen key 1 4 mm Allen key 1 5 mm Allen key 1 6 mm Allen key 1 8 mm single head wrench 2 10 mm single head wrench...

Page 17: ...6 Fold down the back upholstery and secure it to the straps Adjustment of the back form and depth greatly affects the benefit the user gets from the chair Wolturnus A S recommends that form and depth...

Page 18: ...bar for the back To adjust the height even further the height bar can be removed and reversed image 7 Mount the back upholstery and top again Image 9 Remove the front section Image 10 Adjust the Velc...

Page 19: ...height making sure that the holes in the footrest and the front frame are aligned Make sure that the footrest is not lopsided image 11 Mount the clamps and nuts and tighten them Tension 4 Nm 3 0 ft lb...

Page 20: ...e head wrench to loosen the bolts on the foot plate then remove it image 13 Mount it in the second set of foot plate notches The bracket itself can be reversed so that the holes are positioned to the...

Page 21: ...d back that can be optimised It can be used to meet a wide range of individual seating position requirements image 15 The Wing Back system is exceptional because the upper part of the back can be adju...

Page 22: ...To insulate in order to prevent thermal bridges sideguards can be covered with neoprene Aluminium side guards are particularly well suited for this treatment as aluminium conducts heat Neoprene can ei...

Page 23: ...thread depth min 1 mm X X X X Rear wheel Directional stability during use Wheels rotate freely without misalignment Nuts on rear wheel mounting bracket are tight X X X Castor No front fork obstructio...

Page 24: ...rts to dry before mounting and using To disinfect use water based agents and follow the manufacturer s instructions yet keep away all water based agents from any and all electrical components Do not u...

Page 25: ...d The de fective tyre or tube can now be replaced Replacement of front wheels fork Replacing the front wheel is done by raising the wheelchair so that the tyre is free of ground The front wheel is dis...

Page 26: ...f they do not roll freely change the ball bearings Section 8 3 Section 8 2 Front fork shakes Loosen and remove the bearing housing cap and tighten the nut to a degree where the front fork with wheel c...

Page 27: ...problems in the control bus system the system triggers an emergency stop to avoid uncontrolled functions The wheelchair can be driven out of a danger zone for example by means of the control again roa...

Page 28: ...eck the motor Short circuit on battery connection to the right motor E g defective cable Check the battery connec tion to the right motor Driving function blocked due to outside influen ces The charge...

Page 29: ...rest to Seat VSL mm 390 450 Leg to seat surface angle 75o 100o Adjustable Foot Support 0 20o gascylinder 0 30o electric Back Height BH mm 320 380 Back Height adjustability Yes Backrest Angle adjustabi...

Page 30: ...W Seat Width RA Front of Back to Center Rear Axel SD Seat Depth BF Front of Back to front Footrest SH r Seat Height rear FF Inner Front Frame SH f Seat Height front CW Center Caster bearings BH Back H...

Page 31: ...iginal instructions has a five year lifetime excluding time kept in storage by an authorised dealership or the user Note that with careful care and proper use the active wheelchair can be used for a l...

Page 32: ...elchair for many years The wheelchair lifetime is calculated to be approximately five years if it is maintained according to the instructions in this user manual The long lifetime limits its effect on...

Page 33: ...ce New Zealand Euromedical Germany Austria and the Czech Republic Otto Bock After sales spare parts are available for all Wolturnus wheelchairs Manufacturer Wolturnus A S Halk rvej 24B Bislev DK 9240...

Page 34: ......

Page 35: ......
Page 36: ...efon 45 96 71 71 70 www wolturnus dk Mail info wolturnus dk Produktion Production Wolturnus A S Halkj rvej 24B 9240 Nibe Wolturnus A S l Skalhuse 31 l DK 9240 Nibe l T 45 96 71 71 70 l E info wolturnu...

Reviews: