


20
Wizard™ International, Inc., 4600 116th St. SW, Mukilteo, WA 98275 888/855-3335 Fax: 425/551-4350
wizardcutters.com
CMC
8000RC/FrameShop
20-71034-1
GettingStartedManual8000RCFrameShop
http://info.wizardint.com/KB/default.aspx#pageid=getting_started_manual_8000_rc
04/05/19
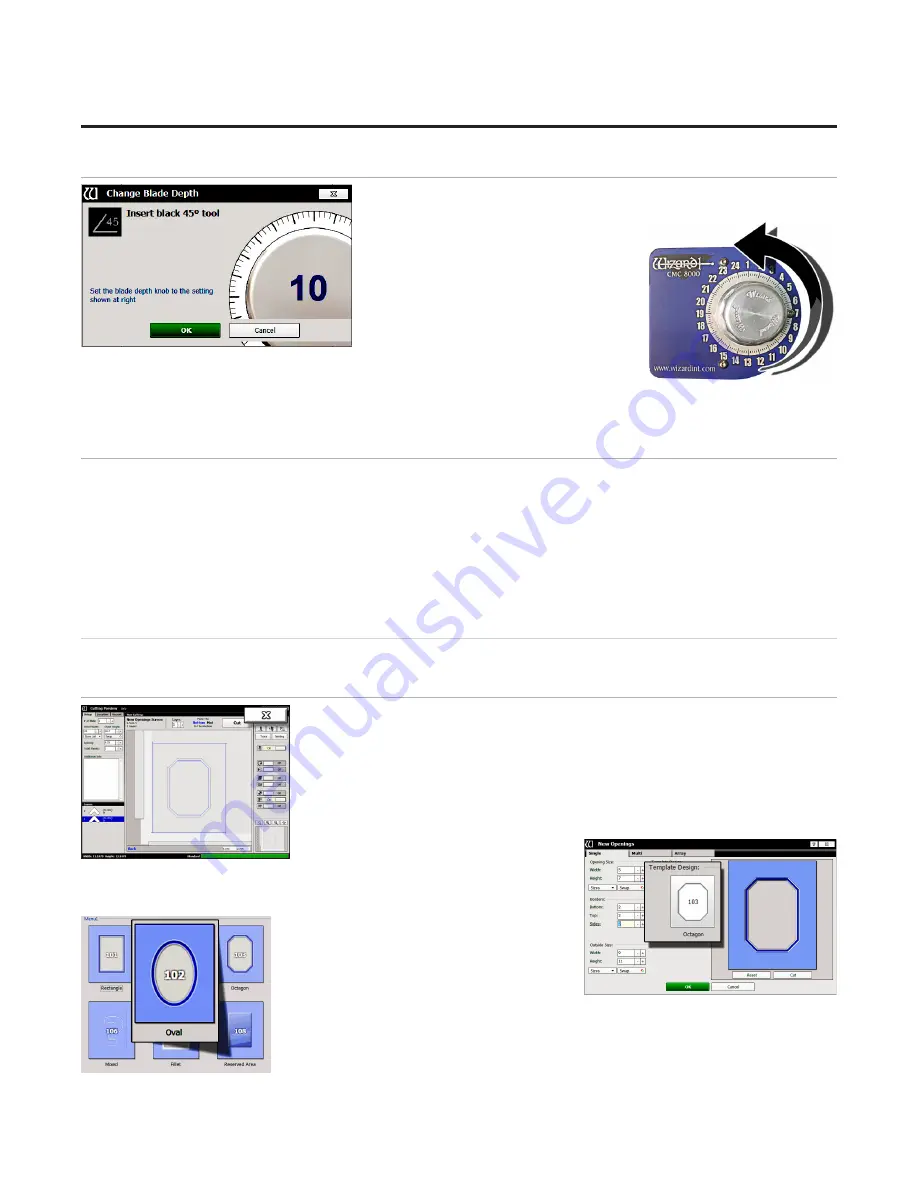
Insert Blade Cartridge and Adjust Blade Depth
If the current layer uses a different blade cartridge or is a different
thickness than the last layer cut, the
user is prompted to change the blade
cartridge and/or the blade depth.
If the current layer uses the same
blade cartridge and the same thickness
as the last layer cut, the CMC will
begin to cut without further prompt.
The 45° blade cartridge and blade
have already been inserted, so change the blade depth by turning the blade
depth dial to the requested depth and click
OK
on the prompt.
2. The CMC will begin to cut.
After the CMC Has Cut the Mat
1. After the cut has finished, the head will return to the home position, and the foot block will rotate to the
aligned position for access to the blade cartridge. Unless the screen prompts to align the head, do
NOT
turn
the foot block.
2. Remove the matboard from the CMC. The first mat has been cut.
If The Cut Doesn't Look Right
See
"Troubleshooting" on page 22
.
Design a Different Mat
Select a Different Template
1. Click the “X” on the Cut Preview screen to close this screen and return to the
New Openings Screen.
The current design can be easily altered for the next project by changing the
size and other parameters.
This next project is an oval instead of an octagon.
2. Click on the template thumbnail under template design.
3. Template Library opens.
4. Click on new template thumbnail to
select it.


