


English
_39
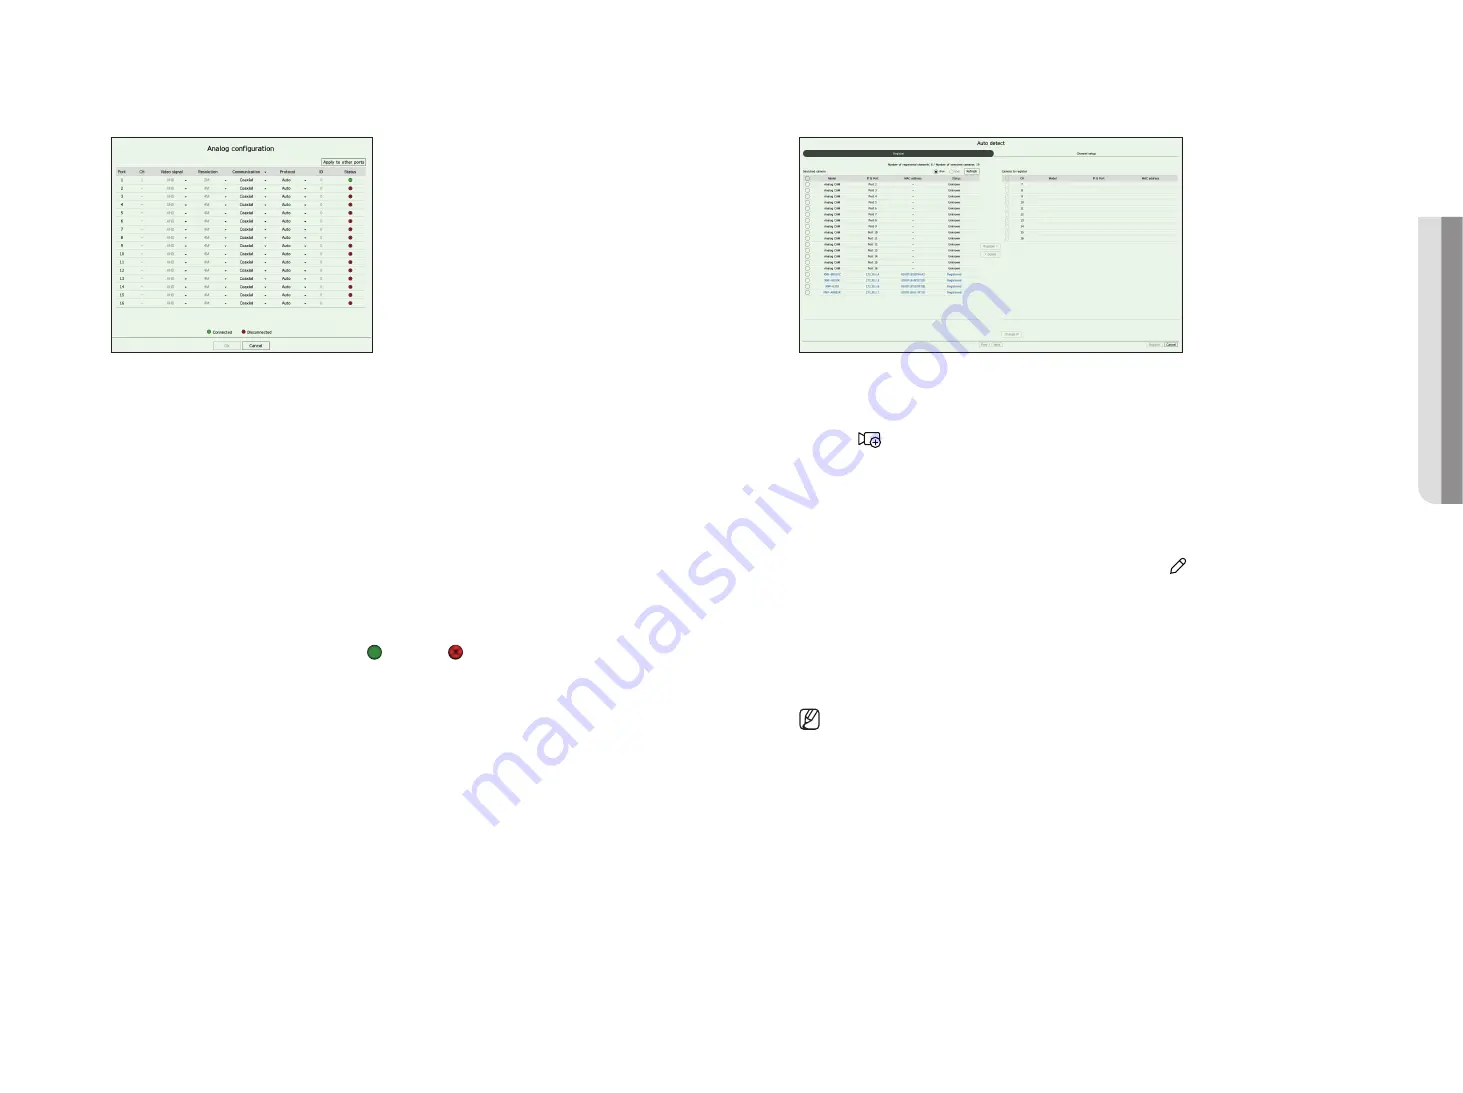
Setting the analog camera
1.
Click <
analog
> in the <
channel Setup
> field.
2.
Search for an analog camera connected.
3.
Select the desired item and change the setting.
●
Apply to other ports : If you select <
apply to other ports
>, the "
apply to other ports
" confirmation window
will appear.
Select the ports you want to apply the set value to and click <
oK
>. Then the set value is applied to the selected
ports.
●
Video signal : Displays video signals inputted from AHD, TVI, CVI, and CVBS.
●
Resolution : Displays the resolution input to the camera.
●
Communication : You can set the camera port control method as coaxial or serial.
●
Protocol : When the communication method selected is Serial, you can select Samsung-T, Pelco-D, or Pelco-P.
●
ID : When the communication method selected is Serial, you can enter the device ID.
●
Status : Shows the camera connection status.( Connected, Disconnected)
automatic registration of network cameras
1.
In the <
channel setup
> field, click on the <
auto detect
> button.
2.
<
auto detect
> window appears.
■
Click <
> in the camera list on the live screen to automatically search and register the camera.
3.
Select a camera to register in the <
Searched camera
> list and press the <
register
> button.
You can check the selected camera in the <
camera to register
> list.
■
An already registered camera will be marked in blue in the list.
■
If you search for the camera again or if the IP is an old IP that was not assigned by the DHCP server (such as 192.168.1.100), then press the
<
Refresh
> button to check if a new IP has been assigned.
■
<
Status
> shows the camera authentication status. In the <
Auth failed
> state, click <
> to enter the camera ID and password.
■
Click a header at the top of the list to sort the list according to that header.
4.
To change the IP address of the camera, select the desired camera from the <
camera to register
> list and
press the <
change ip
> button.
5.
Click <
next
> at the bottom of the screen to set the registered camera channel.
6.
Press the
<
register
> button on the lower right of the screen to register the selected camera.
■
If you register a camera using a user account—not admin account—the camera features may be limited.
■
When you change the camera ID/password in the camera web viewer, if the camera is already registered in Recorder, you also have to
change the camera ID/password information registered in Recorder.
■
When the camera is factory reset, it defaults to the ID and password set in "
Setup
>
Camera
>
Camera password
"
.
■
If the camera's ID and password have already been set, the registered information matches the ID and password set in the "
Setup
>
Camera
>
Camera password
"
. (up to 3 sets)
■
Wisenet camera is registered via Wisenet protocol while a third party camera is registered via ONVIF protocol.
•
S
etup
Summary of Contents for HRX Series
Page 1: ...DIGITALVIDEO RECORDER User Manual HRX Series ...
Page 109: ......


