background image



INTRODUCTION: 

Vehicle Identification Numbers 


VIN number 

Engine Serial Number

Summary of Contents for FARMBOSS II

Page 1: ... FarmBoss II Diesel Utility Owner s manual For Maintenance and Safety ...

Page 2: ...WARNING Read understand and follow all of the instructions and safety precautions in this manual and on all product labels Failure to follow the safety precautions could result in serious injury or death ...

Page 3: ...ith the quality products and professional back up service now WINWAYhas been a recognized brand by the market Value for money quality assured customer service lends to our motto SOLD BUT NOT FORGOTTEN All information contained within this manual is based on the latest product information at the time of publication Due to constant improvements in the design and quality of production components some...

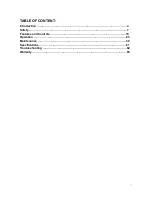
Page 4: ... TABLE OF CONTENT Introduction 4 Safety 7 Features and Controls 15 Operation 23 Maintenance 39 Specifications 61 Troubleshooting 62 Warranty 65 ...

Page 5: ...he vehicle operator a bystander or a person inspecting or repairing the vehicle CAUTION ACAUTION indicates special precautions that must be taken to avoid damage to the vehicle NOTE ANOTE provides key information to make procedures easier or clearer WARNING Failure to follow the warning and advice in this manual can result in serious injury or death Warning Safety First Important notice To assist ...

Page 6: ...maintained 22 People should not operate an UTV beyond their physical or mental limitation or capabilities 23 Keep the owner s manual in a safe place of the vehicle or under the seat at all times 24 Only use an UTV on level open ground away from people while learning 25 Obey government laws at all times 26 Contact your agent for anything that you do not understand or need advice on 27 If you allowe...

Page 7: ... INTRODUCTION Vehicle Identification Numbers VIN number Engine Serial Number ...

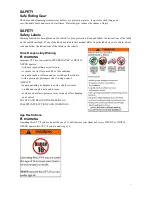
Page 8: ...vehicle Drive Responsibly Warning WARNING Improper UTV use can result in SEVERE INJURY or DEATH NEVER operate without proper training or instruction at speeds too fast for your skills or the conditions on public roads a collision can occur with another vehicle with a passenger passengers risk of losing control ALWAYS use proper riding techniques to avoid vehicle overturns on hills and rough terrai...

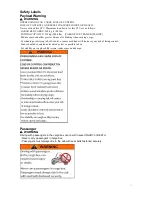
Page 9: ...ce speed and allow greater distance for braking when carrying cargo Overloading or carrying tall off center or unsecured loads will increase your risk of losing control Loads should be centered and carried as low as possible in box For stability on rough or hilly terrain reduce speed and cargo Passenger WARNING Driving with passengers in the cargo box can result in sever INJURY or DEATH Never carr...

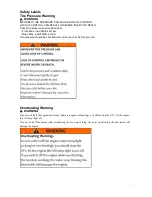
Page 10: ...d 340lbs at 7psi Rear Max load 420lbs at 7psi Tire pressure should be checked when tires are cold before you ride Overheating Warning WARNING Do not switch off the engine when temp light on engine overheating you should stop the UTV let the engine idle till temp light off If you switch off the engine while overheating the fan stopworking the water stop flowing the heat inside will damage the engin...

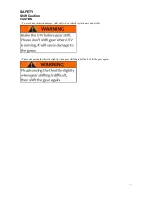
Page 11: ... SAFETY Shift Caution CAUTION To avoid transmission damage shift only when vehicle is stationary and at idle Please advancing the throttle slightly when gear shifting is difficult shift the gear again ...

Page 12: ...this vehicle without wearing the seat belt increases the risk of serious injury in the event of rollover loss of control other accident or sudden stop Seat belts may reduce the severity of injury in these circumstances All riders must wear seat belts at all times Operating With a Load on the Vehicle The weight of both cargo and passengers impacts vehicle operation For your safety and the safety of...

Page 13: ...ice turning at slow speeds before attempting to turn at faster speeds Operating on Pavement This vehicle s tires are designed for off road use only not for use on pavement Operating this vehicle on paved surfaces including sidewalks paths parking lots and driveways may adversely affect the handling of the vehicle and may increase the risk of loss of control and accident or rollover Avoid operating...

Page 14: ...he brakes Place the transmission in reverse and slowly allow the vehicle to roll straight downhill while applying light brake pressure tocontrol speed If you begin rolling downhill Never apply engine power Apply the brakes gradually until the vehicle is fully stopped Place the transmission in reverse and slowly allow the vehicle to roll straight downhill while applying light brake pressure tocontr...

Page 15: ...ident or rollover Always remove the ignition key when the vehicle is not in use Hot Exhaust Systems Exhaust system components are very hot during and after use of the vehicle Hot components can cause burns and fire Do not touch hot exhaust system components Always keep combustible materials away from the exhaust system Use caution when traveling through tall grass especially dry grass to avoid deb...

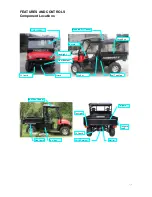
Page 16: ...ponent Locations Headlight WINDSCREEN Winch CV Guard Fuel Tank Cap Cargo Box Console Mounted Air Cleaner Tool Box Tailgate Tailgate Latch Hitch Receiver Muffler Tail Light CV Guard Front Bumper Hip Bar Mud Guard Roof Sun Canopy ...

Page 17: ... the brake force shorten the braking distance and improve the safety performance Fuel Filter Fuel Water Separator Air Filter Fuel Tank Clutch CVT Belt Overflow Bottle Fuse box Booster Master brake cylinder Vacuum pump Air tank Radiator Oil cooler Fuel tank Fuel Water Separator Air filter Fuel filter Drive pulley Driven pulley Fly wheel Drive belt Oil filter ...

Page 18: ...e light switch s function 1 Horn 2 Light off 3 Light On 4 low beam 5 high beam 6 Turning Right 7 Turning Left ON All electrical circuits are supplied with power the ignition system and fuel system the headlights and taillights come on when the light switch is on OFF All electrical circuits are switched off The key can be removed in this position Start The electric starter is engaged by turning and...

Page 19: ...r disc 4 Engage the park gear lever WARNING Operating the vehicle while the park brake is engaged could cause loss of control and Gear Selector Use the gear selector to shift gears Low gear is the primary driving range for the heavy load High gear is intended for use on hard packed surfaces with light loads To shift gears brake to a complete stop When the engine is idling move the lever to the des...

Page 20: ...e FARMBOSS To wear the seat belt properly follow this procedure 1 Pull the seat belt latch downward and across your chest toward the buckle at the inner edge of the seat The belt should fit snugly across your hips and diagonally across your chest Make sure the belt is not twisted 2 Push the latch plate into the buckle until it clicks 3 Release the strap it will self tighten 4 To release the seat b...

Page 21: ...ucts including insect repellents and chemicals will damage the instrument cluster lens and other plastic surfaces Do not use alcohol to clean the instrument cluster Do not allow insect sprays to contact the lens Immediately clean off any fuel that splashes on the instrument cluster Speedometer The indicator shows vehicle speed in km h MPH Odometer Mode The odometer records the miles traveled by th...

Page 22: ...icator remains on when the engine is running stop the engine immediately to avoid engine damage Check the oil level and add oil as necessary to bring the level within the safe operating range See page 67 If the oil level is adequate see your WINWAY dealer for service High Beam Low Beam Indicator This indicator displays high beam low beam Gear Indicator This indicator displays gear shifter position...

Page 23: ...el tank When the last segment clears a low fuel warning is activated All segments will flash Refuel immediately Water Temperature Gauge The segments of the temperature gauge show the level of temperature in the engine If the gauge reaches H the engine is overheating Check and clean the radiator screen and core and the engine exterior If the display continues see your dealer for service Turning Ind...

Page 24: ...eed and load are desirable Avoid prolonged operation at minimum or maximum engine speeds and loads for the next 4 to 5 hours 4 During the break in period carefully observe the engine oil pressure and engine temperature 5 Check the engine oil and coolant levels frequently during the break in period Perform regular checks on areas outlined on the daily pre ride inspection checklist 6 Change both the...

Page 25: ... Steering Ensure free operation Tires Inspect condition and pressure Wheels fasteners Inspect ensure fastener tightness Frame nuts bolts fasteners Inspect ensure tightness Fuel and oil Ensure proper levels Coolant level Ensure proper level Coolant hoses Inspect for leaks Throttle Ensure proper operation Indicator lights switches Ensure operation Air filter pre filter Inspect clean Air box sediment...

Page 26: ...duce engine performance and or cause engine damage Fuel additives are not recommended Some fuel additives may cause poor engine performance Ash content must not exceed 0 01 by volume Carbon residue content must not exceed 0 35 by volume Less than 0 1 is preferred Total aromatics content should not exceed 35 by volume Less than 30 is preferred PAH polycyclic aromatic hydrocarbons content should be ...

Page 27: ...ap is located on the left side of the vehicle near the driver s seat Remove the cap and add the recommended fuel to the bottom of the filler neck Do not overfill 1 Add the fuel to the fuel tank Add the fuel without containing dirt and water To prevent the fuel from overfilling during the running course the amount of the refilled fuel should be 90 of the fuel tank capacity 2 Eliminate the air in th...

Page 28: ...the air in the high pressure fuel line The high pressure fuel line begins from VE dispensing pump through high pressure fuel pipe to the fuel Injector Method of the treatment loosen the connector where the high pressure fuel pipe connects with fuel injector then start the starter motor and let it run at low speed until the fuel overflows around the connector finally tighten it If there is still so...

Page 29: ...gine performance and avoid premature engine wear Avoid operating in the presence of chemical gases or fumes Avoid operating in a corrosive atmosphere such as salt water spray NEVER operate the engine in a floodplain unless proper precautions are taken to avoid being subject to a flood NEVER expose the engine to the rain The standard range of ambient temperatures for the normal operation of DAIHATS...

Page 30: ...within five seconds release the ignition switch and wait five seconds Repeat steps 5 6 and 7 until the engine starts 8 Vary the engine RPM slightly with the throttle to aid in warm up until the engine idles smoothly NOTICE Operating the vehicle immediately after starting could cause engine damage Allow the engine to warm up for several minutes before operating the vehicle Stopping the Engine For m...

Page 31: ...iving experience with this vehicle Driving with a Passenger 1 Perform the pre ride inspection See page 24 2 Make sure all passengers are at least 12 years of age and tall enough to comfortably and safely sit in a passenger seat with the seat belt secured put both feet on the floor and grasp the hand hold 3 Make sure all passengers are wearing an approved helmet and eye protection 4 Make sure all p...

Page 32: ...ould be on the other side of the hill Driving on a Sidehill Sidehilling Driving on a sidehill is not recommended Improper procedure could cause loss of control or rollover Avoid crossing the side of any hill unless absolutely necessary If crossing a sidehill is unavoidable follow these precautions 1 Slow down 2 Exercise extreme caution 3 Avoid crossing the side of a steep hill Driving Downhill Whe...

Page 33: ...ng AWD 5 Correct a skid by turning the steering wheel in the direction of the skid Never apply the brakes during a skid Driving Over Obstacles Follow these precautions when operating over obstacles 1 Always check for obstacles before operating in a new area 2 Look ahead and learn to read the terrain Be constantly alert for hazards such as logs rocks and low hanging branches 3 Travel slowly and use...

Page 34: ...ing water which could result in loss of control and lead to serious injury or death Never cross deep or fastflowing water with your FARMBOSS II 5 After leaving water always dry the brakes by applying light pressure to the pedal repeatedly until braking action is normal NOTICE After operating the vehicle in water it s critical that you perform the services outlined in the Periodic Maintenance Give ...

Page 35: ...loads Slow down and drive in the lowest gear available SECURE ALL LOADS BEFORE OPERATING Unsecured loads can create unstable operating conditions which could result in loss of control of the vehicle OPERATE ONLY WITH STABLE AND SAFELY ARRANGED LOADS When handling off centered loads that cannot be centered securely fasten the load and operate with extra caution Always attach the tow load to the hit...

Page 36: ...bility Always follow these precautions when towing 1 Never load more than 68 kg 150 lbs tongue weight on the towing bracket 2 Always shift to low gear for towing 3 When towing a disabled vehicle place the disabled vehicle s transmission in neutral Do not operate the vehicle faster than 16 km h 10 MPH when towing 4 Towing a trailer increases braking distance Do not operate the vehicle faster than 1...

Page 37: ...may dump unexpectedly and cause serious injury to the operator or bystanders Never operate the dump lever without ensuring that the load is positioned evenly or at the front of the box 8 Stand clear and pull up on the cargo box release lever 9 Lift the front of the cargo box to dump the cargo 10 Lower the cargo box and push down securely to latch WARNING Operating the vehicle while the cargo box i...

Page 38: ...rential gear locked Front wheels turn at same speed regardless of traction SECURITY LOCK TO MAKE SURE PEOPLE FOLLOW CORRECT OPERATING PROCEDURE 2WD 4WD DIFFS LOCK WE FITTED A SECURITY LOCK THE SECURITY LOCK SWITCHES ON THE FRONT DIFF LOCK IS AVAILABLE SWITCHES OFF THE FRONT DIFF LOCK IS NOTAVAILABLE WARNING TO ENGAGE OR DIS ENGAGE THE FRONT DIFF LOCK ON 2WD DRIVE MODE COULD CAUSE SERIOURS DAMAGE T...

Page 39: ...stment procedures have a qualified dealer perform these operations Vehicles subjected to heavy or severe use patterns must be inspected and serviced more frequently Severe Use Definition Frequent immersion in mud water or sand Frequent or prolonged operation in dusty environments Racing or race style high RPM use Prolonged low speed heavy load operation Extended idle Short trip cold weather operat...

Page 40: ...nal surfaces daily Headlamp tail lamp Daily Check operation apply dielectric grease if replacing Air filter main element Weekly Inspect replace every 150 hours or more often Brake pad wear 10 H Monthly Inspect periodically Battery 20 H Monthly Check terminals clean test Front Gearcase oil if equipped 25 H 1 M Perform a break in oil level check Rear gearcase oil if equipped 25 H 1 M Perform a break...

Page 41: ...ipped 100 H 6 M Inspect level change yearly Transmission oil 100 H 6 M Inspect level change yearly Fuel system 100 H 12 M Check for leaks at tank cap lines fuel valve filter pump throttle body replace lines every 2 years Radiator in applicable 100 H 12 M Inspect clean external surfaces Cooling Hoses 100 H 12 M Inspect for leaks Engine mounts 100 H 12 M Inspect Exhaust muffler pipe 100 H 12 M Inspe...

Page 42: ...dic Maintenance Chart Oil Recommendations NOTICE Use of a non recommended engine oil may cause serious engine damage WINWAY recommends the use of L ECD grade oil 15W 30 or 15W 40 for this vehicle Always use the correct viscosity grade based on the ambient temperature expected during operation Oil Check The oil dipstick is located on the engine under the cargo box 1 Position the vehicle on a level ...

Page 43: ...erclockwise to remove it 9 Using a clean dry cloth clean the filter sealing surface on the crankcase 10 Lubricate the o ring on the new filter with a film of fresh engine oil Check to make sure the o ring is in good condition 11 Install the new filter and turn by hand until the filter gasket contacts the sealing surface then turn and additional 1 2 turn 12 Remove the oil fill cap and add 4 8L 5 07...

Page 44: ...1 Position the vehicle on a level surface Remove the fill plug 2 Check the oil level Add the recommended oil as needed 3 Reinstall the fill plug Oil Change The drain plug is located on the back of the transmission Access the drain plug from the engine cover between two seats of the cab 1 Remove the fill plug 2 Place a drain pan under the transmission drain plug 3 Remove the drain plug Allow the oi...

Page 45: ...ehicle on a level surface 2 Remove the fill plug Check the oil level 3 Add the recommended oil as needed 4 Reinstall the fill plug Oil Change 1 Support the vehicle securely with a jackstand 2 Remove the front tire on the driver s side 3 Remove the fill plug 4 Place a drain pan under the drain plug on the bottom 5 Remove the drain plug Allow the oil to drain completely 6 Clean and reinstall the dra...

Page 46: ...oints at front shaft see pictures 3 U jointat rear shaft see picture 4 Rear wheels bearing see pictures 5 Shifting gear Grease Zerk Grease Zerk Grease Zerk Grease Zerk Grease Zerk Grease Zerk Grease Zerk Grease Zerk Lower grease Zerk Upper grease Zerk Grease Zerk ...

Page 47: ...ind of solution can be added tocooling water in all seasons Its mixing ratio is 30 55 please see the chart below The lowest temp 15 C 20 C 24 C 29 C Mixing ratio 30 35 40 45 Use the commercial available anti freezing solution with the mixing ratio recommended by manufacturer meanwhile it must be replaced every year CAUTION If the mixing ratio of anti freezing solution is too low cooling water will...

Page 48: ...e a funnel to add coolant through the filler opening Reinstall the cap Tip If coolant must be added often or if the overflow bottle runs completely dry there may be a leak in the system Have the cooling system inspected by your WINWAY dealer Adding coolant Notice The BLEEDER SCREW is located under the front of cargo box CAUTION Escaping steam can cause burns Never remove the pressure cap or plug w...

Page 49: ...ine is warm or hot Always allow the engine to cool before removing the pressure cap or air release plug 1 Open the cap of Overflow bottle under bonnet 2 Release the Bleeder screw located under the front of cargo box 3 Remove the front panel under the vehicle 4 Before unscrew the bolt on the coolant tube please put a pan under the hole ...

Page 50: ...e clutch and vent system when replacing the belt See your dealer This CVT system is intended for use on FARMBOSS II only Do not install it in any other product Belt Replacement Debris Removal If a belt fails always clean any debris from the duct and from the clutch and engine compartments when replacing the belt WARNING Failure to remove ALL debris when replacing the belt could result in vehicle d...

Page 51: ... repeat the process 7 Take the vehicle to your dealer for service as soon as possible Vehicle Immersion NOTICE If your vehicle becomes immersed major engine damage can result if the machine is not thoroughly inspected Take the vehicle to your dealer before starting the engine If it s impossible to take your FARMBOSS to a dealer before starting it follow the steps outlined below 1 Move the vehicle ...

Page 52: ...uids water and fuel 3 Slightly loosen the bleed screw to relieve fuel pressure in the filter Do not tighten the screw at this time 4 Reach under the fuel filter and slightly loosen the drain valve until the fluids drain from the drain hole Do not completely unscrew the drain valve 5 When fluids stop draining from the valve tighten the valve firmly by hand only 6 Reconnect the battery 7 Turn the ig...

Page 53: ...g and twisting motion Use care to avoid damaging the filter element 4 Remove debris from the filter using low pressure compressed air Lightly blow from the inside out NOTICE Operating a diesel engine with a soiled or damaged air filter can result in engine damage Do not attempt to wash the filter Always replace a soiled or damaged filter with a new filter 5 Clean any oil or water deposits from the...

Page 54: ...r Never go under the vehicle while it s inclined Use the following procedure to periodically purge accumulated carbon from the exhaust pipe 1 Place the transmission in neutral Engage the park brake Start the engine 2 Purge accumulated carbon from the system by momentarily revving the engine several times 3 If carbon is expelled partially cover the exhaust outlet and rap on the pipe around theclean...

Page 55: ...misadjustment it will cause a delay in throttle response especially at low engine speed The throttle may also not open fully If the throttle pedal has no freeplay the throttle may be hard to control and the idle speed may be erratic Check the throttle pedal freeplay at the intervals outlined in the Periodic Maintenance Chart beginning Adjust the freeplay if necessary Throttle Freeplay Inspection 1...

Page 56: ...on the vehicle on a level surface 2 View the brake fluid level at the reservoir in the driver s side wheel well 3 The level should be between the upper MAX and lower MIN level lines 4 If the fluid level is lower than the upper level line add brake fluid to the upper MAX line 5 Apply the brake forcefully for a few seconds and check for fluid leakage around the fittings Brake Inspection 1 Check the ...

Page 57: ...ke 2 Stop the engine Place the transmission in gear 3 Loosen thewheel nuts slightly 4 Elevate the side of the vehicle by placing a suitable stand under the frame 5 Remove the wheel nuts andwashers Remove the wheel Wheel Installation 1 Apply the brakes 2 Place the transmission in gear 3 Engage the park brake 4 Place the wheel in the correct position on the wheel hub Be sure the valve stem is toward...

Page 58: ...the ON position 2 Depress the brake pedal The brake light should come on after depress the pedal If the light doesn t come on check the bulb Headlight Lamp Replacement 1 Open the hood CAUTION Hot components can cause burns to skin Allow lamps to cool before servicing 2 Unplug the headlamp from the wiring harness Be sure to pull on the connector not on the wiring 3 Turn the lamp counterclockwise to...

Page 59: ...with dielectric grease or petroleum jelly Battery Removal 1 Lift the hoods 2 Remove the screws from the battery hold down strap and remove the strap 3 Disconnect the black battery cable first 4 Disconnect the red battery cable last 5 Lift the battery out of the vehicle Battery Installation Using a new battery that has not been fully charged can damage the battery and result in a shorter life It ca...

Page 60: ... can scratch the finish Do not use a power washer to clean the vehicle Do not use medium to heavy duty compounds on the finish Always use clean cloths and pads for cleaning and polishing Old or reused cloths and pads may contain dirt particles that will scratch the finish Washing the Vehicle If a high pressure water system is used for cleaning not recommended exercise extreme caution The water may...

Page 61: ...MBOSS Follow these procedures when transporting the vehicle 1 Apply the brakes 2 Engage the park brake 3 Stop the engine 4 Place the transmission in gear 5 Secure the fuel cap oil cap hood and seat Ensure that the seats are attached correctly and are not loose WARNING Cargo and other loose vehicle parts may fly off while transporting this vehicle Secure or remove all cargo and inspect the unit for...

Page 62: ...D 4WD switch Shaft Electronic diff locks Top Speed In high gear range 60 km h In low gear range 35 km h Brake Front Rear Hydraulic disc with power booster Braking Distance Less than 7M at 30km h Steering Rack and Pinion Suspension Front Independent Mac Pherson strut Rear Independent dual A arm IRS Towing Capacity 910 kg 2006 lbs Cargo Bed Load Capacity 500 kg 1100 lbs Fuel Consumption On Road 8 L ...

Page 63: ...ects from a stopped position Shift the transmission to low range and carefully use fast brief aggressive throttle application to engage clutch WARNING Excessive throttle may cause loss of control and vehicle rollover Belt slippage from water or snow ingestion into the CVT system Dry out the CVT Inspectclutch seals for damage if repeated leaking occurs Clutch malfunction See your WINWAY dealer Poor...

Page 64: ...WINWAY dealer Low battery voltage Recharge the battery Mechanical failure See your dealer Defective glow plug Inspect and replace Defective stop solenoid Replace Defective fuel pump Replace Engine Backfires Possible Cause Solution Old or non recommended fuel Replace with fresh recommended fuel Loose ignition connections Check all connections and tighten Water present in fuel Replace with fresh rec...

Page 65: ...e Loose ignition connections Check all connections and tighten Water present in fuel Replace with new fuel Kinked or plugged fuel tank vent line Inspect and replace Other mechanical failure See your dealer Out of fuel Refuel Low battery voltage Recharge the battery Overheated engine Clean radiator screen and core clean engine exterior operate at lower load see your dealer ...

Page 66: ...oper fuel surface imperfections caused by external stress heat cold or contamination operator error or abuse improper component alignment tension adjustment or altitude compensation snow water dirt or other foreign substance ingestion contamination improper maintenance modified components use of aftermarket or unapproved components accessories or attachments unauthorized repairs or repairs made af...

Page 67: ... SHALL BE AT WINWAY S OPTION REPAIR OR REPLACEMENT OF ANY DEFECTIVE MATERIALS COMPONENTS OR PRODUCTS THE REMEDIES SET FORTH IN THIS WARRANTY ARE THE ONLY REMEDIES AVAILABLE TO ANY PERSON FOR BREACH OF THIS WARRANTY WINWAY SHALL HAVE NO LIABILITY TO ANY PERSON FOR INCIDENTAL CONSEQUENTIAL OR SPECIAL DAMAGES OF ANY DESCRIPTION WHETHER ARISING OUT OF EXPRESS OR IMPLIED WARRANTY OR ANY OTHER CONTRACT ...

Reviews: