background image


Chapter 2: Getting Started 

Chapter 2: Getting Started 

Thank you for purchasing this rugged Tablet Computer. The rugged design allows you to use it in 
harsh outdoor environments.  

This chapter tells you step by step how to get the Tablet Computer up and running. You will find 
instructions for the following procedures: 

  Unpacking 

  Description of Parts 

  First Time Operations 

  Powering On/Off 

2.1 Unpacking 

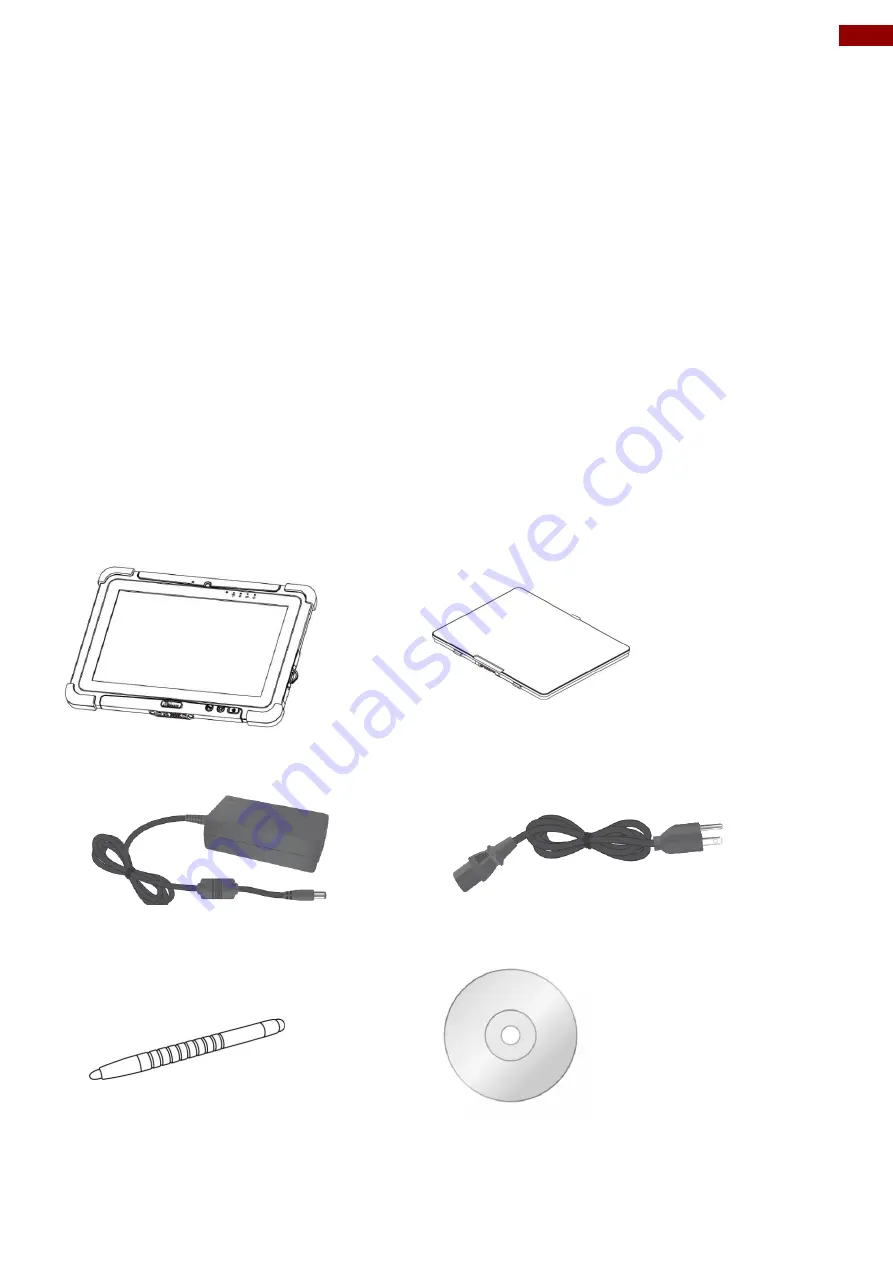
Check and identify the standard supplied accessories. 

Standard factory shipment list: 

  Tablet Computer 


  Standard Battery 


  Power Adapter 


  Power Cord and Plugs 


  Capacitive Touch Stylus 


  Driver CD 


Summary of Contents for M101B Series

Page 1: ...duct and save this manual for future use M101B M101BL Rugged Windows Tablet Intel Celeron Quad Core N2930 1 83 GHz Windows 10 IoT Enterprise Windows Embedded 8 1 Industry Pro Windows 7 Pro for Embedded Systems User Guide Version 1 6 Document Part No 9171111K101X ...

Page 2: ... 7 Setup 19 3 2 SETTING UP WINDOWS 7 ULTIMATE PROFESSIONAL 20 3 3 SETTING UP WINDOWS EMBEDDED 8 STANDARD 24 3 4 SETTING UP WINDOWS EMBEDDED 8 1 INDUSTRY PRO 29 3 5 SETTING UP WINDOWS 10 IOT ENTERPRISE 33 CHAPTER 4 OPERATING THE DEVICE 36 4 1 HOTTAB INTRODUCTION 36 4 2 SHORTCUTS 37 4 3 CAMERA 38 4 4 DEVICE ON OFF 40 4 4 1 Using Wireless LAN Wi Fi 40 4 4 2 Using Wireless WAN 3G LTE 41 4 4 3 Using GP...

Page 3: ...CKING CONNECTOR PIN DEFINITION 79 5 6 EXPANSION PORT PIN DEFINITION 79 5 7 COM PORT DEFINITION 80 5 8 PAIRING WITH A WIRELESS BLUETOOTH BARCODE SCANNER WITH BLUETOOTH SERIAL PORT PROFILE 82 5 8 1 Setup Computer for Bluetooth Pairing 82 5 8 2 Set up the Barcode Scanner for Bluetooth Pairing 85 5 8 3 Perform Bluetooth Pairing 85 CHAPTER 6 TROUBLESHOOTING 88 6 1 BASIC TROUBLESHOOTING 88 APPENDIX A OR...

Page 4: ...ormation Important An important note indicates information that is important for you to know Caution Attention A Caution alert indicates potential damage to hardware and explains how to avoid the potential problem Unealerted attentionindique un dommage possible à l équipement et explique comment éviter le problèmepotentiel Warning Avertissement An Electrical Shock Warning indicates the potential h...

Page 5: ... Has Deteriorated Replace It with a New Battery Continued use of a damaged battery pack may result in heat generation ignition or battery rupture FR Lorsque la pile est détériorée la remplacer par une nouvelle pile L utilisation continue d une pile endommagée peut occasionner une génération de chaleur l amorçage ou la rupture de la pile Do Not Expose the Battery Pack to Excessive Heat or Extreme H...

Page 6: ...rise de terre possède deux lames et une troisième qui est la terre Si la fiche principale fournie ne peut être insérée dans votre prise consultez un électricien pour remplacer votre prise obsolète Use only accessories specified by the manufacturer FR Utiliser uniquement les accessoires spécifiés par le fabricant This product should not be used near water such as bathtubs sinks swimming pools wet b...

Page 7: ...essuyer l extérieur du produit Gently wipe the display with a soft lint free cloth Do not use alcohol or detergent on the product FR Essuyer délicatement l écran avec un chiffon doux non pelucheux Ne pas utiliser d alcool ou un détergent sur le produit Touchscreen Guideline Guide de l écran tactile Use your finger or the stylus on the display Using sharp or metallic object may cause scratches and ...

Page 8: ...dio frequency energy and if not installed and used in accordance with the instruction manual may cause harmful interference to radio communications Operation of this equipment in a residential area is likely to cause harmful interference in which case the user will be required to correct the interference at him own expense CE Notice European Union Electromagnetic Compatibility Directive 2014 30 EU...

Page 9: ...ells you step by step how to get the Tablet Computer up and running You will find instructions for the following procedures Unpacking Description of Parts First Time Operations Powering On Off 2 1 Unpacking Check and identify the standard supplied accessories Standard factory shipment list Tablet Computer Standard Battery Power Adapter Power Cord and Plugs Capacitive Touch Stylus Driver CD ...

Page 10: ...strap can help you handle the Rugged Tablet PC much more easily and comfortably Battery Charger Dual charging bays supporting both BS101 and BL101 LED indicators to show current battery charging status Vehicle Charger Rapidly charges your M101B Tablet PC in your car while you drive Length 3m Desk Docking 4 x USB 2 0 2 x Rear 2 x Side 1 x LAN 10 100 1 x VGA 1 x RS232 Vehicle Docking VESA Mounting s...

Page 11: ...ss 6 Power Button Power on off tablet 7 I O Cover Protects I O ports No Item Description 8 Micro HDMI HDMI output to external display 9 LAN RS232 Adapter port for LAN RS232 connector 10 USB 3 0 High speed USB port connects to USB devices such as USB flash drive mouse keyboard printer etc 11 Mic In Line Out Headset or headphone can be connected Mic is only supported with 3 5mm 4 pin headset 12 Powe...

Page 12: ...for special application USB2 0 x 1 RS232 x 1 21 Fn2 Button Programmable function key configured by Hottab Utility 22 Volume Buttons Volume Control Raise volume Lower volume 23 Battery Lock Latch Latch to lock the battery in place once battery is inserted Not spring loaded 24 Battery Release Slider Spring loaded slider that latches the battery in Bottom No Item Description 25 Touch Pen Slot Pen hol...

Page 13: ...ft Under Windows Buttons Keystroke Menu Hottab Quick Access Fn1 Default Web Browser Fn2 Default Camera Volume UP Raise volume Volume Down Lower volume Power Power ON OFF Volume Up Volume Down Ctrl Alt Del LED Indicators Item Description Power Indicator Blue Tablet is ON No light Tablet is OFF Battery Status Orange AC adapter is plugged in and charging Green AC adapter is plugged in and battery is ...

Page 14: ...screws torque 2 0 0 5 kgf cm Remove four screws and remove the service window Remove the one screw that secures the 3G LTE module Carefully lift the module up Do not to damage the connected cables Carefully flip and move the 3G LTE module and to the right Do not disconnect cables Insert SIM Card all the way in Chip contact facing down Use your hand to carefully pull the cable outside the module ca...

Page 15: ... the Battery Release Slider Battery will be flat against the housing once fully inserted Removing the Battery Pack 1 Power off the tablet computer or put it to sleep Disconnect any cords connected to the computer 2 Turn the tablet computer over back facing up 3 Locate the Battery Lock Latch and push it to the Unlocked position 4 Locate the Battery Release Slider that is spring loaded Pull back and...

Page 16: ... power cord into the AC adapter 4 Finally Plug the AC power cord into the electrical outlet When the AC Adapter is connected the battery pack starts charging The battery LED indicator on the tablet computer would show different states Please refer to description of LED indicator on Description of Parts Item Hours Battery Life Standard Battery BS101 8 Hours High Capacity Battery BL101 16 Hours Item...

Page 17: ...ttons screen or external keyboard mouse 2 5 2 Powering Off Perform the following procedure to power off the Tablet Computer 1 Make sure you have closed any programs that are open on the Desktop Start Screen apps don t need to be closed 2 Under Windows 8 1 OS open the Charms Bar by swiping your finger from the far right of the screen towards the middle of the screen 3 Tap on the Settings charm 4 Ta...

Page 18: ... 7 WS7P During the setup process you create a user name and password verify the correct time and date and then choose your Internet network 3 1 1 Creating a user name and password 1 Create a User name This user name is for the administrator of the computer 2 Type the selected user name in the text box and then click Next 3 On the next screen type the password in the text box retype the password in...

Page 19: ... provided by Microsoft 2 Install important updates only only downloads and installs critical updates 3 Ask me later Click the option you wish to use Reviewing your time and date settings The next screen contains options for changing the date and time settings Verify your time zone time and date Make any necessary changes Then click Next to continue ...

Page 20: ...ng locations for your computer Home network Select this location if all the computers on this network are at your home and you recognize them This is a trusted home network Work network Select this location if all the computers on this network are at your workplace and you recognize them This is a trusted work network Public network Select this location if you do not recognize all the computers on...

Page 21: ...ws 7 Ultimate Professional Follow the steps below to complete the setup process 1 Press the power button to power on the computer 2 First select your region and language information and then tap Next 3 Type in a user name for your account to be used on this PC and tap Next ...

Page 22: ...ser Guide 4 Type in a password for your account and tap Next 5 Now enter the product key that came with the computer and tap Next For this version of the Windows a product key entry is required when setting up the computer for the first time ...

Page 23: ...Time 6 On the license terms screen click on the I accept the license terms and tap Next 7 For the update option choose Use recommended settings for Windows to install updates If you do not wish Windows to do so choose the other options accordingly ...

Page 24: ...ate and time settings on the computer 9 Select the computer current location for network privacy setting Choose the location below to your actual usage accordingly 10 Allow time for windows to setup your desktop for the first time 11 Now the computer is ready to be used ...

Page 25: ...he steps below to complete the setup process 1 Press the power button to power on the computer 2 Check I accept the license terms for using Windows to accept the terms and then click or tap Accept 3 On the Personalize screen choose a color you like you can always change this later from the Start screen ...

Page 26: ...Rugged Windows Tablet M101B M101BL User Guide 4 In the PC name field type a name for your computer and then click or tap Next 5 On the Settings page screen choose Use express settings for the fastest setup ...

Page 27: ...for the First Time 6 On the Sign in to your PC screen choose to create a Local account 7 Windows will then try to connect to network Ignore attempt to connect to internet as you do not need internet connection to finish setup your pc ...

Page 28: ...27 Rugged Windows Tablet M101B M101BL User Guide 8 Type your username and password to create a local account and then click or tap Finish 9 Windows may take some time to finalize your settings ...

Page 29: ...3 Setting Up Windows for the First Time 10 On the Windows Sign in screen enter the user name and password that you set up earlier and then press Enter 11 Once Windows finishes login you are now ready to use the PC ...

Page 30: ...the steps below to complete the setup process 1 Press the power button to power on the computer 2 Check I accept the license terms for using Windows to accept the terms and then click or tap I Accept 3 On the Personalize screen choose a color you like you can always change this later from the Start screen ...

Page 31: ...hapter 3 Setting Up Windows for the First Time 4 In the PC name field type a name for your computer and then click or tap Next 5 On the Settings page screen choose Use express settings for the fastest setup ...

Page 32: ...ndows will then try to connect to network Ignore attempt to connect to internet as you do not need internet connection to finish setup your pc 7 On Your account screen type your username and password to create a local account and then click or tap Finish ...

Page 33: ...ter 3 Setting Up Windows for the First Time 8 Windows may take some time to finalize your settings 9 On the Windows Sign in screen enter the user name and password that you set up earlier and then press Enter ...

Page 34: ...ws 10 IoT Enterprise Follow the steps below to complete the setup process 1 Press the power button to turn on the computer 2 First select your country region your preferred app language your preferred keyboard layout and your time zone then tap Next 3 On the Here s the legal stuff screen read through the disclosures then tap Accept ...

Page 35: ...n as you can then set up the network later 5 On the Get going fast screen click Use Express settings for the fastest setup If you would like more information tap Learn more or if you would like to select your own options click Customize settings 6 To create a local account type your User name password and Password hint in the fields provided then tap Next ...

Page 36: ...1BL User Guide 7 The initial setup screens are complete and the desktop is displayed 8 Read any introductory screens describing features of your computer and tap Next upon completing each You are now done with the initial setup process ...

Page 37: ... Introduction Hottab provides quick access to the tablet s functions and features such as setting up shortcuts using camera powering on off built in devices programming function key and changing power management As Windows starts up Hottab starts and runs in the background To display the Hottab control utility press the Menu Button located on the front panel OR launching the Hottab Utility applica...

Page 38: ...ffers 8 empty slots to store user s desired quick access Shortcuts can be mapped to any of the executable files exe installed on the tablet Short Cut Menu To store a new shortcut 1 Open the Hottab utility by press the Menu Button located on the front panel OR launching the Hottab Utility application 2 Tap on the Shortcuts button 3 Tap on button of any empty slot 4 An on screen file browser will ap...

Page 39: ...Utility application 2 Tap on Device ON OFF button to check the built in devices status 3 Check the status color of the Camera icon Item Status Color Description Orange Camera is enabled White Camera is disabled 4 If the Camera feature is disabled white tap on the Camera icon to enable it orange 5 Go back to the Hottab main menu by pressing the Menu Button located on the front panel OR click on the...

Page 40: ...ition when taking pictures LED Flash fires automatically in low light condition when taking pictures 4 Resolution Pictures will be saved at resolution of 640 x 480 Pictures will be saved at resolution of 1024 x 768 Pictures will be saved at resolution of 1600 x 1200 Pictures will be saved at resolution of 2592 x 1944 5 Exit Exits the Camera and hide Hottab Utility 6 Picture Video Mode Switch Switc...

Page 41: ...f the Wi Fi icon Item Status Color Description Orange Wi Fi is enabled White Wi Fi is disabled 4 If the Wi Fi feature is disabled white tap on the Wi Fi icon to enable it orange 5 Click the wireless network connection status icon in the Windows notification area A list of available wireless networks is displayed 6 Double click a network to connect to it Provide required authentication information ...

Page 42: ...on status through the wireless network connection status icon in the Windows notification area The more bars encompassed the better the signal is Note For the Windows 7 operating system you also can check the Access Connections gauge the Access Connections status icon or the Access Connections wireless status icon in the Windows notification area 4 4 3 Using GPS To enable the wireless GPS feature ...

Page 43: ...evice automatically 7 Choose the Bluetooth device that user wants to connect and follow onscreen prompt to continue the pair procedure and use the Bluetooth device NOTE If user uses Win 7 OS need to adjust Bluetooth setting right click on the Bluetooth device which user want to pair and choose the service 4 4 5 Turn on off LED Indicators The LED Indicators for Power Status Battery Status and RF Co...

Page 44: ...g Menu Button located on the front panel OR launching Hottab Utility application 2 Choose Device ON OFF and click on Barcode and the setting utility will show up as below 3 Tap on the ON button 4 Check the status color of the ON button is green and the status color of the Barcode icon on the Hottab menu is orange at the same time Item Status Color Description Orange Barcode Reader is enabled Readi...

Page 45: ...ing light will be on when the Fn2 button is triggered and off when the barcode is successfully read or the Fn2 button is released Pulse Under Pulse mode user can define the scanning time after each trigger The scanning light will be on when the Fn2 button is triggered and off when the barcode is successfully read or the defined read time ends To set up the scanning time tap on the Read time option...

Page 46: ...data User can disable Identifier Code check box to ignore specific characters Output to This setting defines the output type of the scanned data Here are the options available Keyboard Wedge Under this setting the data scanned is sent like keyboard data The scanned data can be output directly to the demo area below this window or user can also open other utility such as Office Word or Notepad file...

Page 47: ...fines to append an TAB which is followed by the characters Regex Filter Press on Presets button user can define how many characters to show after the data scanned Replace User can define specific characters to be replaced with preferred characters automatically When the characters defined in Regex Substitution is scanned the data will be replaced with the one filled in Replace with Reset User can ...

Page 48: ...shipped with default settings shown below If the default setting suits the usage requirement setting symbologies is not necessary Symbologies Default Settings Symbologies Default setting 1D UPC A Enable UPC E Enable EAN 8 Enable EAN 13 Enable UPC E1 Disable GS1 DataBar Omni Directinal Disable GS1 DataBar Limited Disable GS1 DataBar Expanded Disable Code 39 Enable Code 128 Enable ISBT 128 Disable G...

Page 49: ...Download Easyset barcode scanner configuration application from Intermec website and execute it by tapping on its icon 3 When Easyset application launches a Select product on screen prompt will show up Select Scan engines and pick ED40 Make sure the Online setup option is checked and select OK as shown in the screen capture below 4 Another Device Selection on screen prompt will show up Select Comm...

Page 50: ...a_id 5760 4 4 7 Using HF RFID Reader IMPORTANT The HF RFID Reader is optional for M101B Tablet PC and is not re workable by the end user To use this feature please make sure the tablet PC is built in HF RFID reader before use or contact our sales contact window for more details To enable the HF RFID Reader feature perform the following procedure 1 Open the Hottab utility by press the Menu Button l...

Page 51: ...ID Reader is enabled White HF RFID Reader is disabled Trigger Setting Item Description Auto Scan The default setting for RFID trigger is Auto Scan Under this setting the RFID Reader will always be ready to scan tags 1 When the RFID tag is detected from RFID antenna the data will be read automatically 2 User can define the RFID scanning frequency from the drop down menu shown as below The frequency...

Page 52: ...tion Sound The Sound check box defines whether a beep sound will come with the data scanning Output to This setting defines the output type of the scanned data Two options are available Keyboard Wedge Under this setting the data scanned is sent like keyboard data The scanned data can be output directly to the demo area below this window or user can also open other utility such as Office Word or No...

Page 53: ...fine the characters BEFORE the data scanned Suffix User can type in this field to define the characters AFTER the data scanned Append Enter The check box user can defines to append an Enter which is followed by the characters Append TAB The check box user can defines to append an TAB which is followed by the characters Regex Filter Press on Presets button user can define how many characters to sho...

Page 54: ...g SDK for software porting the scanned data can also be output with the format needed NOTE User can download the SDK from Winmate Download center website M101B BL BT Development Kit or check the Driver CD which is shipped with the tablet http www winmate com DownCenter DownLoadCenter asp DownType 2207 O yContent RFID Output Setting Item Description Select RFID Output Type The default setting for b...

Page 55: ...to vehicle dock and the vehicle dock has connected with external GPS antenna When working with vehicle dock connecting to external antenna user can switch GPS antenna from the internal one to the external one from Hottab menu To enable disable the GPS Ext Antenna perform the following procedure 1 Open the Hottab utility by press the Menu Button located on the front panel OR launching the Hottab Ut...

Page 56: ...erating modes for users to choose under different usage scenarios Mode Usage Scenario Hand Rain Mode The Hand Rain mode is the default operating mode of the touchscreen Under this mode the touchscreen is set to have the ability to reject false touch inputs while liquid is present on the touchscreen Once the liquid is removed from the touchscreen touch inputs from bare fingertips will continue to o...

Page 57: ...en the different touchscreen operating modes 1 Via the built in HotTab utility 2 Via the programmable function buttons Switch via Built in HotTab Utility To switch between the different touchscreen modes via the HotTab utility perform the following procedure 1 Open HotTab utility by pressing Menu Button located on the front panel OR launching HotTab Utility application 2 Choose Device ON OFF and t...

Page 58: ...ouch related setting to switch the touchscreen input between mouse mode with cursor or with multi touch mode Item Description Mouse Mode Single touch point supported with mouse cursor shown Multi touch Mode The default setting of the touch screen supports multi touch mode up to 10 points Switch via Programmable Function Buttons ...

Page 59: ...etting button 3 Tap on F1 icon 4 Tap on the Long Press icon 5 Change the Long Press function to Touch Mode as shown below Once the touchscreen mode switching is set to the programmable function button Long Press on F1 function button to cycle through the different touchscreen modes When touchscreen mode is switched an icon will temporarily overlay on the lower center of the screen to indicate curr...

Page 60: ...not used To enable the add on module from expansion port perform the following procedure 1 Open the Hottab utility by press the Menu Button located on the front panel OR launching the Hottab Utility application 2 Tap on the Device ON OFF button 3 Check the status color of the Ext Module icon Item Status Color Description Orange Expansion Module is enabled White Ext Module is disabled 4 4 12 UHF RF...

Page 61: ... 2 Choose Device ON OFF and click on Ext Module and the setting utility will show up as below 3 Tap on the ON button 4 Check the status color of the ON icon is green Trigger Setting Item Description Auto Scan The default setting for UHF RFID trigger is Auto Scan Under this setting the UHF RFID Reader will always be ready to scan tags 1 When the UHF RFID tag is detected the data will be read automa...

Page 62: ...nder this setting the UHF RFID Reader will be triggered only when user click on Send Settings Item Description Sound The Sound check box defines whether a beep sound will come with the data scanning Region Basing on different regional regulations about UHF RFID frequencies user can switch frequency to NA North America 902 928 MHz or EU3 Europe 865 868 MHz from the drop down menu shown as below ...

Page 63: ... the scanned data Two options are available Keyboard Wedge Under this setting the data scanned is sent like keyboard data The scanned data can be output directly to the demo area below this window or user can also open other utility such as Office Word or Notepad files for data input ...

Page 64: ... this field to define the characters BEFORE the data scanned Suffix User can type in this field to define the characters AFTER the data scanned Append Enter The check box user can defines to append an Enter which is followed by the characters Append TAB The check box user can defines to append an TAB which is followed by the characters Regex Filter Press on Presets button user can define how many ...

Page 65: ...User can download the SDK from Winmate Download center website M101B BL BT Development Kit or check the Driver CD which is shipped with the tablet http www winmate com DownCenter DownLoadCenter asp DownType 2207 O yContent RFID Output Setting Item Description EPC The EPC check box defines whether to show the complete information of EPC Electronic Product Code including 1 The identifiers of the obj...

Page 66: ... provides users information such as PC Information Battery status and also device settings such as power management setting and function key mappings Perform the following procedure to access the Hottab Setting menu 1 Open the Hottab utility by press the Menu Button located on the front panel OR launching the Hottab Utility application 2 Tap on the Settings button 3 Below shows the items listed in...

Page 67: ... or long press of keys To configure function key mapping perform the following 1 Open the Hottab utility by press the Menu Button located on the front panel OR launching the Hottab Utility application 2 Tap on the Setting button 3 Tap on function key icon for the corresponding key that you want to change 4 At top of utility it will say Short Press or Long Press to indicate what type of press is be...

Page 68: ...is section will explain how you can adjust the built in windows display scaling setting and resolution setting NOTE The Tablet computer is shipped with display scaling set at Larger 150 We recommend the users set the scaling to this setting for optimal text and image viewing Before proceeding to change the scaling option make sure any opened document is saved and close and all running applications...

Page 69: ...quently Used Settings 3 A Display window will show up Under Change the size of all items section change the scaling option to Larger 150 or any other desired display scaling and hit Apply to save changes as shown below ...

Page 70: ...gain to Windows to see the changed display scaling already being applied 5 1 2 Changing screen resolution setting Alternatively instead of changing the display scaling setting user may choose to change the overall resolution setting to make screen elements bigger 1 Tap and hold anywhere on the desktop for 3 seconds and release to bring up the context menu and select Screen resolution option as sho...

Page 71: ...ay Settings prompt will show up to ask the user if the applied resolution is usable 4 If the new resolution is the desired display setting hit Keep changes and continue to next step If the new resolution is not desirable hit Revert and select a different resolution to change to and start again from step 2 5 The user may now use the device with the new resolution setting ...

Page 72: ...t swap the batteries 1 While the tablet is powered on go to Hottab utility to check on the power level of the Backup battery 2 If the Backup battery level is at Low please charge the tablet with AC Power until the Backup battery level is at Medium or High and do not remove the main battery 3 If the Backup battery level is at Medium or High continue to remove the main battery 4 Insert a new charged...

Page 73: ...recovery process Follow the procedure below to enable quick one key recovery procedure 1 Plug in the AC adapter to M101B tablet computer Make sure the M101B tablet computer stays plugged in to power source during the recovery process 2 Power on the tablet computer and when the boot screen shows up press the Fn1 button Recovery Key on the front bezel OR press F6 when using an external USB keyboard ...

Page 74: ...t till the recovery process to complete During the recovery process a command prompt will show up to indicate the percent of recovery process 6 After recovery is completed please press any key to continue and the tablet computer will restart automatically ...

Page 75: ... setting UEFI LEGACY mode to install OS 5 4 1 Changing BIOS Settings UEFI LEGACY mode to Install OS This section describes how to change UEFI LEGACY mode in BIOS settings to install OS that is different from Winmate s shipment 5 4 1 1 Default Windows 8 1 10 change to Windows 7 The instruction below describes how to change Windows 8 1 10 to Windows 7 1 Enter BIOS Setup utility 2 Go to Miscellaneous...

Page 76: ...75 Rugged Windows Tablet M101B M101BL User Guide 4 Go to CSM Configuration change Storage and Video to Legacy only ...

Page 77: ...ently Used Settings 5 Go to Boot menu and change setting Boot Mode select to LEGACY 5 4 1 2 Default Windows 7 change to Windows 8 1 10 1 Enter BIOS Setup menu 2 Go into item Miscellaneous Configuration at BIOS setup menu ...

Page 78: ...77 Rugged Windows Tablet M101B M101BL User Guide 3 Change OS setting to Windows 8 X 4 Go to CSM Configuration change Storage and Video to UEFI ...

Page 79: ... change boot order doc put your install device to Boot Option 1 then you will start install process IMPORTANT Pay attention to the mode you created on the Recovery DVD PE3 0 only support legacy mode for Windows 7 PE5 0 can support Win7 8 8 1 at legacy or UEFI mode Creation and installing processes of the chosen mode must match ...

Page 80: ...13 GND 4 RF_GND 14 Power 5 RF_GND 15 USB 6 NC 16 USB 7 NC 17 GND 8 DETECT 18 GND 9 Power 19 DETECT 10 Power 5 6 Expansion Port Pin Definition M101B tablet computer supports one optional 19 pin expansion port at the rear side The pin definition is listed as the following table 19 Pin Expansion Port Pin No Descriptio n Pin No Description 1 NC 11 RIB 2 NC 12 RTSB 3 NC 13 DTRB 4 NC 14 RXDB 5 NC 15 DM4...

Page 81: ...ional COM 3 HF RFID optional COM 4 Bluetooth Auto Pairing COM 9 GPS COM 11 RS232 at Docking optional COM 15 Barcode Reader optional COM 20 UHF RFID optional For some special applications user might re install OS and lose the COM port settings To make sure the features works properly with Hottab utility please follow the procedure below to re define the COM port numbers 1 Go to Device Manager right...

Page 82: ...ab and click on Advanced button 3 Tap on the dropdown list and choose the correct COM Port Number refer to the COM Port Definition Table and click OK 4 Double check Device Manager to make sure the COM Port number has been re defined successfully and then restart the system ...

Page 83: ...er to initial Bluetooth Serial Port Profile pairing request 5 8 1 Setup Computer for Bluetooth Pairing To start the pairing process first perform the following steps to ensure the computer is properly setup for pairing 1 Locate the Bluetooth icon in the Notification Area 2 Bring up the Contextual Menu by performing long press on the icon with touchscreen or right click on the icon with a mouse and...

Page 84: ...01BL User Guide Click OK to continue 4 In the Bluetooth Settings menu go to COM Ports tab COM port has to be setup for the wireless Bluetooth Barcode Scanner to communicate via the Bluetooth Serial Port Profile Click on the Add button ...

Page 85: ...COM4 is allocated Click OK to continue 7 Next the user has to configure the application that is used to accept the scanned data from the wireless Bluetooth Barcode Scanner The application has to be configured to accept the same COM Port that has been assigned for the Bluetooth Serial Port Profile in the previous step IMPORTANT Make sure the application stays open while pairing 8 Now the computer i...

Page 86: ...rm scanning procedures A Bluetooth notification window pop up on the right hand side of the desktop Left click on the mouse to enter Add a device menu 3 In Add a device window click Next to connect the Barcode Scanner to the Computer IMPORTANT The wireless Bluetooth Barcode Scanner has to be configured as Bluetooth Serial Port Profile Master device to establish connection via Bluetooth MAC address...

Page 87: ... to exit Add a device menu In order to ensure that Bluetooth Device is successfully pared to the Computer follow the steps below 5 Locate the Bluetooth icon in the Notification Area Select Show Bluetooth Devices You can access this menu in the Control Panel Windows Control Panel Devices and Printers Bluetooth Devices ...

Page 88: ...87 Rugged Windows Tablet M101B M101BL User Guide 6 Make sure your device is connected to the Computer ...

Page 89: ...et computer closer to the access point or another wireless LAN device associated with it Check if your surroundings have interferences such as microwave ovens cordless phones Move the tablet computer away from objects causing interference I cannot connect to another wireless LAN device Make sure that wireless LAN feature is powered on Make sure that the SSID setting is the same for every wireless ...

Page 90: ...and does not seem to work Make sure the Barcode scanner device is enabled in Hottab utility Make sure under Windows the Barcode Reader is set to COM 15 port so that Hottab can trigger the Barcode Reader hardware Barcode Scanner emits laser beam but does not read barcode presented to it Adjust the distance between barcode scanner of the device and the barcode being scanned Make sure the barcode cod...

Page 91: ...Optional Optional Default N A N A N A M101BT Optional Optional Optional N A N A Default M101B HF Optional Optional N A Default N A N A M101B UF Optional Optional N A N A Default N A M101BL 1280x800 is available in the following configurations Order Information M101BL 3G 4G 1D 2D Barcode Reader HF RFID UHF RFID Smart Card Reader M101BL Optional Optional N A N A N A N A M101BL 3 Default N A Optional...

Page 92: ...Winmate Inc 9F No 111 6 Shing De Rd San Chung District New Taipei City 24158 Taiwan R O C www winmate com Copyright Winmate Inc All rights reserved ...

Reviews: