Only hang the window mount assembly on an exterior bracket when the
vehicle is parked and the antenna is in use; store the window mount
assembly when not in use. Model MT-SM40 window mount should only
be deployed when the vehicle is stationary. Do not use while the vehicle
is moving. Remove prior to traveling.
Top
Bottom
Hanging on Window or Exterior Brackets
Once ready to use the antenna, hang the window mount assembly
on the window or exterior bracket.
If hanging the assembly on the vehicle window, apply the plastic
film where the mount will be hung on the window, and then slide
the clip over the plastic film. The window may need to remain
slightly open when the window mount is on the window.
If hanging the assembly on the exterior bracket, make sure the
sealant is dry, and slide the clip into the exterior bracket. When
placing the antenna on the optional exterior bracket, ensure that
the window mount is properly secured to the optional exterior
bracket; failure to secure properly may result in injury.
Installation of Exterior Brackets
After the antenna has been secured to the mount, the
assembly can be hung on the edge of a window or on the
provided exterior brackets. The exterior brackets will enable
the assembly to be hung on the exterior of the vehicle.
Complete the following steps to install the exterior brackets
on the vehicle.
1. Choose a location on the exterior of the vehicle for the
exterior brackets.
Consider possible obstructions to the
satellite line-of-sight and where cables will be run
.
2. Clean the areas where the exterior brackets will be installed on the vehicle.
3. Position an exterior bracket over one of the chosen locations for installation,
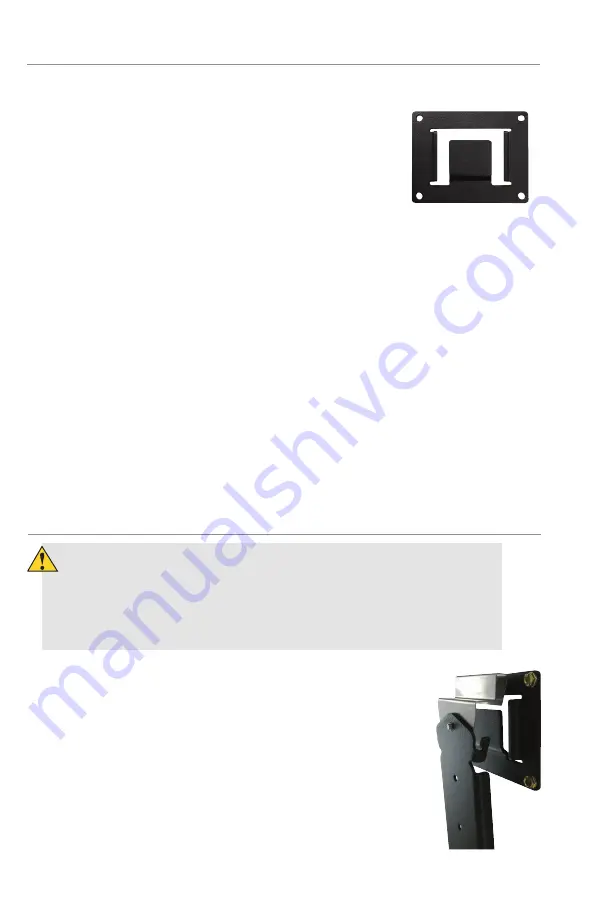
making sure that the top of the exterior bracket is oriented upwards (see
image to right for reference). Keep in mind that the antenna assembly
should be level front-to-back and side-to-side for best operation.
4. Trace around the edge of the bracket, and mark pilot holes through the
bracket.
5. Drill the pilot holes.
6. Apply sealant in the traced area.
7. Mount the exterior bracket with four of the provided mounting screws.
8. Apply sealant over the screws.
9. If using the second exterior bracket repeat steps 3–8.


