Williams Sound
®
Helping People Hear
9
Note:
To remove a wall-mounted telephone,
slide the phone up and pull it slightly
away from the wall. Squeeze the clip on
the modular plug and pull it from the jack.
Bare Wall Installation
Even if you don’t have a studded wall phone plate,
you can still mount the TeleTalker on any wall
surface within seven feet of a standard modular jack
and AC outlet. To mount the phone farther from the
jack you’ll need a longer line cord or a telephone
extension cord. Place the AC power pack in a
location which will not be subject to disturbance.
Step 1:
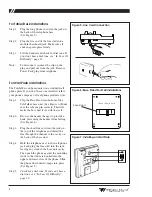
Measure and mark the wall for mounting
screws.
Mark two points 3-
1
⁄
4
inches apart for
upper and lower mounting screws. The
lower mark should be 48–52 inches from
the floor. Use a level to make sure the
marks are in vertical alignment.
Step 2:
Install the mounting screws.
Use wood screws for stud mounting,
anchor screws for hollow wall mounting.
Drive the screws almost completely in,
leaving a
1
⁄
8
inch space between the wall
surface and the bottom of the screw head
(about the thickness of two stacked
pennies).
Step 3:
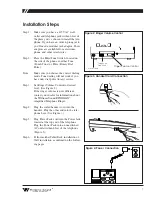
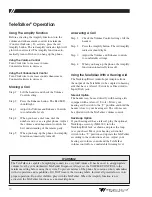
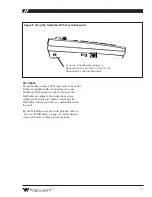
Reverse the handset hook.
(See Figure 8.)
Step 4:
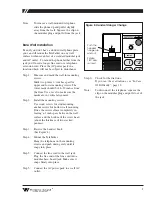
Mount the TeleTalker.
Hang the telephone on the mounting
screws and push down gently until it
snaps into place
Step 5:
Connect the line cord to the wall jack.
Plug the free end of the line cord into a
modular base–board jack. Make sure it
snaps firmly into place.
Step 5:
Connect the AC power pack to a wall AC
outlet.
Step 6:
Check for the dial tone.
If you can’t hear a dial tone, see “In Case
Of Difficulty”, page 12.
Note:
To disconnect the telephone, squeeze the
clip on the modular plug and pull it out of
the jack.
Volume
Enhance
Louder
Softer
Less
More
Amplified Telephone
Amplified Telephone
Amplify
Ringer Tone
Lower
Higher
®
Ring
Williams Sound
®
Helping People Hear
REDIAL
AMPLIFY
1
2
5
8
3
6
9
4
7
0
#
*
DEF
ABC
MNO
JKL
GHI
WXY
TUV
OPER
PRS
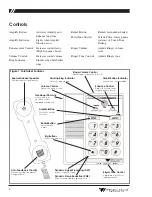
Figure 8: Handset Hanger Change
Push the
handset
hanger up
and out.
Rotate
180º and
re-insert.


