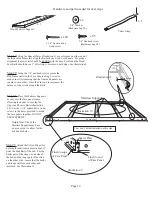
Step 1:
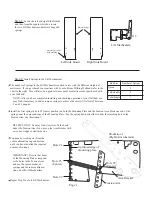
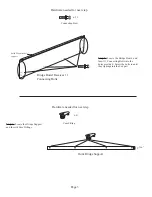
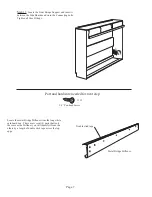
Locate the left and right Side Boards
and then from the square white box locate
the two Lift Mechanisms, hardware bags and
springs.
Left Side Board
Right Side Board
Lift Mechanism
X 2
Page 1
Step 2:
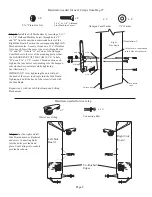
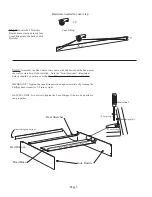
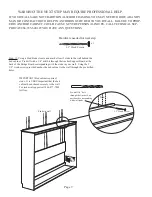
Install Springs in the Lift Mechanisms
Bed Size
Number of Springs
Queen
Full/Double
Twin/Single
5
3
1
HELPFUL HINT: You may find it easier to fit the hook
under the Tension Arm if you pry up the Arm Bracket with
a wooden wedge or similar device.
IMPORTANT! Be sure that holes
of the Mounting Plate correspond
to the holes in the Tension Arm
and use the same number of
springs and the same configura-
tion on both Lift Mechanisms
(Center)
Hole #1
Hole #9
Hole #5
Tension Arm
Upturned edge of
mounting plate
(Center)
Hole #5
Arm Bracket
Illustration 1
(Right lift mechanism)
Repeat Step 2 for Left Lift Mechanism.
The number of springs in the Lift Mechanism required varies with the different weights of
mattresses. If you purchased your mattress with your bed from Wilding Wallbeds refer to the
chart to the right. This will also be a good reference point for mattresses not purchased with
your Wall bed.
Install the first spring in hole #5 (center position) on both the Mounting Plate and the Tension Arm. Hook one end of the
spring under the upturned edge of the Mounting Plate. Lay the spring down and slide it under the matching hole in the
Tension Arm. See illustration 1.
Continue by working out from the
center, alternating top and bottom,
until you have installed the required
number of springs.
NOTE: After you have completed installing and checking operation of your Wallbed, you
may find it necessary to add or remove springs to achieve the correct lift effort of between
5 and 10 pounds.
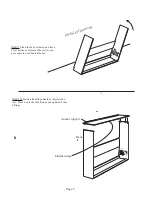
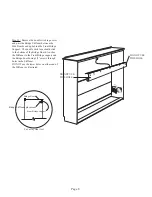
Finished edge
Cut out for room
base molding
Summary of Contents for Wallbeds
Page 2: ......


