Whistler WVR-165 User Manual Download Page 8

Moving to/Scanning/Selecting File (FF/REW)      

13

You can move to, search, or select a file using the FF/REW button.       

¡

 Moving to the previous or next file:        

     Press the FF/REW button shortly during playback.     

¡

 Scanning file: Press the FF/REW button longer during playback.       

     During the first 10 seconds: Moves to the previous or next file by second.      

     After 10 seconds: Moves to the previous or next file by 10 seconds.        


FF/REW

¡

  When you want to listen to the recorded sound from the 30-minute position on         

 the fourth of 5 recorded files:         

1. Move to the fourth file by pressing the FF/REW button shortly in the stop mode.         

2. Press the PLAY button.         

3. Press the FF/REW button longer to move fast to a position. Fast forward/rewind 

works while you  are holding it down. When moved to the 30-minute position, stop

holding it down and playback starts from the position you stop.

14

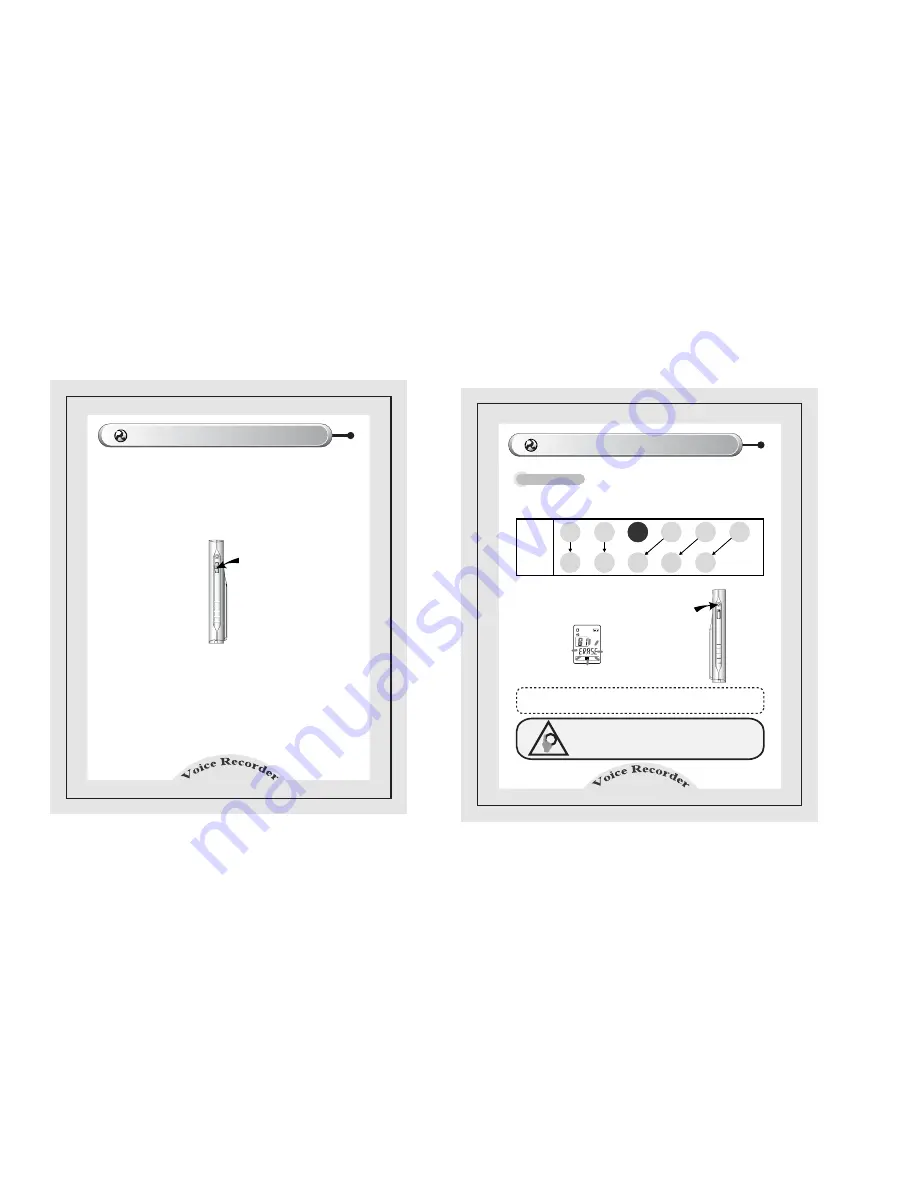
Deletes the sound recorded in the recorder.

¢”

 When deleting the number 3 file:   

1. Select the file to delete in stop mode.    
2. Press the ERASE button once for more than 1 second.      
    The "ERASE" message blinks and the first and      
    end 5 seconds of the recorded file are played back.     

3. Press the ERASE button shortly again to delete file.     

Caution

¢”

 The deleted recording file cannot be recovered.    

    Make sure to decide properly whether to delete.         

!

Before 
deleting 

After 
deleting

Before 
deleting 

After 
deleting

Deleting one file 

£“

 The number 4 file is moved to the number 3 file automatically.       


¢

 Note 

¢—

¢”

If you do not press any button for 10 minutes after the "ERASE" message       

is displayed on the LCD, the ERASE function is released automatically.   

Delete the current file displayed on the LCD.     
The file numbers are decreased by one after deleting file.      

01          02          03          04          05          

01          02         

 03

          04          05          06

01            02            03            04             05          

01            02           

 03

            04             05            06

<Deleting the number 1 file>  

Deleting Recorded Sound  

1

Summary of Contents for WVR-165

Page 1: ...USER S MANUAL WVR 165 REC VOL VOL Digital Recorder HQ Digital Recorder...

Page 2: ...ou can find easily whenever you need Safety Instructions Contents 2 Safety Instructions Precautions Product Features Names of Parts Before Using Inserting Battery Powering On Off Recording Playback Mo...

Page 3: ...s on the product or impact against the product Do not impact against the LCD of the product Precautions for use of the product Percautions Precautions for use of the battery 4 Do not impose heat on it...

Page 4: ...onsumption Recording Mode You can record in HQ or LP mode Long time Recording You can record for a long period of time in LP mode Repair Function Recorded sound can be recovered even if the power is c...

Page 5: ...e battery cover slightly and slide it in the arrow direction 2 Insert two AAA alkaline batteries Make sure that the polarities are correct 3 Close the battery cover 2 1 3 Names of Part 7 Left Top Earp...

Page 6: ...ery if you do not use the product for more than 1 minute When you do not use the product set the HOLD switch to ON to prevent unwanted consumption of the battery due to misuse of the buttons Note LO B...

Page 7: ...e HOLD button to OFF HOLD OFF 2 Turn the power on 3 Press the REC STOP button shortly once to start recording 4 Press the REC STOP button shortly again to stop recording Note If the recording source i...

Page 8: ...down and playback starts from the position you stop 14 Deletes the sound recorded in the recorder When deleting the number 3 file 1 Select the file to delete in stop mode 2 Press the ERASE button once...

Page 9: ...t operate normally for example the buttons do not work format the product as directed above and the product will operate normally Deleting File 15 Deleting all files in a folder Deletes all the record...

Page 10: ...UME button The range is between 0 and 20 Volume Control HQ SPLP VOS 1 A B 1 Press the REC STOP button longer once during playback 2 The Add R message is displayed and the additional recording starts 3...

Page 11: ...o your situation 1 Press the MENU shortly twice in the stop mode 2 Select the HQ or LP using the FF REW button Note The HQ mode has better recording quality than LP mode Recording time means the avail...

Page 12: ...when you supply the power again Note The longer you have recorded previously the longer the REPAIR time is taken The REPAIR message is displayed on the LCD screen while repair is proceeding PC Interf...

Page 13: ...heck the recording status using an earphone You can also record by connecting an external microphone you purchased separately to the microphone terminal of your recorder If you fix an external microph...

Page 14: ...correct Make sure that the polarities are correct Check whether the HOLD Set the HOLD button to OFF button is set to ON Check whether the memory is full Delete unnecessary recorded sound See page 15 t...

Page 15: ...ximum Recording Time LP 504 min Memory 16 MB Voice A B C 3 Folders X 100 Files Data D 1 Folder Earphone Speaker Dynamic 28mm 8 Ohm Dimensions 36 108 17 9 mm W H D Weight About 43g Except battery Stora...

Page 16: ...cause harmful interference to radio communications However there is no guarantee that interference will not occur in a particular installation If this equipment does cause harmful interference to rad...

Reviews: