background image

12

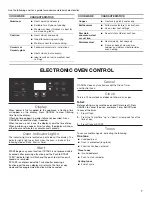
Oven Light

The oven light is a standard 40 W appliance bulb. When the 

oven door is closed, press Oven Light to turn on the light.
Before replacing, make sure the oven and cooktop are cool 

and the control knobs are off.

To Replace:

1.

Unplug range or disconnect power.

2.

Turn bulb counterclockwise to remove from socket.

3.

Replace bulb.

4.

Plug in range or reconnect power.

Oven Door

For normal range use, it is not suggested to remove the oven 

door. However, if removal is necessary, make sure the oven is off 

and cool. Then, follow these instructions. The oven door is heavy.

To Remove:

1.

Open the oven door. Insert the hinge locks into both hinge

hangers. See following illustration. Do not unlock hinges

while the door is removed from the range.

2.

Grasp the door on the sides with your fingers on the front of

the door and your thumbs on the inside surface.

3.

Pull door straight up, then toward you. Do not unlock the

hinges until the door is replaced on the range.

To Replace:

1.

Grasp the door on the sides with your fingers on the front of

the door and your thumbs on the inside surface.

2.

Hold oven door so that the top edge of each door slot is

horizontal. Insert door hinge into the hinge slots.

3.

Tilt top of door toward range. Insert bottom door hinge notch

down onto front frame edge.

4.

Open the door completely and unlock the hinges.

5.

Close the door slowly to assure door side panel clearance

and proper hinge engagement.

Removing the Oven Bottom

The oven bottom can be removed for standard cleaning of 

the oven.
Before cleaning, make sure the oven is completely cool.

To Remove:

1.

Remove the oven racks.

2.

Place fingers in the slots in the bottom panel.

To

 Replace:

Reverse the previous steps 1-4.

A. Hinge lock

A

A. Hinge lock

A. Lip

A

A

3.

   Lift the rear of the panel up and back.

      The lip at the front of the panel should clear the front frame of  


the oven cavity

.

4.

   Lift the bottom up and out.

Summary of Contents for WFG505M0MB

Page 1: ...For questions about features operation performance parts accessories or service call 1 866 698 2538 or visit our website at www whirlpool com In Canada call for assistance installation or service call 1 800 807 6777 or visit our website at www whirlpool ca ...

Page 2: ... 7 Tones 7 Fahrenheit and Celsius 8 Timer 8 Control Lock 8 Oven Temperature Control 8 OVEN USE 8 Aluminum Foil 8 Positioning Racks and Bakeware 9 Bakeware 9 Oven Vent 9 Baking and Roasting 10 RANGE CARE 11 General Cleaning 11 Oven Light 12 Oven Door 12 Removing the Oven Bottom 12 TROUBLESHOOTING 13 ASSISTANCE OR SERVICE 15 In the U S A 15 Accessories 15 Griddle on some models 6 In Canada 15 Frozen...

Page 3: ...ne or other flammable vapors and liquids in the vicinity of this or any other appliance WHAT TO DO IF YOU SMELL GAS Do not try to light any appliance Do not touch any electrical switch Do not use any phone in your building Immediately call your gas supplier from a neighbor s phone Follow the gas supplier s instructions If you cannot reach your gas supplier call the fire department Installation and...

Page 4: ...le Do not cut or remove the grounding prong from this plug Disconnect power before servicing Injuries may result from the misuse of appliance doors or drawers such as stepping leaning or sitting on the doors or drawers Maintenance Keep range area clear and free from combustible materials gasoline and other flammable vapors and liquids Storage in or on the Range Flammable materials should not be st...

Page 5: ...PORTANT Do not obstruct the flow of combustion and ventilation air around the burner grate edges Burner cap Always keep the burner cap in place when using a surface burner A clean burner cap will help avoid poor ignition and uneven flames Always clean the burner cap after a spillover and routinely remove and clean the caps according to the General Cleaning section A Surface burner locator B Left r...

Page 6: ...cool dry place Home Canning When canning for long periods alternate the use of surface burners between batches This allows time for the most recently used areas to cool Center the canner on the grate above the burner Do not place canner on 2 surface burners at the same time For more information contact your local agricultural department Companies that manufacture home canning products can also off...

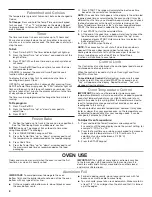
Page 7: ...lash when the oven is in one of the following modes Bake Broil or Timer Display When power is first supplied to the appliance a flashing time will appear on the display Press CANCEL to clear flashing time from the display If flashing time appears a power failure has occurred Press CANCEL and reset the clock if needed When the oven is not in use the display shows the time of day When performing a c...

Page 8: ... If the oven door remains open for too long the heating elements will shut off until the oven door is closed All timers including any active Cook Time or Timed Cook functions will continue to count down Control Lock The Control Lock function blocks the control panel pads to avoid unintended use of cook functions When the control is locked only Clock Oven Light and Timer Set Off will function To Lo...

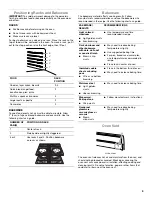
Page 9: ...ack 2 Side by side or slightly staggered 3 or 4 Use racks 2 and 4 Position bakeware on racks as shown 5 4 3 2 1 BAKEWARE RESULTS RECOMMENDATIONS Light colored aluminum Light golden crusts Even browning Use temperature and time recommended in recipe Dark aluminum and other bakeware with dark dull and or nonstick finish Brown crisp crusts May need to reduce baking temperatures slightly Use suggested...

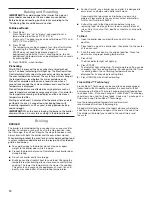
Page 10: ...nology should only be used for these foods Cook only 1 package at a time when using Frozen Bake Technology Use the recommended temperature and maximum recommended time from the packaging A beep will alert you to check the food s doneness before the cook time is completed and again at the end of the cook time The display will prompt you to add to the cook time or end the cycle Baking and Roasting I...

Page 11: ...h as vinegar and tomato should be cleaned as soon as the cooktop grates and caps are cool These spills may affect the finish To avoid chipping do not bang grates and caps against each other or hard surfaces such as cast iron cookware Do not reassemble caps on burners while they are wet Cleaning Method Nonabrasive plastic scrubbing pad and mildly abrasive cleanser Clean as soon as cooktop grates an...

Page 12: ... surface 3 Pull door straight up then toward you Do not unlock the hinges until the door is replaced on the range To Replace 1 Grasp the door on the sides with your fingers on the front of the door and your thumbs on the inside surface 2 Hold oven door so that the top edge of each door slot is horizontal Insert door hinge into the hinge slots 3 Tilt top of door toward range Insert bottom door hing...

Page 13: ... heard each time the Bake or Broil burners ignite during the cycle A pop can be heard when the gas valve is opening or cycling on and will make a single pop when it snaps open from the solenoid It sounds similar to a suction cup being pulled off of a piece of glass The igniters will click several times until the flame is detected These are short clicking sounds like tapping a nail onto a piece of ...

Page 14: ...e proper oven temperature calibration set See the Oven Temperature Control section Is the proper bakeware being used See the Bakeware section Are the racks positioned properly See the Positioning Racks and Bakeware section Is there proper air circulation around bakeware See the Positioning Racks and Bakeware section Is the batter evenly distributed in the pan Make sure batter is level in the pan A...

Page 15: ... United States To locate the Whirlpool designated service company in your area you can also look in your telephone directory Yellow Pages For further assistance If you need further assistance you can write to Whirlpool Corporation with any questions or concerns at Whirlpool Brand Home Appliances Customer eXperience Center 553 Benson Road Benton Harbor MI 49022 2692 Please include a daytime phone n...

Page 16: ...W11508721D 2022 Whirlpool All rights reserved 07 22 ...

Reviews: