background image

9

General Cleaning

IMPORTANT: Before cleaning, make sure all controls are off and 
the oven and cooktop are cool. Always follow label instructions on 
cleaning products. For additional information, you can visit the 
Customer Care section of our website at www.whirlpool.ca.
Soap, water and a soft cloth or sponge are suggested first unless 
otherwise noted.

EXTERIOR PORCELAIN ENAMEL SURFACES (on some 
models)

Food spills containing acids, such as vinegar and tomato, should 
be cleaned as soon as the entire range is cool. These spills may 
affect the finish.
Cleaning Method:

Glass cleaner, mild liquid cleaner or nonabrasive scrubbing 
pad: 
Gently clean around the model and serial number plate 
because scrubbing may remove numbers.

All-Purpose Appliance Cleaner Part Number 31682B (not 
included):
See cover for contact information.

STAINLESS STEEL (on some models)

NOTE: To avoid damage to stainless steel surfaces, do not use 
soap-filled scouring pads, abrasive cleaners, Cooktop Cleaner, 
steel-wool pads, gritty washcloths or abrasive paper towels. 
Damage may occur to stainless steel surfaces, even with one-time 
or limited use.
Cleaning Method:

Rub in direction of grain to avoid damaging.

Stainless Steel Cleaner and Polish Part Number 31462B (not 
included): 
See cover for contact information.

Liquid detergent or all-purpose cleaner: 
Rinse with clean water and dry with soft, lint-free cloth.

METALLIC PAINT (on some models)

Do not use abrasive cleaners, cleaners with bleach, rust removers, 
ammonia or sodium hydroxide (lye) because paint surface may 
stain. 

CERAMIC GLASS (on some models)

Cleaning Method:

Cooktop Cleaner Part Number 31464B is recommended regularly 
to help avoid scratches, pitting and abrasions and to condition the 
cooktop.
Cooktop Scraper Part Number WA906B is also recommended for 
stubborn soils. These can be ordered as accessories. See cover for 
contact information. The Cooktop Scraper uses razor blades. Store 
razor blades out of the reach of children.
Do not use steel wool, abrasive powder cleansers, chlorine bleach, 
rust remover or ammonia because damage may occur.

Light to moderate soil

Clean with paper towels or clean damp sponge

Sugary spills (jellies, candy, syrup)

Clean with cooktop scraper and cooktop cleaner. Scrape off 
sugary spills while the cooktop is still warm. You may want to 
wear oven mitts while cleaning the cooktop.

Heavy soil, dark streaks, specks and discoloration

Clean with Cooktop Cleaner or nonabrasive cleanser:

Burned-on soil

Clean with Cooktop Cleaner and Cooktop Scraper. 

Metal marks from aluminum and copper

Clean with Cooktop Cleaner as soon as cooktop has cooled 
down. The marks will not totally disappear, but after many 
cleanings they will become less noticeable.

Tiny scratches and abrasions

Use Cooktop Cleaner for scratches. Scratches and abrasions 
do not affect cooking performance, and after many cleanings 
they will become less noticeable.

COOKTOP CONTROLS

To avoid damage to the cooktop controls, do not use steel wool, 
abrasive cleansers or oven cleaner.
Do not soak knobs. When replacing knobs, make sure knobs are in 
the OFF position.
On some models, do not remove seals under knobs.
Cleaning Method:

Soap and water: 
Pull knobs straight away from control panel to remove.

CONTROL PANEL AND OVEN DOOR EXTERIOR

To avoid damage to the control panel, do not use abrasive 
cleaners, steel-wool pads, gritty washcloths or abrasive paper 
towels.

Cleaning Method:

Glass cleaner and soft cloth or sponge: 
Apply glass cleaner to soft cloth or sponge, not directly on 
panel.

All-Purpose Appliance Cleaner Part Number 31682B (not 
included):
See cover for contact information.

COIL ELEMENTS (on some models)

Cleaning Method:

Damp cloth: Make sure control knobs are off and elements are 
cool.

Do not clean or immerse in water. Soil will burn off when hot.

BURNER BOWLS (on some models)

Before removing or replacing coil elements and burner bowls, 
make sure they are cool and the control knobs are in the OFF 
position.
Remove the coil element by pushing the edge of the coil element 
toward the receptacle. Lift it enough to clear the burner bowl. Pull 
the coil element straight away from the receptacle to remove. Lift 
out the burner bowl.
Cleaning Method:

Chrome burner bowls

Wash frequently in warm, soapy water. (It is not recommended to 
wash chrome bowls in a dishwasher). A mild abrasive cleaner and a 
plastic scrubber can be used to remove stubborn stains.
For heavily soiled bowls, place an ammonia soaked paper towel on 
the stains and allow to soak for a short time, then gently scrub with 
a plastic scrubber.

SURFACE UNDER COOKTOP (on some models)

The coil cooktop will lift up to provide easy access for cleaning 
beneath. Lift the cooktop by both front corners until the support 
locks into place.
Cleaning Method:

Glass cleaner, mild liquid cleaner or nonabrasive scrubbing 
pad.

Summary of Contents for W10196155B

Page 1: ...he oven frame behind the storage drawer panel ELECTRICRANGE USERINSTRUCTIONS Table of Contents RANGE SAFETY 2 The Anti Tip Bracket 2 FEATURE GUIDE 4 COOKTOP USE 5 OVEN USE 6 Electronic Oven Controls 6 Aluminum Foil 6 Positioning Racks and Bakeware 6 Oven Vent 7 Baking and Roasting 7 Broiling 7 Timed Cooking on some models 7 RANGE CARE 8 Self Cleaning Cycle on some models 8 General Cleaning 9 Oven ...

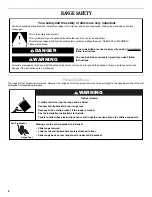
Page 2: ...nce Always read and obey all safety messages This is the safety alert symbol This symbol alerts you to potential hazards that can kill or hurt you and others All safety messages will follow the safety alert symbol and either the word DANGER or WARNING These words mean follow instructions instructions DANGER WARNING Tip Over Hazard A child or adult can tip the range and be killed Connect anti tip b...

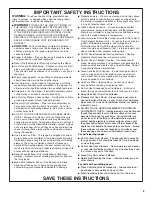
Page 3: ...ese pans or bowls during cooking may subject wiring or components underneath to damage Protective Liners Do not use aluminum foil to line surface unit drip bowls or oven bottoms except as suggested in the manual Improper installation of these liners may result in a risk of electric shock or fire Glazed Cooking Utensils Only certain types of glass glass ceramic ceramic earthenware or other glazed u...

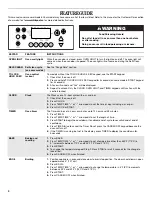
Page 4: ... The Clock uses a 12 hour cycle with a m and p m 1 Check that the oven is off 2 Press CLOCK 3 Press TEMP TIME or arrow pads to set the time of day including a m or p m 4 Press CLOCK or START TIMER Oven timer The Timer can be set in hours or minutes up to 12 hours and 59 minutes 1 Press TIMER 2 Press TEMP TIME or arrow pads to set the length of time 3 Press START to begin the countdown If enabled e...

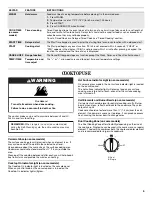
Page 5: ... on the size of the cookware Single size can be used in the same way as a regular element The dual size combines both the single and outer element and is recommended for larger size cookware WARM Hold warm Food must be at serving temperature before placing it in the warmed oven 1 Press WARM 2 Temperature is set at 170 F 75 C for 60 minutes 1 00 hours 3 Press START 4 Press CANCEL OFF when finished ...

Page 6: ...can be set between 30 F 15 C and 30 F 15 C 3 Press START Options Mode Press and hold TIMER for 5 seconds and Opt will appear Use the TEMP TIME keys to cycle through the following options Press CANCEL to exit the mode End of Cycle Tones b1 beep once or b continue to beep will be displayed Press TIMER to toggle through selection 12 Hour Shutoff If 12 Hr is displayed the oven will automatically shut ...

Page 7: ...mperature when Custom Broiling allows more precise control when cooking The lower the temperature the slower the cooking Thicker cuts and unevenly shaped pieces of meat fish and poultry may cook better at lower broiling temperatures For best results use a broiler pan and grid It is designed to drain juices and help avoid spatter and smoke If you would like to purchase a broiler pan one may be orde...

Page 8: ...led To stop the self cleaning cycle at anytime press CANCEL OFF If the temperature is too high the oven door will remain locked and cool and locked will be displayed The oven light will not function during the self cleaning cycle Style 1 Electronic Oven Control with Adjustable Clean Time on some models The SELF CLEAN self cleaning cycle is time adjustable between 2 hours 30 minutes and 4 hours 30 ...

Page 9: ...wear oven mitts while cleaning the cooktop Heavy soil dark streaks specks and discoloration Clean with Cooktop Cleaner or nonabrasive cleanser Burned on soil Clean with Cooktop Cleaner and Cooktop Scraper Metal marks from aluminum and copper Clean with Cooktop Cleaner as soon as cooktop has cooled down The marks will not totally disappear but after many cleanings they will become less noticeable T...

Page 10: ...ons suggested here or visit our website and reference Customer Care section to possibly avoid the cost of a service call www whirlpool ca Nothing will operate Is the power supply cord unplugged Plug into a grounded outlet Has a household fuse blown or has a circuit breaker tripped Replace the fuse or reset the circuit breaker If the problem continues call an electrician Cooktop will not operate Is...

Page 11: ...ven Controls section Was the oven preheated See Baking and Roasting section Are the racks positioned properly See Positioning Racks and Bakeware section Is there proper air circulation around bakeware See Positioning Racks and Bakeware section Is the batter evenly distributed in the pan Check that batter is level in the pan Is the proper length of time being used Adjust cooking time Has the oven d...

Page 12: ...ons made to the appliance 9 Expenses for travel and transportation for product service if your major appliance is located in a remote area where service by an authorized Whirlpool servicer is not available 10 The removal and reinstallation of your major appliance if it is installed in an inaccessible location or is not installed in accordance with published installation instructions 11 Major appli...

Page 13: ...ON DE LA CUISINIÈREÉLECTRIQUE Table des matières SÉCURITÉ DE LA CUISINIÈRE 14 La bride antibasculement 14 GUIDE DES CARACTÉRISTIQUES 17 UTILISATION DE LA TABLE DE CUISSON 18 UTILISATION DU FOUR 19 Commandes électroniques du four 19 Papier d aluminium 19 Positionnement des grilles et des ustensiles de cuisson 20 Évent du four 20 Cuisson au four et rôtissage 20 Cuisson au gril 21 Cuisson minutée sur...

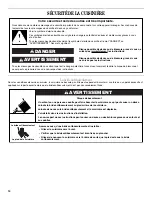
Page 14: ...curité et de vous y conformer AVERTISSEMENT DANGER Voici le symbole d alerte de sécurité Ce symbole d alerte de sécurité vous signale les dangers potentiels de décès et de blessures graves à vous et à d autres Tous les messages de sécurité suivront le symbole d alerte de sécurité et le mot DANGER ou AVERTISSEMENT Ces mots signifient Risque de basculement Un enfant ou une personne adulte peut faire...

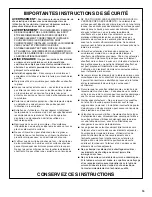
Page 15: ...cée Les endroits près des éléments de surface peuvent devenir assez chauds pour causer des brûlures Pendant et après l utilisation ne pas toucher les éléments chauffants et ne pas laisser les vêtements ou autres matériaux inflammables entrer en contact avec ces éléments de surface ou les endroits près des éléments avant qu ils soient suffisamment refroidis Ces endroits comprennent la table de cuis...

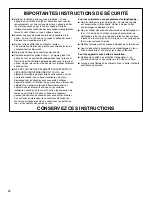
Page 16: ... pour causer des brûlures Pendant et après l utilisation ne pas toucher ou laisser des vêtements ou autres matériaux inflammables venir en contact avec les éléments chauds ou les surfaces intérieures chaudes du four avant qu ils aient eu assez de temps pour refroidir D autres surfaces de l appareil peuvent devenir assez chaudes pour causer des brûlures Ces surfaces comprennent les ouvertures de l ...

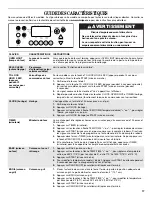
Page 17: ...t p m 1 Vérifier que le four est éteint 2 Appuyer sur CLOCK horloge 3 Appuyer sur les touches à flèche TEMP TIME température durée ou pour régler l heure y compris a m ou p m 4 Appuyer sur CLOCK horloge ou START mise en marche TIMER minuterie Minuterie du four La minuterie peut être réglée en heures ou en minutes jusqu à concurrence de 12 heures et 59 minutes 1 Appuyer sur TIMER minuterie 2 Appuye...

Page 18: ...îner un changement de couleur de la cuvette du brûleur WARM tiède Garder tiède Les aliments doivent être à la température de service avant d être placés dans le four chaud 1 Appuyer sur WARM tiède 2 La température est réglée à 170 F 75 C pendant 60 minutes 1 heure 3 Appuyer sur START mise en marche 4 Appuyer sur CANCEL OFF annulation arrêt après avoir terminé COOK TIME cuisson minutée sur certains...

Page 19: ...MPORTANT Ne pas utiliser de thermomètre pour mesurer la température du four car l ouverture de la porte du four peut provoquer des mesures incorrectes du brûleur à fonctionnement par intermittence Le four fournit des températures précises toutefois il peut cuire plus rapidement ou plus lentement que votre ancien four c est pourquoi le calibrage de la température peut être ajusté Il peut être chang...

Page 20: ...r permet l évacuation de l air chaud et de l humidité du four et ne doit pas être obstrué ou couvert L obstruction nuirait à la circulation adéquate de l air et affecterait les résultats de cuisson et de nettoyage Ne pas placer près de l évent du four des produits en plastique en papier ou autres articles qui pourraient fondre ou brûler Sur les modèles avec éléments en spirale l élément peut être ...

Page 21: ... de cuisson 5 Appuyer sur START mise en marche L afficheur présente le compte à rebours de la durée Lorsque la durée est écoulée le four s arrête automatiquement et End fin apparaît sur l afficheur 6 Appuyer sur CANCEL OFF annulation arrêt pour effacer l affichage Réglage d une cuisson minutée différée Avant le réglage s assurer que l horloge est réglée à l heure exacte Voir la caractéristique de ...

Page 22: ...ionne pas durant le programme d autonettoyage Style 1 Commande de four électronique avec durée de nettoyage réglable sur certains modèles La durée du programme d autonettoyage SELF CLEAN est réglable entre 2 h 30 et 4 h 30 par tranches de 15 minutes Les durées de nettoyage suggérées sont de 2 h 30 pour un niveau de saleté faible et de 4 h 30 pour un niveau de saleté élevé Pendant les 30 dernières ...

Page 23: ... de cuisson utilise des lames de rasoir Ranger les lames de rasoir hors de portée des enfants Ne pas utiliser de laine d acier de poudre à récurer abrasive d agent de blanchiment au chlore de produit antirouille ou d ammoniaque car ces produits peuvent endommager la surface Souillure légère à modérée Nettoyer avec des essuie tout ou une éponge propre et humide Renversements de matières sucrées gel...

Page 24: ... ternies et glissent difficilement appliquer une légère couche d huile végétale sur les glissières pour faciliter le glissement des grilles TIROIR DE REMISAGE Vérifier que le tiroir de remisage est vide et froid avant de procéder au nettoyage Méthode de nettoyage Détergent doux Lampedufour La lampe du four est une ampoule standard de 40 watts pour appareil électroménager Avant le remplacement s as...

Page 25: ... four doit il être ajusté Voir la section Commande de température du four dans la section Commandes électroniques du four Les témoins lumineux du four clignotent Les indicateurs lumineux du four clignotent ils Voir Afficheur du four dans la section Commandes électroniques du four Si le témoin lumineux clignote toujours faire un appel de service Voir la page de couverture pour savoir qui contacter ...

Page 26: ... impropre ou abusif incendie inondation actes de Dieu installation fautive ou installation non conforme aux codes d électricité ou de plomberie ou l utilisation de pièces consomptibles ou de produits nettoyants non approuvés par Whirlpool 5 Les défauts apparents notamment les éraflures les bosses fissures ou tout autre dommage au fini du gros appareil ménager à moins que ces dommages soient dus à ...

Page 27: ... UNE AUTRE Si vous résidez à l extérieur du Canada et des 50 États des États Unis contactez votre marchand Whirlpool autorisé pour déterminer si une autre garantie s applique 1 08 Pour des informations supplémentaires sur le produit visiter www whirlpool ca Si vous n avez pas accès à Internet et que vous nécessitez une assistance pendant l utilisation du produit ou que vous souhaitez prendre un re...

Page 28: ...Tous droits réservés Registered Trademark TM Trademark of Whirlpool U S A Whirlpool Canada LP Licensee in Canada Marque déposée TM Marque de commerce de Whirlpool U S A emploi sous licence par Whirlpool Canada LP au Canada 8 08 Printed in U S A Imprimé aux É U ...

Reviews: