


5
All specifications and informations are subject to change without notice.
IV. User Setup
1. Schematic Diagram of Keys
M
E
1 2 3 4 5 6
2. Description of Keys' Functions
Note: The physical keys of the specific model shall govern.
LED
indicator
light
1
.
2
.
3
.
4
.
6
.
5
.
Pops up the menu/Backs to the previous menu (in case of main menu,
exits from the whole menu).
When the menu is activated, used as the left function selection key,
and decreases progressively the value of the progress bar; when the
menu is inactivated, used as the specified shortcut mode hot key.
When the menu is activated, used as the right function selection key,
and increases progressively the value of the progress bar; when the
menu is inactivated, used as the specified shortcut mode hot key .
If the menu is activated, chooses the corresponding function.
When the menu is inactivated, press this button to enter the automatic
adjustment function; the automatic adjustment function will automatically
set the horizontal vertical position, always and focus (only for VGA signal)
Power switch: Powers on/off the monitor.
lighting: Turn on; Flash: stand-by.
M
E
▲
▲
(The above pictures are for illustration only and the physical accessories shall govern.)
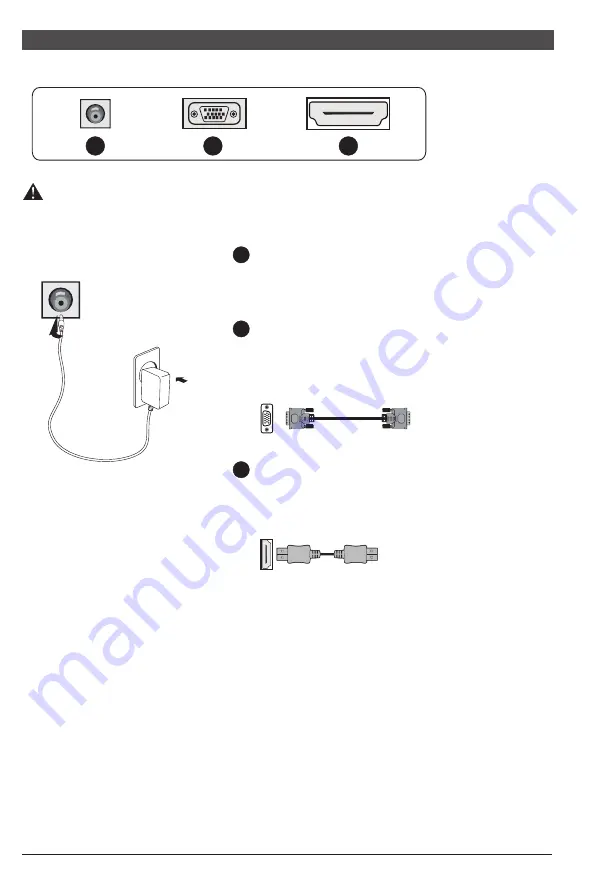
III. Connect the Monitor to PC
1
2
3
Before connecting the LCD monitor to the PC, please power down the PC and
the monitor.
2
3
Power Plug
Connect the power cord of the monitor into
the POWER port in the back of the monitor.
VGA Port
Connect the VGA cable into the VGA IN port
in the back of the monitor (this needs the
support of the monitor).
HDMI Port
Connect t h e H D M I c a b l e into the HDMI IN
port into the back of the monitor (this needs
the support of the monitor).
1
* Warning: Always use the power
cord of standard configuration.
Power adapter
6
All specifications and informations are subject to change without notice.


