Westinghouse L2610NW - 26

OSD Menu Functions 

All the function settings for this LCD monitor are controlled via the control keys located on the side of the monitor. 
To display the OSD main menu, press the 

  keypad button on the control panel. (Note: The OSD menu 

display will disappear automatically after approximately 10 seconds, if no action is taken.)   
 
This LCD monitor has been adjusted to optimal settings before shipment. If needed, adjustments to the monitor 
settings can also be made using the OSD menu.   
 

 Press 

the    button to display the OSD. 

 Press 

the

 or

 button to scroll through the sub-menus (Image, Audio, Color, Miscellaneous, and 

Information Sub-Menus). 

 Press 

the 

X

 button to enter the sub-menu. 

 Press 

the

or

 button to select the function to be adjusted. 

 Press 

the 

W

 or

X

buttons to change the current setting of the sub-function. 

  To go back to the previous menu, press the 

  button. Changes are saved automatically. 

  To exit the OSD menu press 

  again. It automatically will save any changes that have been made. 
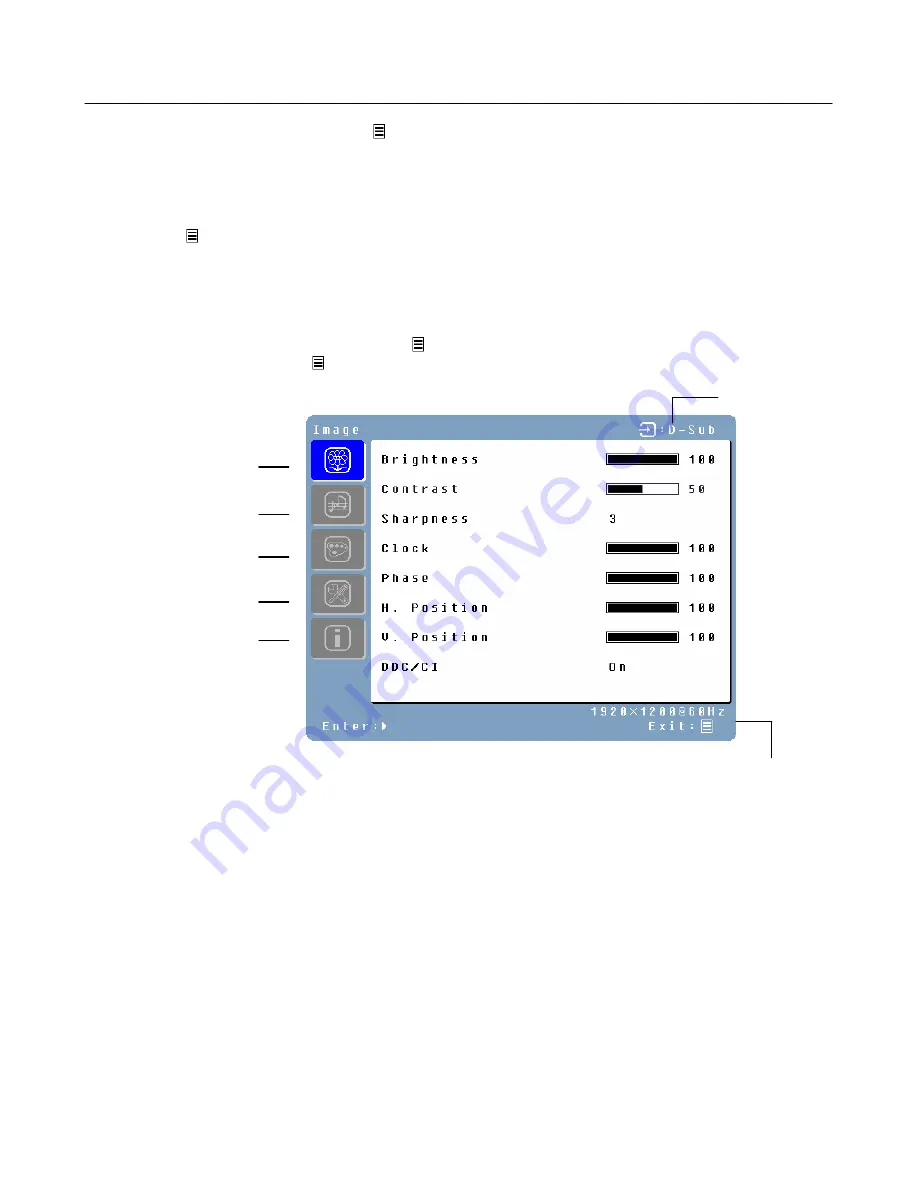
 

(Example)


Extra functions: 


DDC/CI

: Allows the monitor to communicate with PC graphic card under Microsoft Windows Vista. 


DCR: 

To turn on or off Dynamic Contract Ratio. 


Language: 

Select OSD languages in between different languages. 


Auto Setting: 

Set to automatically perform Auto-Configuration function when a new timing is detected. 


CM Engine: 

Start with Color Management Engine. 


Optimal aspect ratio:

 ideal fit your display to the viewable area of the monitor. 


Reset: 

Restore this LCD monitor to its factory default settings. 


NOTES: 

  Any changes are automatically saved in memory when the OSD turns off. Turning off the power should be 

avoided while using the OSD menu. 

  Adjustments for clock, phase, and positions are saved for each individual signal timing. Except for these 

adjustments, all other adjustments have only one setting, which applies to all signal timings. 

  The icon color will change from gray to blue when a sub-menu is selected. 

Color Menu 

Image Menu 

Miscellaneous Menu 

Audio Menu 

Source 

Resolution & Frequency 

Info Menu 

Summary of Contents for L2610NW - 26" LCD Monitor

Page 1: ...USER S MANUAL MANUEL DE L UTILISATEUR MANUAL DEL USUARIO L2610NW Monitor Moniteur...

Page 2: ...CES 6 3 CONNECT POWER CABLE 6 4 TURN THE POWER ON 6 CONTROL PANEL BUTTONS 7 OSD MENU FUNCTIONS 8 QUICK ADJUSTMENTS 9 DISPLAY MODES 10 TROUBLESHOOTING 11 NO POWER 11 NO SCREEN IMAGE 11 FUZZY IMAGE 11 O...

Page 3: ...D Monitor to direct sunlight or high temperatures Avoid exposing the LCD Monitor to moisture or high humidity Do not attempt repairs yourself Your warranty does not cover repairs or attempted repairs...

Page 4: ...18 AWG 16 AWG 14 AWG 10 Amps 12 Amps 12 Amps SVT 18 AWG 17 AWG 10 Amps 12 Amps FCC Compliance Statement This equipment has been tested and complies with the limits for a Class B digital device pursuan...

Page 5: ...the screen To clean the case 1 Use a soft dry cloth 2 If it still is not clean apply a small amount of non ammonia non alcohol based mild non abrasive detergent onto a clean soft lint free cloth then...

Page 6: ...sing any key on the keyboard will return the original screen image You can use your PC to set the function The LCD monitor is compatible with EPA ENERGY STAR and N TEK if used with a VESA DPMS compute...

Page 7: ...ase until it snaps into place To remove the base stand place monitor face down on a flat and soft surface press the tabs on the bottom of the stand neck and remove the base 2 Connect Your Computer and...

Page 8: ...are defined in OSD Functions on page 8 1 Scroll up the OSD sub menu list when the OSD is displayed 2 Scroll down the OSD sub menu list when the OSD is displayed 3 W Move a selection left when the OSD...

Page 9: ...SD menu press again It automatically will save any changes that have been made Example Extra functions DDC CI Allows the monitor to communicate with PC graphic card under Microsoft Windows Vista DCR T...

Page 10: ...he X Brightness button when the Menu is not displayed Contrast Press the W Contrast button when the Menu is not displayed Auto Setting Press the button when the Menu is not displayed Volume Control Pr...

Page 11: ...desire is selected These modes automatically change the backlighting levels between bright brighter and brightest 1 Economy Mode Reduced brightness 2 Text Mode Normal 3 Picture Mode High brightness N...

Page 12: ...nitor Adjust Phase Sharpness setting on the monitor Out Of Range Set screen resolution to panel native resolution at 60 Hz Cannot Find Preferred Mode on My Display Properties You may need to download...

Page 13: ...f Adjust the volume level higher inside of OSD Menu How to Connect a DVI D Input To the Monitor Use a DV DVI or DVI HDMI cable to connect between PC with DVI output and the DVI or HDMI input of the mo...

Page 14: ...www wde com Westinghouse Digital Electronics Santa Fe Springs CA SE UM 2604 0701...

Reviews: