background image

Oyster 2 

 Getting Started Guide October 26, 2019: WestcoastGPS


3 | 

P a g e


LTC batteries should be used when the Oyster2 is exposed to extreme temperatures either below 0 
Celsius or above +60 Celsius for extended periods of time. Do not use rechargeable batteries and if you 
use Alkaline AA batteries they will only operate for about 50% of their useful life. 

The Oyster2 is fitted with a Coulomb Counter which tracks the devices energy consumption and which 
acts as a reasonably good guide for predicting remaining battery life. However theses estimates rely on 
an assumption of the total capacity of the batteries which can vary per battery type and even on a single 
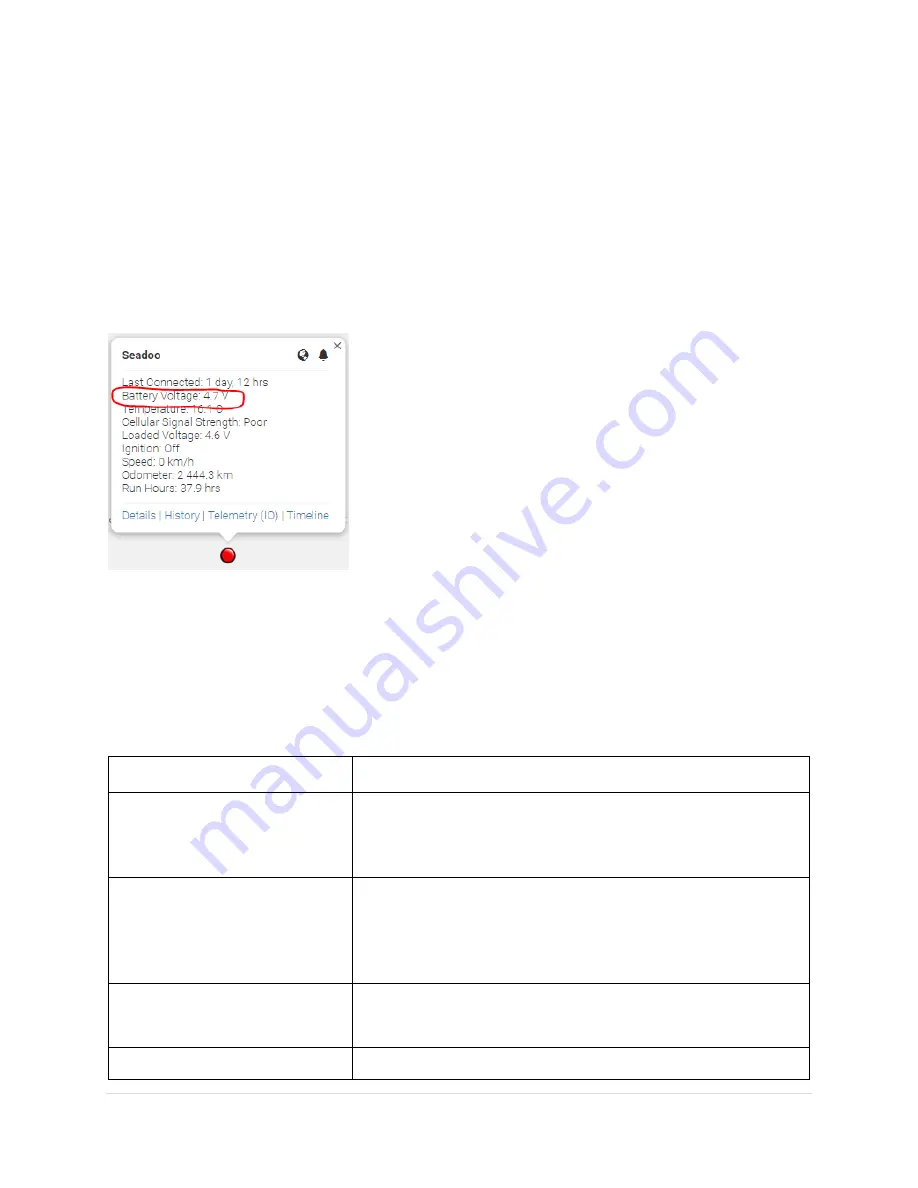
type due to temperature variations. You should also pay close attention to the battery voltage being 
displayed in Live View. For example, the Oyster in the image below is outfitted with three Energizer 
Ultimate Lithium 1.5 V AA batteries and the battery voltage is displaying as 4.7 V (circled in red): 


At 4.7 V the standard lithium batteries are very close to being flat and should be replaced soon. New 
batteries will display 5.2 or 5.3 V. 

Once inserted the LED should flash continuously. If it doesn’t, it means the unit has not yet reset. In this 

case, remove the batteries for a minute or two to allow any residual charge to drain, and then reinsert 
the batteries. Failure to reset the unit will prevent proper resetting of the battery life statistics. 


LED Behaviour 

Information 

Off 

If the LED is not on at all, it is likely that the battery is flat, or the 
device is asleep. Measure the battery voltage with a multi-meter. 
If there is a charge and you wish to see some activity reset the 
device by removing and replacing the batteries. 

From Power-on-Reset, LED 
flashes for duration of start up 
connect, GPS fix, and re-connect 
or until 10 minutes have passed. 

After reset of the Yabby the LED will flash. It will continue to flash 
until it has completed its start up sequence of connect to server 
($Hz flash, gets a GPS fix (1Hz flash), and reconnect to server (4Hz 
flash). If the connections are not successful this will timeout after 
10 minutes. 

After first sleep - off 

After the start up sequence has completed (connect, fix, connect) 
or after 10 min the LED will be switched off. No LED flashes will 
occur until a power-on-reset. 

In Recovery Mode 

 flashes in trip  The LED will flash once every 5s during trips in recovery mode. 

Summary of Contents for Oyster 2

Page 1: ...t s a great choice where access to external power sources does not exist or is difficult to access and the Oyster is very portable so it can be moved from asset to asset as required This getting start...

Page 2: ...d out of the housing to insert swap the SIM CAUTION When handling the control board take steps to prevent static discharge which could render the device inoperable DO NOT touch the GPS antenna Slide t...

Page 3: ...lay 5 2 or 5 3 V Once inserted the LED should flash continuously If it doesn t it means the unit has not yet reset In this case remove the batteries for a minute or two to allow any residual charge to...

Page 4: ...ct us and ask us to check that the SIM is working properly OPENING and CLOSING the HOUSING Once online all that remains is to seal the housing Seal the device carefully to achieve the IP 67 rating Ens...

Page 5: ...to those settings Please remember that more frequent tracking will shorten battery life DEVICE INSTALLATION The Oyster2 can be mounted on the asset to be tracked using screws bolts cable ties or indus...

Page 6: ...s provided to you by WestcoastGPS The App provides basic tracking information including the ability to set up a one time only Movement Alert and to put the asset into Recovery Mode should the asset go...

Page 7: ...olen and or lost assets The Oyster2 is designed around battery conservation and using as little data as possible but when your asset has been stolen lost Recovery Mode can be used to dramatically incr...

Page 8: ...urn off after 6 hours If your device has not been recovered in that time frame be sure to activate Recovery Mode again and or contact WestcoastGPS to ensure Recovery Mode does not turn off Recovery Mo...

Page 9: ...e Address Button which is circled in blue below Then click on the New button Enter the email addresses you anticipate you will use for ALERTS You can use whichever email addresses you want for each AL...

Page 10: ...ect Geo fences as shown below Begin typing an address and matching options will appear Select the correct one as shown You can now adjust the zoom level using the plus and functions on the bottom righ...

Page 11: ...click SAVE The name given to your geo fence will now appear in all of your trip history and reports For advanced options click on Show advanced options These are the advanced settings 1 Priority Geo...

Page 12: ...WestcoastGPS 12 P a g e ALERTS Setting up an Alert is easy From the main menu which you can reach by clicking the WestCoastGPS logo on the top left corner select Alerts as shown below Click on New Al...

Page 13: ...ses you want the Alert to be sent to ASSET NAME DESCRIPTION You can edit the name of your asset by navigating to the Asset Manage Assets circled in red page and clicking on the Asset name in blue circ...

Page 14: ...Photo tab please ensure it does not exceed 2MB in size This guide introduces many of the Oyster and Tracking Platform features If you have unique tracking needs have any problems or have questions re...

Reviews: