background image

CAUTION

Read all precautions and instruc-

tions in this manual before using

this equipment. Keep this manual

for future reference.

Serial Number

Decal

USER'S MANUAL

Model No. WLEX60907.0

Serial No.

Write the serial number in the

space above for reference.

www.weslo.com

QUESTIONS?

If you have questions, or if parts are

damaged or missing,

DO NOT

CONTACT THE STORE; please

contact Customer Care.

IMPORTANT: Please register this

product (see the limited warranty

on the back cover of this manual)

before contacting Customer Care.

CALL TOLL-FREE:

1-866-699-3756

Mon.–Fri. 6 a.m.–6 p.m. MT

Sat. 8 a.m.–4 p.m. MT

ON THE WEB:

www.wesloservice.com

All manuals and user guides at all-guides.com

all-guides.com

Summary of Contents for Pursuit 30

Page 1: ...rence www weslo com QUESTIONS If you have questions or if parts are damaged or missing DO NOT CONTACT THE STORE please contact Customer Care IMPORTANT Please register this product see the limited warr...

Page 2: ...ING REPLACEMENT PARTS Back Cover LIMITED WARRANTY Back Cover WESLO is a registered trademark of ICON IP Inc WARNING DECAL PLACEMENT This drawing shows the location s of the warning decal s If a decal...

Page 3: ...0 6 m of clearance around your exercise cycle 6 Inspect and properly tighten all parts regular ly Replace any worn parts immediately 7 Keep children under age 12 and pets away from the exercise cycle...

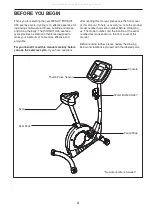
Page 4: ...e exercise cycle If you have questions after reading this manual please see the front cover of this manual To help us assist you note the product model number and serial number before contacting us Th...

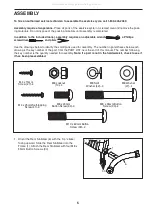
Page 5: ...rentheses below each drawing is the key number of the part from the PART LIST near the end of this manual The number following the key number is the quantity needed for assembly Note If a part is not...

Page 6: ...our M8 Washers 47 and four M8 Locknuts 10 Note The Washers and the Locknuts may be pre attached to the underside of the Seat 4 12 5 47 47 10 10 2 Orient the Front Stabilizer 2 with the large holes fac...

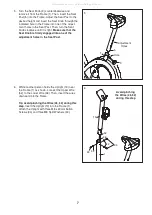
Page 7: ...Washers 42 Avoid pinching the Wires 46 52 during this step 5 Turn the Seat Knob 9 counterclockwise and remove it from the Frame 1 Then insert the Seat Post 5 into the Frame Adjust the Seat Post to the...

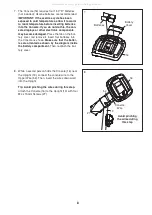
Page 8: ...ot included alkaline batteries are recommended IMPORTANT If the exercise cycle has been exposed to cold temperatures allow it to warm to room temperature before inserting batteries into the Console If...

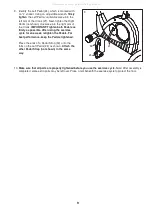
Page 9: ...tighten the Left Pedal counterclockwise into the left arm of the Crank 21 Next tighten the Right Pedal not shown clockwise into the right arm of the Crank IMPORTANT Tighten both Pedals as firmly as p...

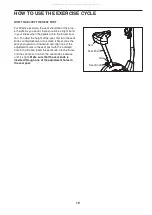
Page 10: ...t turn the seat knob counterclockwise and remove it Next slide the seat post upward or downward and align one of the adjustment holes in the seat post with the indicated hole in the Frame Insert the s...

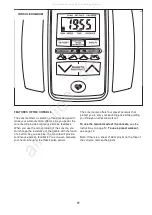
Page 11: ...e will provide continuous exercise feedback You can even measure your heart rate using the thumb pulse sensor The console also offers four preset workouts that prompt you to vary your pedaling pace wh...

Page 12: ...ed time Distance This display shows the distance you have pedaled in miles or kilometers Calories This display shows the approximate number of calories you have burned Fat Calories This display shows...

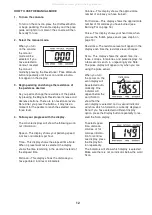
Page 13: ...r heart rate if desired To measure your heart rate stop pedaling and place your thumb on the pulse sen sor Do not press too hard or the circula tion in your thumb will be restricted and your pulse wil...

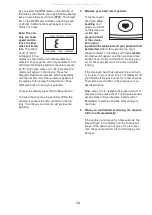
Page 14: ...ide will prompt you to keep your pedaling pace near the target pace setting for the current segment When the left indicator lights increase your pace when the right indicator lights decrease your pace...

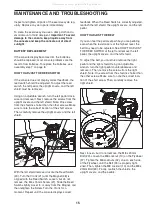
Page 15: ...not remove the M4 x 15mm Screw 27 Slide the Reed Switch slightly closer to or away from the Magnet and then retighten the Screw Turn the Crank for a moment Repeat until the console displays correct f...

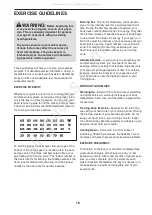
Page 16: ...rdiovascular system you must perform aerobic exercise which is activity that requires large amounts of oxygen for prolonged periods of time For aerobic exercise adjust the intensity of your exercise u...

Page 17: ...g in front of the other reach forward and place your hands against a wall Keep your back leg straight and your back foot flat on the floor Bend your front leg lean forward and move your hips toward th...

Page 18: ...M6 Locknut 33 2 M10 x 60mm Button Screw 34 3 M8 x 20mm Button Screw 35 1 Belt 36 Not Used 37 1 Flywheel 38 1 Magnet 39 1 Flywheel Axle 40 2 M10 Small Washer 41 8 M4 x 25mm Self tapping Screw 42 3 M8...

Page 19: ...25 28 31 32 28 25 11 1 33 27 22 43 20 5 10 10 12 47 47 21 24 26 44 47 10 23 27 53 53 8 10 6 14 41 40 52 27 48 29 51 41 27 41 41 41 4 8 10 10 41 49 40 50 34 42 34 42 46 EXPLODED DRAWING Model No WLEX60...

Page 20: ...ed by or attributable to freight damage abuse misuse improper or abnormal usage or repairs not provided by an ICON authorized service center to products used for commercial or rental purposes or as st...

Reviews: