20
EN
WARNING: blade teeth are very sharp.
For best cutting results ensure you use a blade
suited to the material and cut quality you need.
5. ROLLER GUIDE
Ensure the blade is located and runs smoothly in the
groove (SEE FIG F) otherwise the pendulum function will
not work correctly and the blade will not be supported
during cutting.
6. ADJUSTING THE CUTTING ANGLE
(See Fig. G, H)
Using a Allen key (4). Loosen the bolts securing the
base plate (SEE FIG G). For preset angles rotate so the
lines of the angle on the base plate and angle plate (6)
superposition at the desired angle (0°, 15°, 30°, 45°)
(SEE FIG H).For other miter angles, rotate to your desired
angle (use a protractor scale). Following one of the above
procedures, hold the base plate in position and firmly
tighten the bolts to clamp the base plate at the desired
angle.
Finally, check the angle and ensure the base plate
is firmly clamped. The angle markings on the base
plate are accurate for most general purposes but it is
recommended for accurate work to set the angle with a
protractor and make a test cut on other material
7. Starting operation
1) LOCK OFF SWITCH
The lock off switch is used to prevent unintentional
starting. For starting operation of the tool, first depress
the lock-off button (1) and hold it in position, then press
the lock off switch and release the lever to start operation.
For safety reasons the lock off switch of the tool cannot
be locked; it must remain pressed during the entire
operation.
2) FINGER PROTECTION
The finger protection is located in front of the blade
holder. Whilst working, it will help prevent accidental
contact with moving blade.
8. PENDULUM ACTION CONTROL
(See Fig. I)
The pendulum action varies the forward cutting angle of
the blade for increased cutting efficiency. This can also
be adjusted during no load running. Refer to the chart 1
for more details. Do not use excessive blade force when
cutting with the pendulum action. The blade cuts on the
upward stroke only.
Chart 1
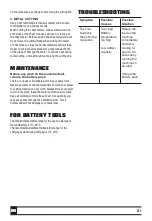
0
Thin materials. Fine cuts. Tight
curves.
Ⅰ
Hard materials, (e.g. steel &
chipboard)
Ⅱ
Thick materials ( e.g. wood ) &
plastic
Ⅲ
Fast cuts (e.g. softwood). Cutting
in the direction of the wood grain.
WORKING HINTS FOR
YOUR JIGSAW
If your jig saw becomes too hot, especially when used at low
speed, set the speed to maximum and run no Load for 2-3
minutes to cool the motor. Avoid prolonged usage at very
low speeds.
GENERAL
Always use a blade suited to the material and material
thickness to be cut. Always ensure the work–piece is
firmly held or clamped to prevent movement. For easier
control, use low speed to start cutting, then increase to
correct speed.
Any movement of the material may affect the quality of
the cut. The blade cuts on the upward stroke and may
chip the uppermost surface or face of the work piece.
Ensure your uppermost surface is a non-visible surface
when your work is finished.
1. CUTTING LAMINATES
Use a fine tooth blade when cutting most laminates and
thin wood materials. To reduce edge chipping, clamp
pieces of waste wood at both ends on both sides and cut
through the waste wood during cutting.
2. CIRCLE CUTTING
Do not use the pendulum action when cutting tight circles
or angles.
3.PLUNGE SAWING (See Fig. J, K )
Plunge cutting may be used only on soft materials such as
wood, aerated concrete, gypsum plaster boards, etc.
Use only short saw blades.
Place the front edge of the base plate on the workpiece
and switch on. Press the tool firmly against the workpiece
and plunge the saw blade slowly into the workpiece.
As soon as the complete surface of the base plate rests
Summary of Contents for WS2933
Page 1: ...WS2933 Serra Tico Tico a bateria PT P05 Jig saw EN P14 Sierra de Calar a batería ES P22 ...
Page 2: ......
Page 3: ...1 8 9 10 11 6 7 2 3 4 12 5 ...
Page 31: ......
Page 32: ......


