


8
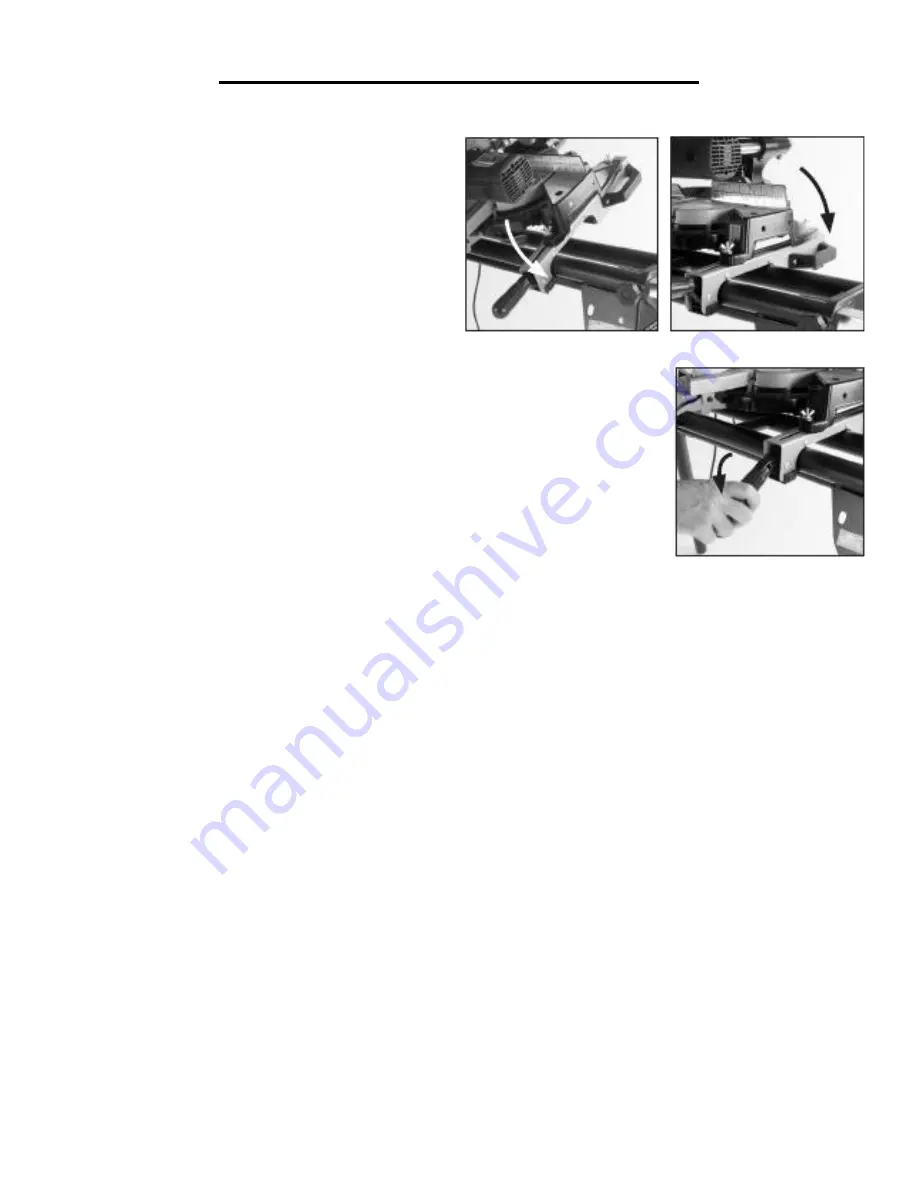
5. Hook the front of the brackets over the front of the
miter stand’s tubular crossbar (Fig. 12).
6. Push the back of the brackets down to engage them
onto the back crossbar (Fig. 13).
7. Lock the brackets into place by gently pressing down
the locking levers (Fig. 14).
8. To ensure the stability of the miter saw stand and the
mounted machine during cutting operations, adjust the
OPERATION
Fig. 14
Fig. 12
Fig. 13
position of the miter saw so the fence of the miter saw is aligned with the center of
the rear crossbar of the stand.
9. When the miter saw is correctly positioned on the stand, securely tighten the
four mounting nuts.
MOUNTING UNUSUAL MITER SAWS
If your miter saw is strange or unusual in terms of either its mounting holes or its social skills, don’t be alarmed.
Every miter saw is special in its own unique way. If you have one of these special miter saws, an adaptor plate may
be necessary. The adaptor should be a square or rectangular worktop (such as a piece of plywood) that fits the
footprint and mounting hole configuration of your miter saw. We recommend using a piece of plywood at least
one inch thick.
1. Bolt the adaptor plate securely to the two saw mounting brackets.
2. Attach the adaptor plate onto the miter saw stand using the saw mounting brackets and lock it in place.
3. Position the miter saw above the adaptor plate. Ensure that the bulk and weight of the miter saw is centrally lo-
cated over the two crossbars. The saw fence should align as closely as possible with the center line of the miter saw
stand’s rear crossbar. Bolt the miter saw securely to the adaptor plate with appropriate screws and fixings.
4. Check the stability of the machine and installation before operation.
NOTE: Consult the manufacturer of the saw for any special adjustments, requirements or fixings needed to
permanently mount your saw to a worktop. Take precaution over a full range of operating conditions. Don’t be
judgmental towards your saw for being different than the other saws on the market. You will hurt its feelings.
MOUNTING A MITER SAW TO THE STAND (CONTINUED)
Summary of Contents for MSA750
Page 10: ...THANKS FOR REMEMBERING...


