5 of 15
WX-501-0518 • 01.22
SW
SW
1–4
5–8
9–12
13–16
17–20
21–24
25–28
SW
1–2
3–4
5–6
7–8
9–10
11–12
13–14
Click
114
Click
112
SW1
SW2
SW3
SW4
Input Mapping
SW1
SW2
SW3
SW4
Click
112
15–16
17–18
19–20
21–22
23–24
25–26
27–28
SW1
SW2
SW3
SW4
SW5
SW6
Baud Rate
SW
9600
19200
38400
57600
Bus 1
Bus 2
The Click 112/114 feature two DIP switches labeled S4 and S5 on the silk screen. The switches are used to
configure a total of three different parameters:
■
Bus 1 baud rate
■
Bus 2 baud rate
■
Channel input map
For each parameter, if any individual switch is in the ON position, that parameter is in
Hardware
mode. If
Hardware
mode is selected, the parameter can be configured using the switches. In this case, the setting can be viewed but
not changed via Click Supervisor and the front panel menu.
If all switches for a particular parameter are in the OFF position, that parameter is in
Software
mode. If
Software
mode is selected, the parameter must be configured using the front panel menu or Click Supervisor.
Channel Input Map
The first parameter that can be configured is channel input. Mapping input datagram channels to output channels
is configured on the first DIP switch, labeled S4, using switches 1–4 (S4:1–4).
Note.
If set to software mode, this parameter can also be changed using the front panel menu or Click Supervisor.
As mentioned earlier, the Click 112//114 receives serial datagrams from a SmartSensor to which is it connected.
These datagrams can contain many channels of detection data.
Because the devices have fewer output channels than there are possible input datagram channels received
from the sensor, you must use the channel input map to map the desired inputs to outputs. The Click 112 has two
outputs and therefore must be mapped to two inputs; the Click 114 has four. (If you need more than two or four
channels, you’ll need to use multiple devices daisy-chained together.)
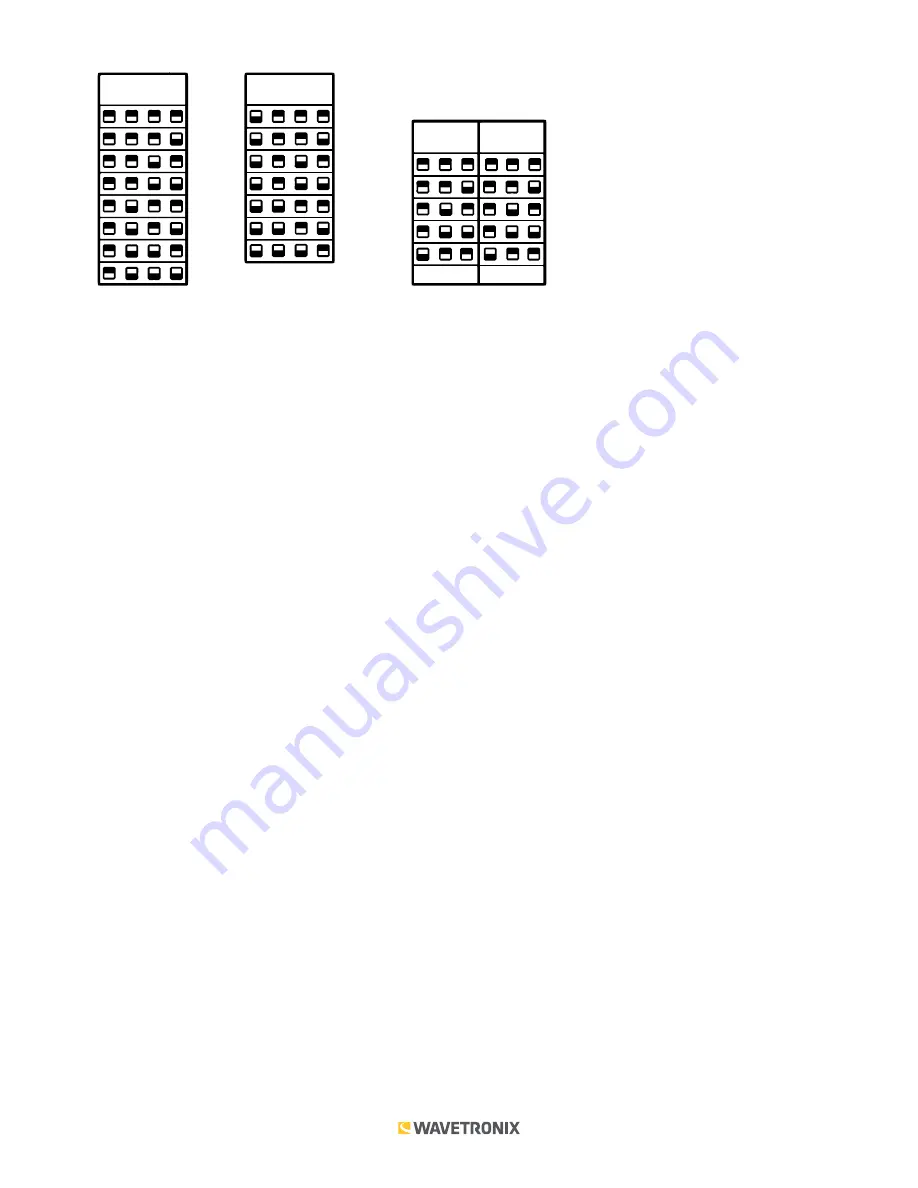
As shown in the table below, the outputs are mapped sequentially—that is, they can only be mapped in
numerically ordered groups of two or four depending on which device you are using (1–2, 3–4, or 1–4, 5–8, etc.).
If you chose, for example, 17–20 (on a Click 114), then input 17 would be mapped to output 1, input 18 would be
mapped to output 2, input 19 would be mapped to output 3, and input 20 would be mapped to output 4.
You will notice that the DIP switch labels on the Click 112 and 114 each have the input mapping information for both
devices combined. Make sure you are looking at the correct information for your device. Additionally, the two sets of
information are separated out and displayed below. (To turn a switch on, flip it up. To turn a switch off, flip it down.)


