Watersavers WLDS-10 Mk3 Installation & Commissioning Download Page 8

4

-MAIN SCREEN


This is the default screen  


Example only


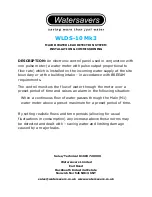
The top line shows TOTAL LITRES registered by the Main meter (M1) at the site 
boundary or main intake (similar to a car’s milometer). The slash next to the L will 
change from \ to / to indicate contact closure from the pulse meter. The bottom line 
shows day of the week, time (24hr format), current High Flow (HF) or Low Flow (LF) 
status and lastly OK - (flow less than preset maximum or HI - greater than preset 
maximum. 


Check that the MAIN display increments as water flows through the pulse meter. 


NB: Larger pulse meters (1” and above) may produce 1 pulse per 10 or 100 
litres and the display will correspondingly be programmed to increment by 
10 or 100 litres. Enter the actual number of litres into the preset fields - 
irrespective of the pulse per litres output. 
 

PLEASE BEAR IN MIND THAT THE ACCURACY OF ANY MEASUREMENT OR 
DETECTION WILL BE LIMITED TO THE K FACTOR OF THE PULSE METER USED 
eg 1, 10 or 100 LITRES.  


TO RESET TOTAL LITRES TO ZERO 

Main: In MAIN display press and hold ‘0’ key for 4 seconds 


M A I N

0 0 0 0 0 0

L

\

0

0

T U E

1 0 : 5 7

L F

O K

Summary of Contents for WLDS-10 Mk3

Page 1: ...through the meter over a preset period of time and raises an alarm in the following situation When a continuous flow of water passes through the Main M1 water meter above a preset maximum for a prese...

Page 2: ...NOTES...

Page 3: ...factor High flow times for days of the week Setting maximum High and Low flow rates Number of alerts before alarm Protection off manual override External selection of HF LF parameters Solenoid valve...

Page 4: ...it is important to establish periods of high use and low use ie when occupied or unoccupied day or night week or weekend etc c An initial water audit will establish the daily weekly patterns of water...

Page 5: ...0 mm cable see wiring diagram Fig 1 Connect Main M1 pulse meter using 2 core 0 5 or 0 75mm cable to terminals 1 2 see wiring diagram Fig 1 Note if a long cable run is required 10m use cable of at lea...

Page 6: ...arm Test press 2 key for 4 seconds Manual Override press 6 key for 4 seconds Valve service press 8 key for 4 seconds Serial Number of the WLDS 20 mk3 press 1 and INFO i keys together The MAIN screen w...

Page 7: ...0 0 0 0 L 0 0 T U E 1 0 5 7 L F O K M A X L H F H H M M 0 0 2 0 0 0 0 3 0 M A X L L F H H M M 0 0 0 2 0 0 0 3 0 O F H I G H S T R E L A T O A L A R M 0 1 0 0 1 0 M A I N K F A C T O R 0 L P U L S E M...

Page 8: ...preset maximum Check that the MAIN display increments as water flows through the pulse meter NB Larger pulse meters 1 and above may produce 1 pulse per 10 or 100 litres and the display will correspon...

Page 9: ...panel turn power off on again after changing parameters SETTING THE TIME AND DATE These are set before they leave the factory If you need to change them proceed as follows Press and hold the INFO key...

Page 10: ...Flow parameters apply See SETTING MAXIMUM LOW FLOW RATE Press Enter to show the flashing cursor Enter the time period FROM and then TO using the numeric keys in 24Hr format Confirm by pressing the Ent...

Page 11: ...the maximum allowable number of litres that pass in a preset time period default 30 mins before a High Alert is registered during periods of low flow LF Press key to show the above screen Press Enter...

Page 12: ...od The Timeout period may be set from 1 minute to 45 hours To cancel Protection Off press key to return to MAIN screen EXTERNAL HF LF INPUTS Instead of using the internal time clock to set time period...

Page 13: ...valve setup screens are located after the Monitoring screens by pressing the key from the MAIN screen SELECT NORMALLY CLOSED OR NORMALLY OPEN The default setting is for a Normally Closed valve Press...

Page 14: ...owing screen will indicate the valve service in progress MANUAL VALVE SERVICE To initiate a manual valve service at any time press key 8 V for 4 seconds VALVE SERVICE FUNCTION The valve service functi...

Page 15: ...UNTIL RESET SEE NOTE BELOW NB Using your readings from the above screens add a safety margin of 10 15 for the maximum flow parameters eg if your peak reading is 150 litres then enter 165 173 litres as...

Page 16: ...rminal block When this input is connected to 24v for 1 second the above screen will show and the alarm will be raised ALARM VALVE TEST To test the operation of the alarm and or solenoid shutoff valve...

Page 17: ...meter disconnect from panel and check that its contacts open and close as water flows through it using a multimeter set to continuity The panel can be checked by short circuiting terminals 1 2 and wat...

Page 18: ...9 WIRING DIAGRAM...

Page 19: ..._ _ _ _ Low Flow LF max litres Time period _ _ _ _ M1 M2 Boundary max litres Time period _ _ _ _ Hi Alerts to alarm High Flow HF times use 24hr format Mon _ _ _ _ to _ _ _ _ Tue _ _ _ _ to _ _ _ _ We...

Page 20: ...minute 45 hours number of High Alerts to alarm 1 99 7 day timer allows daily High Flow periods to be entered External HF LF input overrides internal clock see section 5 LCD display 2x 16 ASCII charac...

Reviews: