©2017 Warn Industries, Inc. WARN® and the WARN logo are trademarks of Warn Industries Inc.
6
105714A0
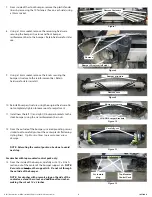
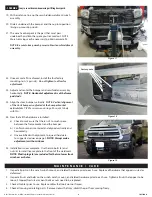
7. From inside of the stock bumper, remove the plastic fender
liners by removing the 10 fasteners (five on each side) using
a 10mm socket.
8. Using a 12mm socket, remove the remaining hardware
securing the bumper structure and front bumper
reinforcement bar to the bumper. Retain hardware for later
use.
9. Using a 14mm socket, remove the 6 nuts securing the
bumper structure to the reinforcement bar. Retain
hardware for later reinstall.
10. Reinstall bumper structure using the original hardware. Do
not completely tighten to leave room for adjustment.
11. Install new the left (1) and right (2) bumper brackets to the
stock bumper, using the six reinforcement bar nuts.
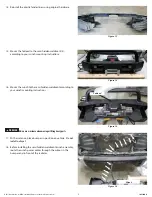
12. From the outside of the bumper, use a reciprocating saw or
similar tool to carefully cut out the center plastic (following
styling lines).
Tip: Mask cut lines to prevent unnecessary
damage.
NOTE: Relocating the control pack can be done to avoid
next step.
For winches with top mounted control pack only:
13. From the inside of the bumper, carefully cut a 10 x 2 inch
section out of the center of the bumper support rib.
NOTE:
Be sure to cut only on the support rib. Do not cut through
the outside of the bumper.
NOTE: For winches with a remote plug on the side of the
contactor, extend the cutout and additional four inches,
making the cut out 14 x 2 inches.
Remove Fasteners
Remove
Bumper Structure (left side)
LH & RH bumper brackets
Bumper structure
Bumper structure
Carefully cut
Top Mounted
Control Pack
For remote
plug
Figure 7
Figure 8
Figure 9
Figure 10
Figure 11
Figure 12
Remove nuts


