Adjust the flashing time as required by using the (+) AND (-)
BUTTONS THEN PRESS ENTER.
The display will now show ‘1 OFF’ and the first programmed
OFF time for the day will flash.
This can be altered in the same way as the ‘1 ON’.
Follow the same procedure for the 2nd and 3rd ON/OFF times
remembering to press ENTER after each change to the
programme. If you do not wish to alter a particular time then
simply press ENTER and the display will move on to the next
ON/OFF time leaving the previous one unchanged.
When the 3rd OFF time has been entered the programmer will display the word COPY
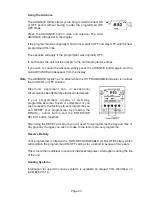
and the DAY OF THE WEEK indicator will flash (see figure 8).
You can now copy the ON/OFF times you have just input for one day onto any other
days that you wish them to apply. This saves you having to separately programme
days with identical switching times.
Use the (+) and (-) buttons to mov the DAY OF THE WEEK indicator to the next day
that you wish the times to apply and press the COPY button, the display will indicate
‘IN’.
Continue in this way until the programme has been copied to all the days that you wish
it to apply to.
When you have finished copying simply press ENTER. The word COPY will be replaced
with ‘DAY’ and the DAY OF THE WEEK indicator will flash.
You can now programme those days that require different times to the ones that you
have just copied by following the same procedure as described at the start of this
section, parts (ii) to (v).
Note
: Your programmer allows you to have up to three ON/OFF periods each day. If you do
not want to use all of these, a switch period can be cancelled by programming the ON
operation the same time as the OFF operation, eg, 2nd ON at 12.00pm and 2nd OFF
at 12.00pm.
The next diagram can be used to identify the SELECT buttons and indicators referred
to in the following sections of this leaflet.
Page 41


