


5
2018151_d•en•2019-10-01
We reserve the right to make technical changes
CExample 2:
Uhe existing unit with a WMS Central transmit-
ter is expanded to include a WMS Wall-mounted
transmitter plus
Step 1:
Cdd the WMS Wall-mounted transmitter plus to the ex-
isting network with a WMS Central transmitter
Wake up the WMS Wall-mounted transmitter plus
Select the "Learn in/out hand-held transmitter/central trans-
mitter" menu item on your WMS Central transmitter under:
Main menu
System
Commissioning (logged in as specialist partner)
Learn in/out hand-held transmitter/central transmitter
Confirm the selected menu item with
The control function LED
and transmission LED
light up on the WMS Wall-mounted transmitter plus (red
and green).
The hand-held transmitter was added to the network.
Step 2:
Copy a channel from a WMS Central transmitter to a
WMS Wall-mounted transmitter plus
Select the "Allocate channel to another control panel"
menu item on your WMS Central transmitter under:
Main menu
Products
Product type
Context menu
Allocate
Allocate channel to another control panel
Select the channel on the target device.
Briefly press the learn button
on the WMS Wall-
mounted transmitter plus.
The transmission LED
on the WMS Wall-mounted
transmitter plus flashes green.
The channel was copied.
The exact description of these procedures can be found
in the instructions of the WMS Central transmitter (art. no.
890 405).
CExample 3:
Cn existing unit with a WMS Wall-mounted
transmitter plus is expanded to include another
WMS Wall-mounted transmitter plus
Step 1:
Cdd the WMS Wall-mounted transmitter plus (2) to the
existing network with a WMS Wall-mounted transmitter
plus (1)
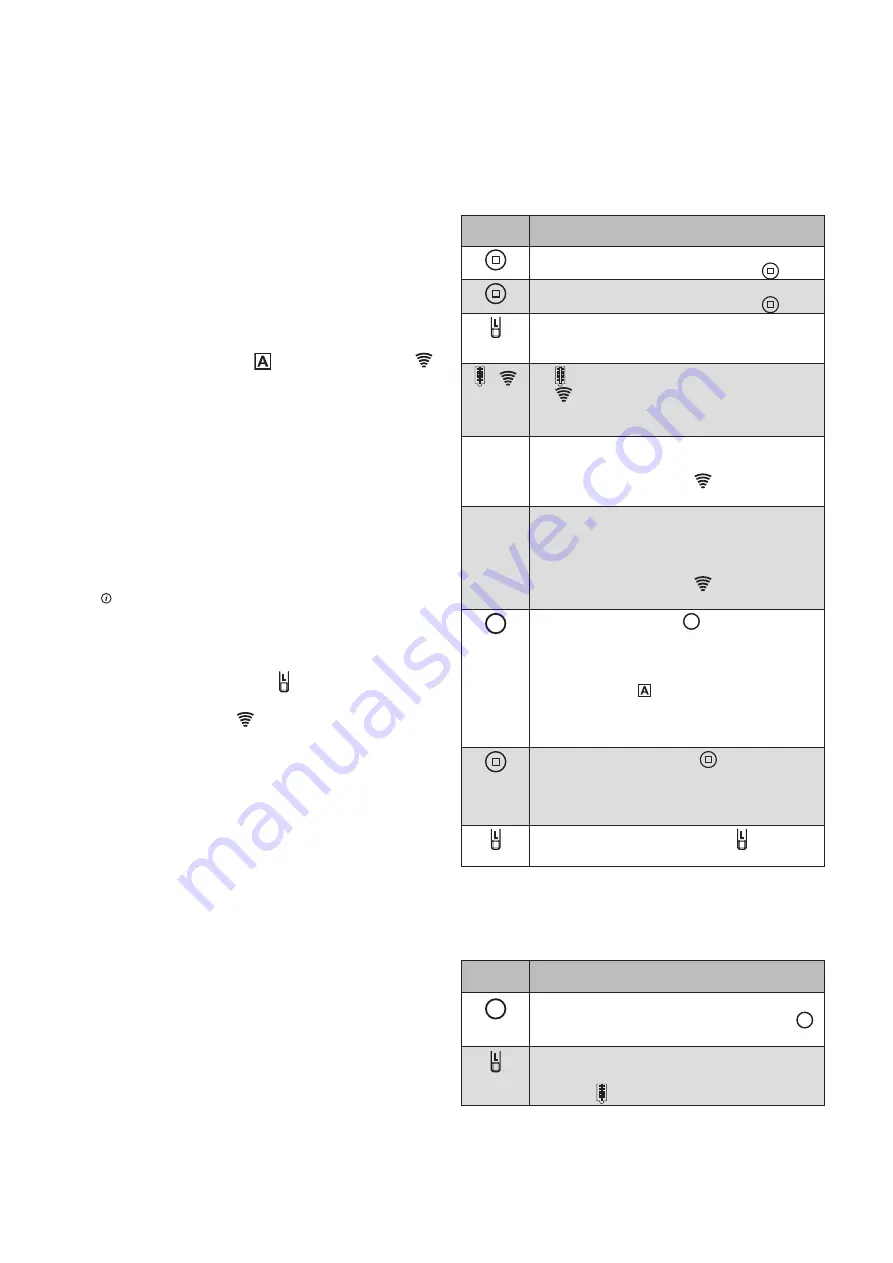
Button/
display
Cction/result
Wake up the WMS Wall-mounted transmit-
ter plus (1) with the STOP button
.
Wake up the WMS Wall-mounted transmit-
ter plus (2) with the STOP button
.
Press the learn button on the WMS Wall-
mounted transmitter plus (1) for approx. 5
seconds.
+
lights up green; the transmission LED
flashes. For several seconds, the WMS
Wall-mounted transmitter plus (1) scans
the operating range for devices.
The WMS Wall-mounted transmitter plus (1)
does not find any device during scanning:
The transmission LED
lights up.
IRCOGCE:
No receiver found.
If the WMS Wall-mounted transmitter plus (1)
finds a receiver, transmitter or sensor that has
not yet been learned in, scanning is stopped.
It is indicated as follows:
The transmission LED
lights up.
RCED:
New receiver
+
When you press the
+
button briefly, you
can check WHICH target device was just
found.
The product then waves and the control
function LED flashes.
RCED:
The target device (transmitter or sensor)
can be added to the network.
Press the STOP button
.
The found target device (transmitter or
sensor) is added to the network.
The target device waves in confirmation.
Briefly press the learn button to leave
the learn mode.
Step 2:
Copy a channel from one WMS Wall-mounted transmit-
ter plus (1) to another WMS Wall-mounted transmitter
plus (2)
Button/
display
Cction/result
+
Select the channel on the WMS Wall-
mounted transmitter plus (1) using the
+
button.
Briefly press the learn button on the WMS
Wall-mounted transmitter plus (1).
L LED lights up green.


