12
Operating Instructions
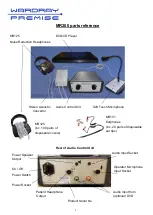
Playing music to the patient
Power on the unit by first turning on power (at the wall socket) to the power cable and then turning
on the on/off switch at the rear of the unit.
Connect the patients choice of music:
If by personal music device (MP3/iPod/Mobile Phone etc)
Connect the device to the 3.5mm jack (if the device requires a 2.5mm jack, please
use the supplied adaptor*) (Fig 1).
If the device is a
mobile phone
, ensure the phone is set to
‘Airplane Mode’
.
Set the device volume to a mid-point
Familiarise yourself with how to start the music playlist
Once the patient is in place, adjust the playback volume by using the Pure Sound II
volume control ONLY.
If by CD/DVD input (via optional DVD player)
Place the music media into the DVD player
If the optional DVD player has a volume control, ensure this is set to a mid-point
Once the patient is in place, adjust the playback volume by using the Pure Sound II
volume control ONLY.
Important Note: The Patient playback via headphones is ONLY for the duration of the patient
undertaking MRI processes. The Unit can play at high volumes (to overcome the noise of the
MRI operation) and long periods of exposure to high volumes may cause discomfort or
damage to the patients hearing.
Playing Music via Powered Speakers
Whether located in the MRI control room or an adjacent waiting room, music playback can be
achieved by connecting the ‘input’ of a powered speaker system to the 3.5mm speaker output on
the rear of the Pure Sound II Unit.
The volume of the playback can be adjusted by both the Pure Sound II volume control or the volume
control on the powered speakers (not supplied). It is recommended that the volume control on the
Pure Sound II unit is used in preference.
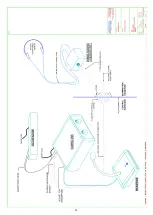
Fig 1
*Please note that for
Apple
IPhone 5
and above, a
‘Lightning Adaptor’ (Fig 2) is
required.
(Not supplied, source locally)
Fig 2


