background image

Valtis Ogrevanje d.o.o.


  Instructions for installers and maintenance workers


7.)


When the program is loaded, disconnect the bootloader and connect the display. First, make sure 
that the calibration sensors are aligned and show the same values (a difference of + - 

3°C is 

allowed).  
 

8.)


Enter the entry code in the 

P1A

 and 

P1d

 menus and exit the menu. Press the MENU key (right 

below) and the possibility of setting the water in the boiler (85°C) is available. Pressing the same 

key again will cause the Lambda probe to be calibrated. The display shows 

"CALB 

 00"

. When the 

+ key is pressed, the calibration of the Lambda probe is triggered. It is necessary to know that the 

boiler temperature must be below 30°C. Once this operation is finished, the process is complete.


When it comes to this version of the program, it is important to note that: 

-


The Lambda probe through the Belimo motors maintains 180 °C of fumes by closing the primary 

flap. This parameter is an integral part of the "hidden" parameters and cannot be modified. 

-


If the fume temperature exceeds 190 °C, the boiler starts to

 modulate, thus reducing the boiler 

output. 

-


The output of the boiler is no longer visible on the display 


IMPORTANT! 

The SW_28012020 program version is currently 

not

 uploading to Vivo GT with Flamtronic lambda probe.  
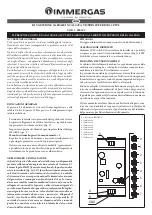


6.)


With the + and - keys, select the program 

for the appropriate boiler and confirm it 

with the MENU key 


5.)


It is imperative that we wait for the sensors 

to be calibrated correctly 


Summary of Contents for Viva GT

Page 1: ...Valtis ogrevanje d o o Cesta k Tamu 61 2000 Maribor Manual for Maintenance Workers Viva GT V_06032020...

Page 2: ...Fume extraction duct 2 Combustion chamber 3 Loading bay door 4 Ash cleanout doors 5 Smoke chamber cover 6 Firewood storage 7 Belimo air intake motors 8 Boiler heat exchanger 9 Fan 10 Chimney connectio...

Page 3: ...mixing valve 5 4 with motor drive e g PROMIX AVC05 5Nm 2 min 230V and flow pumps 25 60 180 or the exact equivalent of the one described The diameter of the pipe between the boiler and the water stora...

Page 4: ...p 4 Thermal discharge safety device 5 Visible outflow into the canal INSPECTION OF THE CORRECT INSTALLATION OF THE STS SAFETY VALVE MINIMUM WALL CLEARANCE In order for the manufacturer to ensure troub...

Page 5: ...OFF is displayed on the top screen To get to the parameter change menu you must first unlock the electronics The procedure for unlocking the electronics is as follows 1 Hold the bottom right button no...

Page 6: ...tects a fire in the firebox it starts to regulate both flaps In the first stage the primary air flap will be almost fully open it must reach a fume temperature of 180 C When the boiler reaches an oper...

Page 7: ...n the lower layer The smaller the material the less you can mix in Inappropriate fuels Moist fuels with more than 20 water are not allowed They cause water to accumulate corroding the walls of the boi...

Page 8: ...output only rated output only kW Boiler connection voltage 230 50 230 50 V Hz Required chimney draft 10 15 10 15 Pa Fumes temperature 100 200 100 200 C Test pressure 4 5 4 5 bar Boiler class EN303 5...

Page 9: ...llers and maintenance workers CONNECTING THE BOILER TO THE ELECTRICITY GRID The connection of the boiler to the electricity grid and the input output components valves pump sensors is done via the ter...

Page 10: ...connect the electrical voltage We take into account that the water in the boiler should be below 30 C 1 Place the fume sensor in the correct position Keep him in the cocoon deep in the ribs 2 Insert t...

Page 11: ...ecessary to know that the boiler temperature must be below 30 C Once this operation is finished the process is complete When it comes to this version of the program it is important to note that The La...

Page 12: ...cally check the sensor the suitability of the insulation Change the sensor Displayed when the regulation has not detected a fume sensor Check the connection where the sensor is connected Physically ch...

Page 13: ...the area below the heat exchanger Clogged chimney Try to change the activation of heating pumps with external control Clean the walls of the boiler Clean the heat exchanger Clean the ash in the area...

Page 14: ...ELOW THE REGISTER Clean the chamber walls Clear the ashes INSPECTION OF DOORS AND COVERS Inspection of insulation inserts Inspection and replacement of the sealing cord Check for leaks INSPECTION OF C...

Reviews: