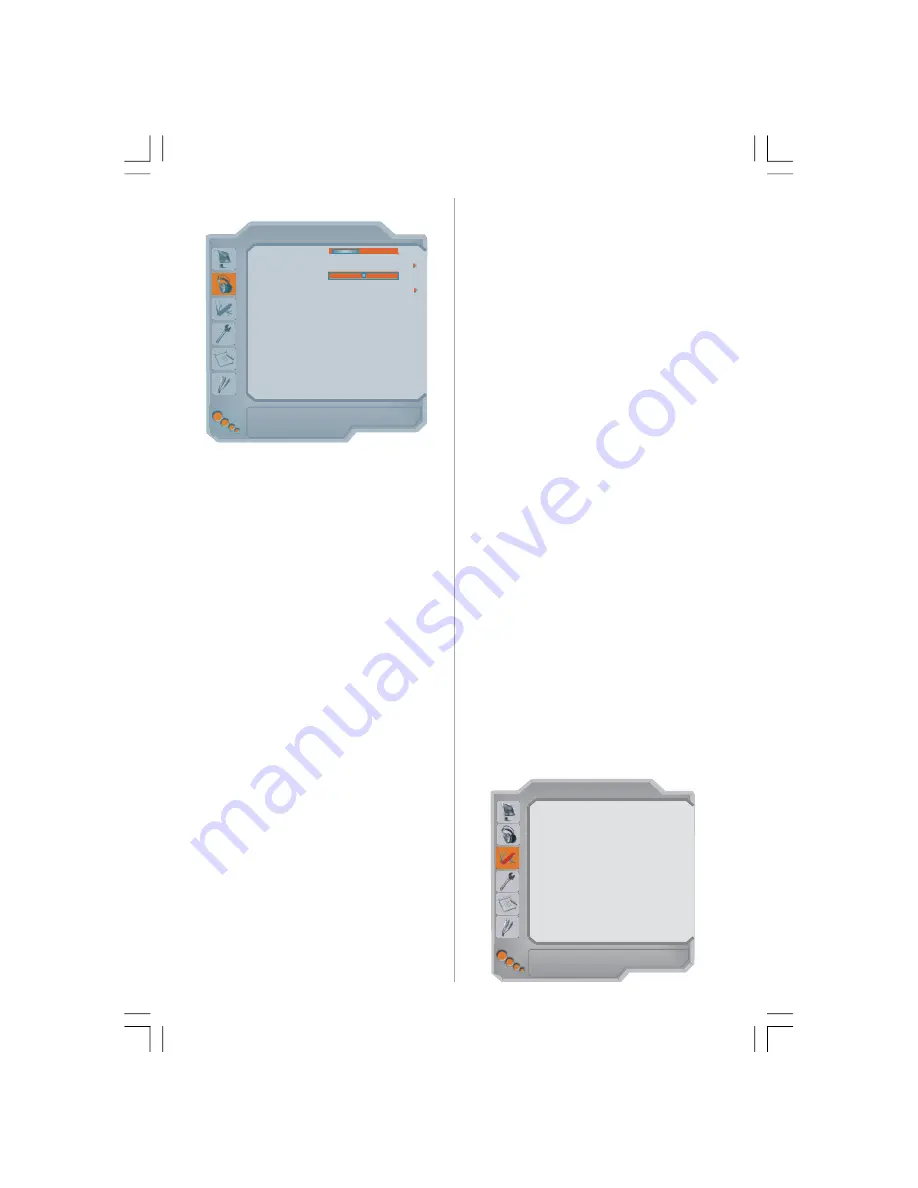
Walker WP5209LCD Operating Instructions Manual Download Page 7

 English 

- 6 -

Sound Menu

Volume                                                 15
Equalizer
Balance                                                  0

Headphone

Sound Mode                                      Mono
AVL                                                      On
Effect                                                   Off
Dynamic Bass                                       Off
3D Panorama                                        Off

Store

SOUND

Subwoofer                                            Off

Volume

By  pressing 

  / 

  select 

Volume

.  Press 

  / 

button to change the level of the Volume.

Equalizer

By pressing 

 / 

 button, select 

Equalizer..

 Press 

 or “

OK

” button to enter equalizer menu.

In equalizer menu the sound mode can be changed to

User,  Music,  Movie,  Speech,  Flat 

and

  Concert

by pressing 

 / 

 button. Select the desired frequency

by 

 / 

 button and increase or decrease the fre-

quency gain by pressing 

 / 

 button.

Press the

 “M”

 button to return to the previous menu.

NOTE: 

Equalizer menu settings can be altered only

when the Equalizer Mode is in User.

Balance

By pressing 

 / 

 select 

Balance

.Press 

 / 

 button

to change the  level of the balance.Balance level can
be adjusted between -32 and + 32.

Headphone

By pressing 

 / 

 button, select Headphone. Press

 button to enter hedphone menu.

volume

By pressing 

 / 

 button, select Volume. Press 

button to increase hp volume level. Press 

 button to

decrease hp volume level. Headphone volume level
can be adjusted between 0 and 63.

balance

By pressing 

 / 

  button, select Balance. Press  

button to increase balance to the right. Press 

 button

to decrease balance to the left. Balance level can be
adjusted between -32 and +32.
Press the “M” button to return to the previous menu.

Sound Mode

By pressing 

 / 

 select 

Sound Mode

. Press 

 / 

button, you can select Mono, Stereo, Dual I or Dual II
mode, only if the selected channel supports that mode.

AVL

By pressing 

 / 

 select 

AVL

VL

. Press 

 / 

 button  to

set the AVL as on or off.

Effect

By pressing 

 / 

 select 

Effect

. Press 

 button  to

set Effect as on or off.

Dynamic Bass

Dynamic Bass is used to increase bass effect of the
TV set.
By pressing 

 / 

 button, select Dynamic Bass. By

pressing 

 / 

 button set Dynamic bass to Low, High

or Off. It is not recommended to select High if listening
at high volume levels.

3D Panoroma

This  feature  is  used  to  create  the  impression  that
sound is coming from around the room instead of the
set speakers. Pressing the 

 / 

 buttons will turn the

feature on  or off.

Subwoofer

It is possible to connect an external, active subwoofer
to the set to give a much deeper bass effect.
By  pressing 

  / 

  button,  select 

Subwoofer..

Subwoofer can be set to On or Off.
Dynamic Bass is not available if Subwoofer is set to On.
Set Subwoofer to On when you connect an external
subwoofer  to  the  set.

Store

• By pressing 

 / 

 button  select 

Store

.

•  Press 

  or  “

OK

”  button  to  store  the  adjustments.

Stored

” will be displayed on  the screen.

Feature Menu

Sleep Timer                                          Off
Child Lock                                             Off
Language                                       English
Ext-2 Out                                              TV
Default Zoom                                       Full
Blue Background                                   On
Menu Background                      Translucent
Menu Timeout                                  60 sec
Teletext Language                               West

FEATURE

ENG-52786W-MB26-1050UK-(W SUB-2SCRT)(3D PAN)(ECO PIP)(WO SVHS)(C2)-50133348.P6526.08.2008, 16:53

6

Summary of Contents for WP5209LCD

Page 1: ...COLOUR TELEVISION WITH REMOTE CONTROL OPERATING INSTRUCTIONS WP5209LCD...

Page 2: ...onnections 15 Specifications 16 Preparation For ventilation leave a space of at least 10 cm free all around the set To prevent any fault and unsafe situa tions please do not place any objects on top o...

Page 3: ...and WIDE Image size Mix PIP mode Teletext Time Red button Page Up Green button Page Down P P SWAP Previous Programme I II Mono Stereo Dual I II P Programme Down Volume Down PP Picture Mode Selection O...

Page 4: ...rd Do not place the set a piece of furniture etc on the power cord mains lead or pinch the cord Handle the power cord by the plug Do not pull out the plug by tugging the cord and never touch the power...

Page 5: ...ote control hand set when it is not to be used for a long period Otherwise it can be damaged due to any leak age of battery Switching The TV ON OFF To switch the TV on Your TV will switch on in two st...

Page 6: ...ssing button select Colour Temp Press to choose from one of these options Cool Normal and Warm Noise Reduction By pressing button select Noise Reduction Press to choose from one of these options Low M...

Page 7: ...ton to return to the previous menu Sound Mode By pressing select Sound Mode Press button you can select Mono Stereo Dual I or Dual II mode only if the selected channel supports that mode AVL By pressi...

Page 8: ...By pressing button select Menu Timeout Press button to change menu timeout to 15 sec 30 sec or 60 sec Teletext Language By pressing button select Teletext Language Press button to change Teletext Lang...

Page 9: ...ghlighted Press button to change that letter and button to select the other letters By pressing the RED button you can store the name Insert Select the programme which you want to insert by navigation...

Page 10: ...correctly before connect ing to the TV See the table on Appendix page Use 15 pin display cable to connect a PC to the LCD TV Menu System in PC mode Sound Menu Feature Menu The items in these menus ar...

Page 11: ...dow is indicated by a white frame around it The active window can be changed by pressing button The status info OSD belongs to active window The place of the sta tus OSDs are same for both windows Pre...

Page 12: ...on the screen by pressing the OK button Teletext You can display Teletext information on your TV Each channel which broadcasts teletext transmits a page with information on how to use its teletext sys...

Page 13: ...ccurs For example page 100 appears to be one greater than page 199 Connect Peripheral Equipment High Definition Your LCD Television is capable of displaying High Defi nition pictures from devices such...

Page 14: ...soft cloth Do not use abrasive solvents as they may damage the TV screen coating layer Poor Picture Have you selected the correct TV system Is your TV set or house aerial located too close to non eart...

Page 15: ...ANT IN AUDIO IN R L VIDEO IN IN OUT IN OUT AUDIO VIDEO SATELLITE RECEIVER ANTENNA CAMCORDER Mode Resolution Frequency Horizontal Vertical Hor kHz Ver Hz 1 640 480 31 5 60 2 640 480 37 9 72 3 640 480 3...

Page 16: ...e separate collection systems for recycling in EU For more information please contact the local authority or the dealer where you purchased the product O H I J K L M N G E F D Video Input Audio Inputs...

Page 17: ...en Display RFAERIAL INPUT 75 Ohm unbalanced OPERATING VOLTAGE 220 240V AC 50 Hz AUDIO 3DPanorama AUDIO OUTPUT POWER WRMS 10 THD 2 x 10 W POWER CONSUMPTION W 375 W 1 W Stand by PANEL 16 9 display 52 Sc...

Page 18: ...be connected to the terminal which is marked with the letter E or by the earth symbol or coloured green or green and yellow The wire which is coloured blue or black must be connected to the terminal...

Page 19: ......

Reviews: