37
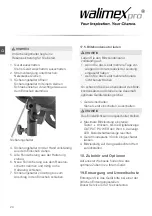
2. Switch on device:
Set main switch on I (ON).
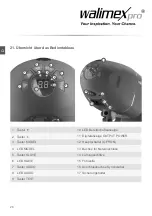
• The digital display OUTPUT POWER
shows the currently adjusted flash power.
• The standby display LED lights up when
the adjusted flash power is reached.
NOTE
An integrated soft-start prevents the flash
tube from damage. It will take 1-2 seconds
until the flash output is reached.
• The modelling light will come on if it
was switched on when the device was
switched off.
• The signal LED AUDIO lights up, if the
acoustic operational readiness was
switched on.
• The SLAVE function LED lights up, when
the photo cell had been switched on.
3. Switch off device:
• Place the main switch in the O (OFF)
position.
• All signals will go out.
• When the modeling lamp was switched on:
The modeling lamp will go out.
NOTE
After switching it off, any residual current
in the device is released by way of an
electronic discharger. You cannot switch
this safety function off. The device does
not flash after the flash power has been
changed.
10. Adjustments
10.1 Adjust flash output
You can adjust the power of the flashes
according to the below mentioned chart.
Flash output
Check value
F-stops
6,0
1 (full output)
5,0
1/2
4,0
1/4
3,0
1/8
2,0
1/16
1,0
1/32
1. Switch on device.
See Switch the device on and off.
2. Press the
button or the
button,
until the digital display OUTPUT POWER
shows the desired flash output.
When the device reaches the adjusted
flash output, LED TEST lights up.
3. Trigger test flash:
Press push-button TEST.
The LED TEST signal goes out and lights
up not until the device will reach the adjus-
ted flash output again.
10.2. Switch the modelling light on and off
The modelling light can only be switched
on or off.
1. Switch on the device.
See „Switch device on/off“.
2. Press the MODEL button. The modelling
light comes on. The LED MODEL lights up.
3. Switch the modelling light off:
Press the MODEL key, until the LED MODEL
goes out. The modelling light goes out.
The LED MODEL goes out.


