43
TempSpray-H326 / -H226 / -H126
2
1
3
4
6
7
5
GB
9.2
TEMPSPRAY-H126
CHANGING THE POWER CORD
Switch the unit off.
Before all repair work: Unplug the power
plug from the outlet.
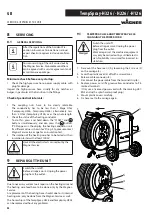
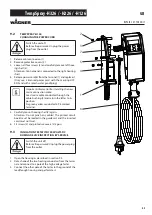
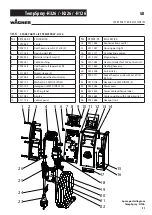
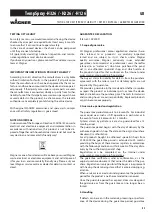
1. Release cable connexion (1).
2. Remove protective covers (2).
3. Loosen all four screws (3) and carefully remove left hous-
ing
shell
(4).
Attention: Control panel is connected to the right housing
shell.
4. Release power cord (6) from the terminal (7) and replace it.
(Only use a licensed power cord with the marking H07-
RNF and with a splash water proof plug)
Important information for installing the new
mains connection cable:
Lead mains cable conductor through the
cable bushing (5) and return the latter to its
position.
Fix green-yellow conductor to PE-marked
terminal.
5. Carefully mount housing shell (4) again.
Attention: Do not pinch any cables! The printed circuit
board must be located in the guide rail, and the inserted
cord must not twist.
6. Fit screws (3) and protective covers (2) again.
9.3
INSULATION TEST WITH 1000 VOLTS DC
DURING DEVICE INSPECTION BY SERVICE
Switch the unit off.
Before all repair work: Unplug the power plug
from the outlet.
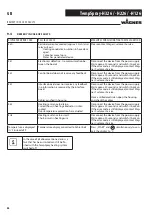
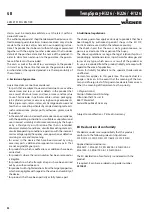
1. Open the housing as described in section 9.2.
2. Detach one of the two heating conductors from the termi-
nal and connect to a pole of the high-voltage tester.
3. Connect the other pole of the tester to the ground of the
leadthrough housing and perform test.
REPAIRS AT THE UNIT


