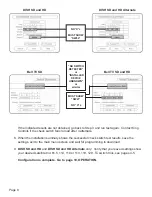
background image

Page 7


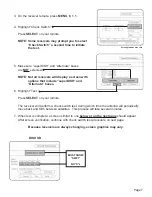
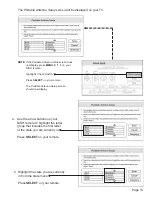
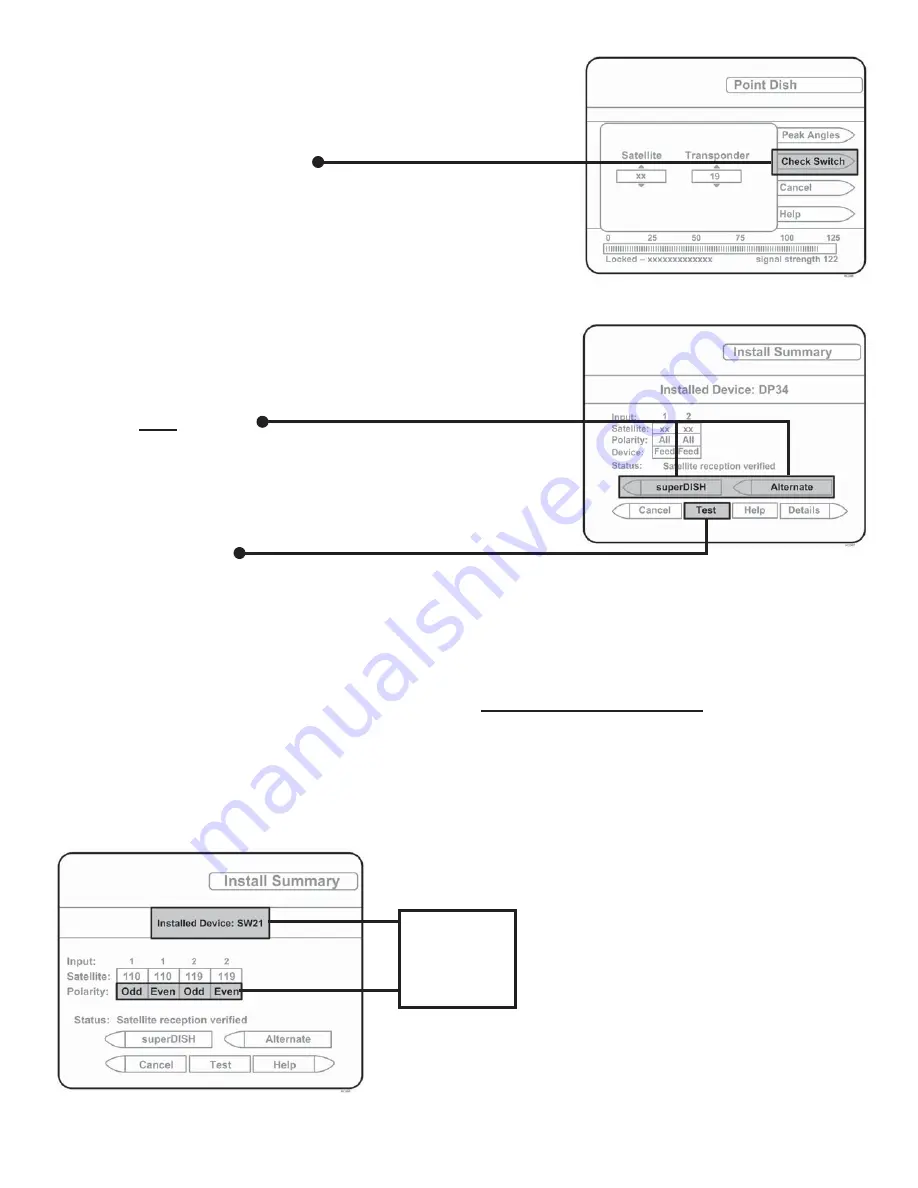
3.  On the receiver remote, press 

MENU

6

1

1

.

 4. 


Highlight “Check Switch.”

Press 

SELECT

 on your remote.


   NOTE:  Some receivers may prompt you to select 

“Check Switch” a second time to initiate 
the test.

Screen graphics may vary.

 5. 


Make sure “superDISH” and “Alternate” boxes 
are 

NOT

 selected.


   NOTE:  Not all receivers will display a screen with

options that include “superDISH” and 
“Alternate” boxes.

 6. 


Highlight “Test.”

Press 

SELECT 

on your remote.


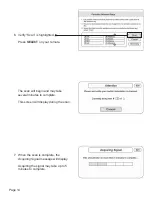
   The receiver will perform a check switch test, during which time the antenna will periodically 

move back and forth between satellites.  This process will take several minutes.

 7. 


When test is complete, a screen similar to one 

below or on the next page

 should appear.  

After screen verifi cation, continue with check switch test procedure on next page.

Because receivers are always changing, screen graphics may vary.  

DISH SD

MUST SHOW 

“SW21”

NO “X”s

Summary of Contents for FLEX VQ2100

Page 1: ...Hampshire Avenue South Bloomington MN 55438 2453 Phone 952 922 6889 Fax 952 922 8424 www kingcontrols com Portable Automatic Satellite TV Antenna VQ2100 Owner s Manual Solutions for Mobile Markets 21438 REV B ...

Page 2: ......

Page 3: ...s King Controls and VuQube are registered trademarks of Electronic Controlled Systems Inc DBA King Controls IMPORTANT The satellite TV market is expanding and changing The information in this manual was accurate at the time of printing If your VuQube FLEX Portable Satellite Antenna does not operate as outlined in this manual please call King Controls at 952 922 6889 or visit our website at www kin...

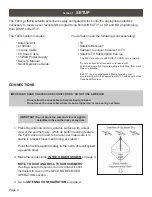
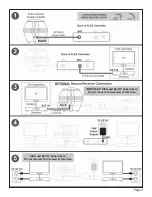
Page 4: ...dle approximately to the north this will speed up search time 2 Make the connections IN THE ORDER SHOWN on page 3 NOTE TO DISH AND BELL TV SUBSCRIBERS If using a second receiver do not connect it until instructed to do so in the SECOND RECEIVER OPERATION section 3 Go to ANTENNA CONFIGURATION on page 4 Section 1 SETUP IMPORTANT HAND TIGHTEN COAX CONNECTIONS DO NOT USE A WRENCH Do not allow the coax...

Page 5: ...Page 3 IMPORTANT DISH and Bell TV Subscribers Do not connect 2nd receiver at this time DISH and Bell TV Subscribers Do not connect 2nd receiver at this time ...

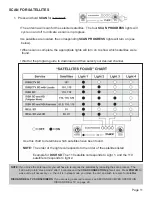
Page 6: ...ess POWER to turn on FLEX controller The COAX CONNECTION light will flash for approximately 10 seconds and then remain on SCAN PROGRESS lights will flash 3 times to indicate the selected service configuration 2 Simultaneously press and hold POWER and SCAN for five seconds COAX CONNECTION and SCAN PROGRESS lights will flash slowly and then the appropriate SCAN PROGRESS lights will turn on to show t...

Page 7: ...creens Dish Type 02 3 LNB 18 x 20 Switch Type 02 Multiswitch If you have an older receiver choose oval dish 2 satellites After setting your dish for either service as described above go to page 10 DISH subscribers with the following receivers ViP211z ViP211k ViP211 411 and who chose DISH SD and HD on the previous page You can use the Tailgater Mode go to page 12 All other DISH and Bell TV subscrib...

Page 8: ...tic satellite switching King Controls recommends using a DISH model 311 receiver for DISH SD If you do not have a clear view of the satellites the switch will not load correctly The SW21 and SW64 switches are a receiver software configuration that is loaded into the receiver after successfully running a check switch test with the dish locked on and configured for the appropriate service This one t...

Page 9: ... options that include superDISH and Alternate boxes 6 Highlight Test Press SELECT on your remote The receiver will perform a check switch test during which time the antenna will periodically move back and forth between satellites This process will take several minutes 7 When test is complete a screen similar to one below or on the next page should appear After screen verification continue with che...

Page 10: ...4 attempts 8 When the installation summary shows the successful check switch test results save the settings exit to the main menu screen and wait for programming to download 9 DISH SD and HD and DISH SD and HD Alternate only Verify that your saved settings show your desired satellite trio 61 5 110 119 or 110 119 129 To switch trios see pages 4 5 Configuration is complete Go to page 10 OPERATION DI...

Page 11: ...Page 9 This page intentionally left blank ...

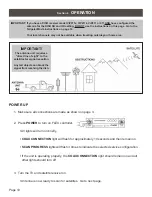
Page 12: ...s POWER to turn on FLEX controller All lights will turn on briefly COAX CONNECTION light will flash for approximately 10 seconds and then remain on SCAN PROGRESS lights will flash 3 times to indicate the selected service configuration If the unit is operating properly the COAX CONNECTION light should remain on and all other lights should turn off 3 Turn the TV and satellite receiver on Antenna is ...

Page 13: ...ove the antenna unit you will have to re acquire the satellites by repeating the scan process The FLEX will go into sleep mode after 15 minutes and the COAX CONNECTION light will dim Press POWER to wake unit up if necessary i e the unit is in sleep mode you move the unit and wish to rescan for satellites DISH AND BELL TV SUBSCRIBERS If you are using a second receiver see SECOND RECEIVER OPERATION ...

Page 14: ...nu to select the input that matches the connection to your DISH receiver i e if using an HDMI cable connection you should select the HDMI TV input IMPORTANT If you have a DISH receiver model ViP211z ViP211k ViP211 or 411 AND have configured the antenna for the DISH SD and HD setting use the instructions on this page IF YOUR RECEIVER IS NEW AND NOT YET ACTIVATED YOU MUST PERFORM THE FIRST TIME SETU...

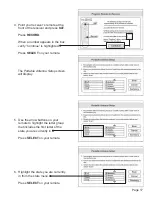
Page 15: ... MENU 6 1 1 on your DISH remote Highlight Check Switch Press SELECT on your remote The Portable Antenna Setup screen should now display The Portable Antenna Setup screen will be displayed on your TV 4 Use the arrow buttons on your DISH remote to highlight the letter group that includes the first letter of the state you are currently in Press SELECT on your remote ...

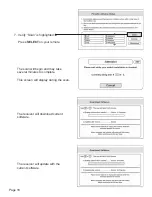
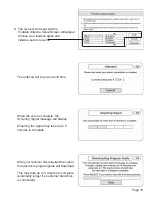
Page 16: ...ECT on your remote The scan will begin and may take several minutes to complete This screen will display during the scan 7 When the scan is complete the Acquiring Signal message will display Acquiring the signal may take up to 5 minutes to complete ...

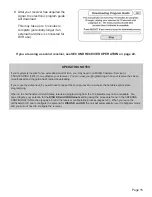
Page 17: ...when your receiver has been re authorized and the guide has finished downloading If you move the antenna unit you will need to repeat the scan process to re acquire the satellites and restore programming When in the northeastern United States television programming from the 129 satellite may not be available You can configure your antenna for the DISH SD and HD Alternate setting using the procedur...

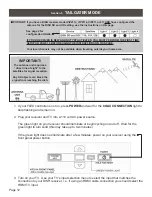
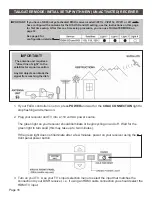
Page 18: ... reaching the dish See page 4 for configuration details 1 If your FLEX controller is not on press POWER and wait for the COAX CONNECTION light to stop flashing and remain on 2 Plug your receiver and TV into a 110 volt AC power source The green light on your receiver should illuminate or begin cycling on and off Wait for the green light to turn solid this may take up to two minutes If the green lig...

Page 19: ...e is highlighted Press SELECT on your remote The Portable Antenna Setup screen will display 5 Use the arrow buttons on your remote to highlight the letter group that includes the first letter of the state you are currently in Press SELECT on your remote 6 Highlight the state you are currently in from the state menu Press SELECT on your remote ...

Page 20: ...d may take several minutes to complete This screen will display during the scan The receiver will download current software The receiver will update with the current software 7 Verify Scan is highlighted Press SELECT on your remote ...

Page 21: ...antenna will scan a second time When the scan is complete the Acquiring Signal message will display Acquiring the signal may take up to 5 minutes to complete After your receiver has acquired the signal the electronic program guide will download This may take up to 5 minutes to complete potentially longer if an external hard drive is connected ...

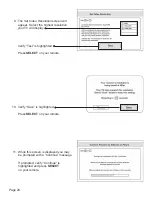
Page 22: ...e If prompted verify Continue is highlighted and press SELECT on your remote 10 Verify Save is highlighted Press SELECT on your remote 9 The Set Video Resolution screen will appear Select the highest resolution your TV will display Verify Test is highlighted Press SELECT on your remote ...

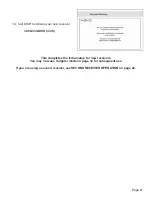
Page 23: ...nitial setup for new receivers You may now use Tailgater mode on page 12 for subsequent use If you are using a second receiver see SECOND RECEIVER OPERATION on page 22 12 Call DISH to activate your new receiver 1 800 333 DISH 3474 ...

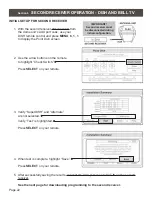
Page 24: ... the remote to highlight Check Switch Press SELECT on your remote 5 After successfully saving the results connect the AUX port coax to SAT IN on the second receiver See the next page for downloading programming to the second receiver 3 Verify SuperDISH and Alternate are not selected Verify Test is highlighted Press SELECT on your remote 4 When test is complete highlight Save Press SELECT on your r...

Page 25: ...adcast from the 119 satellite then the second receiver will be able to display any channel broadcast from the 119 satellite If you switch channels on the main receiver to one that is broadcast from a different satellite i e your channel was broadcast from satellite 119 but your new channel is broadcast from the 110 or 129 the antenna will automatically switch to the new satellite and programming w...

Page 26: ...ves and rescan If problem persists call King Controls Service at 952 922 6889 ERROR light and COAX CONNECTION light both flash quickly Coax between antenna unit and FLEX controller not connected Coax between antenna unit and FLEX controller faulty Coax from FLEX controller connected to wrong port AUX on antenna unit Coax between main circuit board and output port on antenna unit faulty Connect coa...

Page 27: ...Page 25 The FLEX can be secured to an object using a padlock and cable not included to deter theft Section 8 SECURITY Section 9 ACCESSORIES Visit your local dealer or call King Controls to order ...

Page 28: ... the FCC Rules Operation is subject to the following two conditions 1 This device must not cause harmful interference and 2 This device must accept any interference received including interference that may cause undesired operation Section 10 FCC GUIDELINES ...

Page 29: ...does not cover damage caused by the use of a mounting bracket other than a King Controls mounting bracket designed for the product This warranty is not transferable from the original owner Due to the expanding and changing TV market King Controls cannot be held responsible for changes made to satellite services Software updates to address such issues are not covered under warranty This warranty al...

Page 30: ...Page 28 NOTES ...

Page 31: ......

Page 32: ...11200 Hampshire Avenue South Bloomington MN 55438 2453 Phone 952 922 6889 Fax 952 922 8424 www kingcontrols com ...

Reviews: