


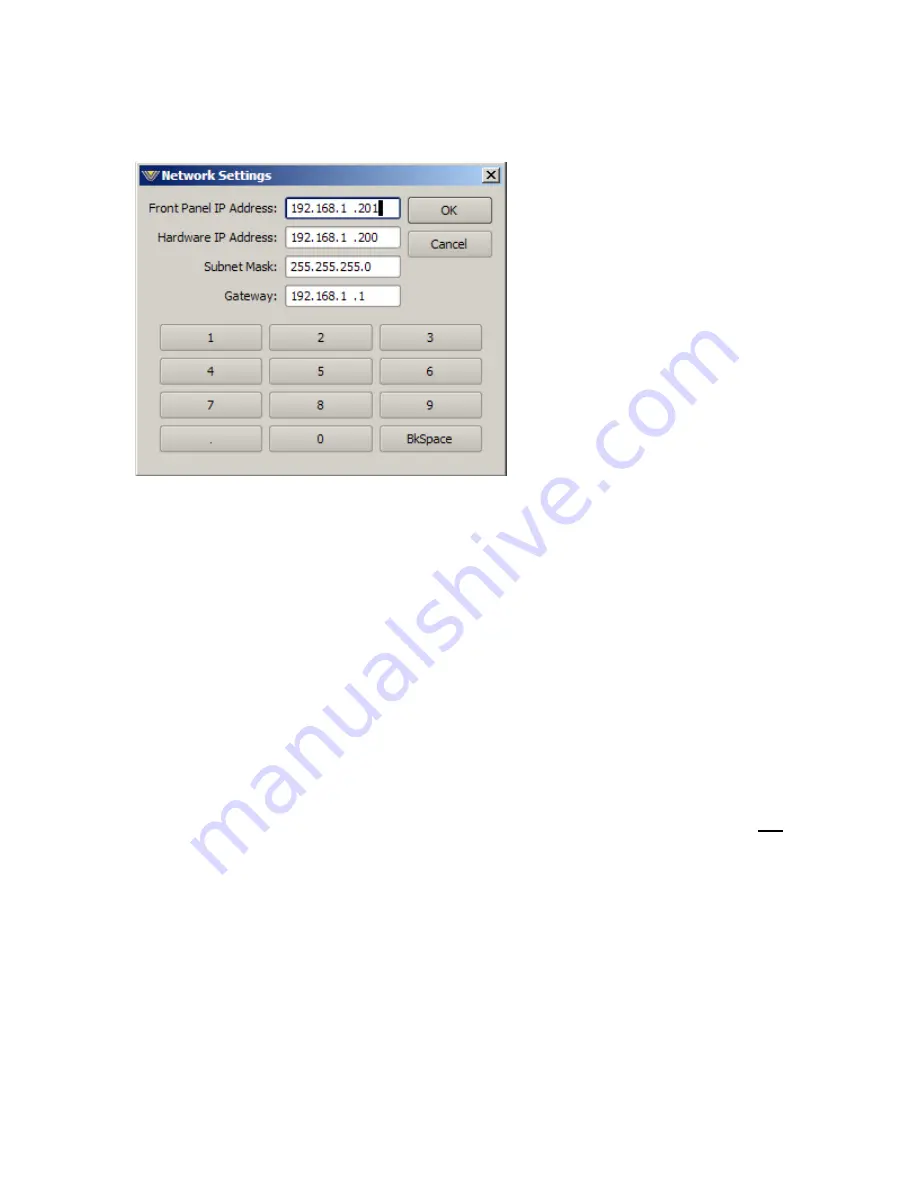
Within that dialog, select the Hardware/Network Settings option and the following
dialog will appear.
Next, using the backspace
button of the numeric keypad,
backspace over any unneeded
entries in the front panel IP
address field.
Next, using the numeric keys,
enter the new IP address for the
front panel, noting that we
usually assign it the next highest
IP address above the hardware
address though this isn’t really
necessary as long as the two
addresses used are in the same
network addressing range.
Next, use the backspace key to erase any undesired characters in the Hardware
IP Address field. Then, using the numeric keys, enter the new Hardware IP
Address.
Use the same procedure to reset the Subnet Mask and Gateway settings to
those appropriate for your network.
Once this has been done, click on the OK button and the new settings will be
stored by the AirAura. When the “You must reboot for the changes to take effect”
message appears, reboot the AirAura by removing its AC power for a few
seconds and then reconnecting it. Once AirAura finishes booting up it will be
operating on the new network settings.
If, after the AirAura boots up the front panel is not showing activity, recheck the
network settings to ensure that they are what you expect them to be. If the Main
DSP board and front panel are on different network address ranges they will
not
be able to communicate.


