Vook VDT2504HD Quick Start Quide Download Page 3

4/8/16DVR Quick Start Guide 

VOOK


premium DVR


3


2.  Connections 

Note: The front view & rear view descriptions are only for reference; please make 
the object as the standard. 

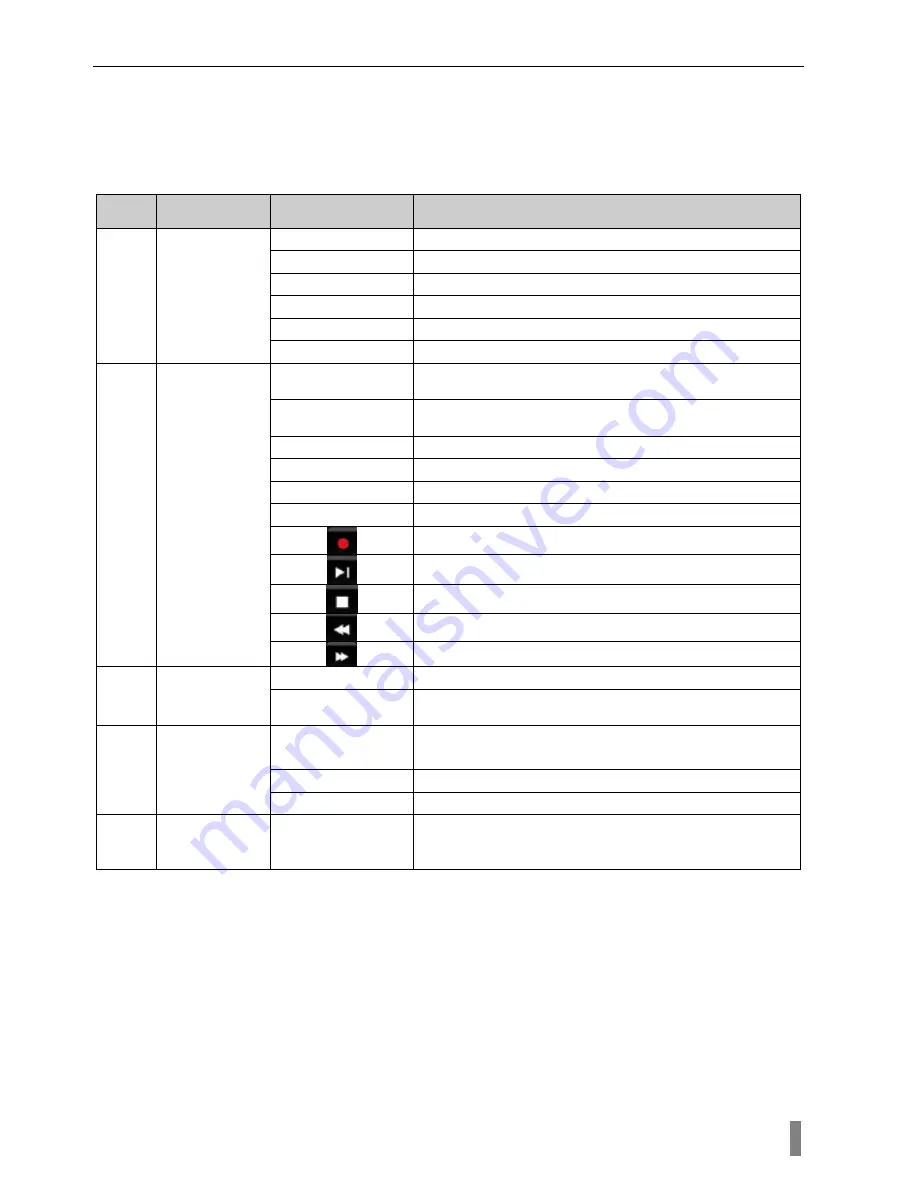
2.1 Front view for DVR 

Item 

Type 

Name 

Description 


Work state 

indicator 

Power 

Power indicator, when connection , the lights up blue   

HDD 

When HDD is writing and reading , the lights up blue   

Net 

When access to network , the lights up blue 

Backup 

When backup files and data, the lights up blue 

Play 

When playing video, the lights up blue   

REC 

When recording, the lights up blue 


Compound 

button


AUDIO/+ 

1. Control voice 
2. Increase the value in setup 

P.T.Z./ - 

1. Enter PTZ mode in live 
2. Decrease the value in setup 

MENU 

Enter menu in live 

INFO 

Check recording data 

BACKUP 

Enter backup mode in live 

SEARCH 

Enter search mode 


Record manually 


Play/Pause 


Stop/Esc 


Rewind 


Fast forward 

Digital 
button 

1-9 

Input number 1-9 or choose camera   

0/10+ 

Input number0, 10 and the above number together 
with other digital keys   


Input 

button 

Direction 

button 

Change direction to select items 

Multi-screen 

Change screen display mode like1/4/9/16 channel 

Enter button 

Confirm selection 

USB 

USB port 

To connect external USB devices like USB flash, 
USB HDD for backup or update firmware; or connect 
to USB mouse 


2.2 Rear view for 4-ch DVR: 

Summary of Contents for VDT2504HD

Page 1: ...VOOK VOOK premium DVR 1 QUICK START QUIDE VDT2504HD VDT2508HD VDT2516HD...

Page 2: ...ect the power and data cables Place the HDD onto the bottom case as below Fig 1 1 Connect HDD Step3 Screw the HDD Note For the convenience to install please connect the power and data cables firstly a...

Page 3: ...Compound button AUDIO 1 Control voice 2 Increase the value in setup P T Z 1 Enter PTZ mode in live 2 Decrease the value in setup MENU Enter menu in live INFO Check recording data BACKUP Enter backup...

Page 4: ...connect external USB devices like USB flash USB HDD for backup or update firmware or connect to USB mouse 11 Network port 12 Connect to external sensor1 4 13 4ch relay output Connect to external alar...

Page 5: ...ct to monitor 2 Video input channels from 1 16 3 Loop out for outputting 1 16ch image independently 4 Connect to monitor as an AUX output channel by channel Only video display no menu show 5 16 CH Aud...

Page 6: ...Notice this serial device can only display menu on VGA monitor or BNC monitor at one time if there is live image display without menu display please check up whether other device has menu display firs...

Page 7: ...n reboot the device and import export data into or from mobile storage medium 4 2 DVR recording modes User need to install and format a HDD and set all the recording parameters before recording There...

Page 8: ...Fig 4 5 motion detection area setup 4 2 4 Alarm Recording Enter into main menu Alarm configuration sensor alarm refer to Fig 4 6 enable Detection first setup the device type Enter into Trigger configu...

Page 9: ...rid Click Play button It will play from the time point where user set Click the relative buttons on the screen to do fast forward rewind pause stop and change the screen mode and re search Fig 4 8 tim...

Page 10: ...ed data will be displayed in the data backup list box Press Backup button it will begin to write video from HDD inside DVR to backup device Click Start button to start backup Fig 4 10 Backup setup 5 R...

Page 11: ...se enable DHCP in both the DVR and router Enter Video to set network video parameters like resolution frame rate etc Forward IP address and port number in Virtual Server setup of the router or virtual...

Page 12: ...d apply for a domain name in a DDNS server supported by the DVR or router Then add to the DVR or router Open IE browser input IP address or dynamic domain name and enter If HTTP port is not 80 add the...

Reviews: