Step 5 Receiving the Custard Freezer:
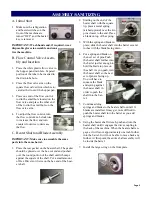
1) Upon arrival, check the entire freezer for any damage that may have occurred during transit. With the
method of packaging used, the freezer should arrive in excellent condition.
The carrier is responsible
for all damage in transit, whether visible or concealed
. Do not pay the freight bill until the freezer has
been checked for damage. Have the carrier note any visible damage on the freight bill. If concealed
damage or a shortage is found later, advise the carrier within 10 days and request inspection. The
customer must place a claim for damages and/or shortages in shipment with the carrier. Stoelting cannot
make any claims against the carrier.
2) Remove the top of the crate using a hammer or pry bar.
3) Remove the eight lag bolts from the freezer using a 1/2” ratchet. Remove the front and rear crate
walls.
4) Remove the four lag bolts located inside the left and right crate walls using 1/2” ratchet. Remove the
left and right crate walls.
5) Remove the plastic wrapping on the freezer. Remove the lower front and back panel on the freezer.
6) Remove the four lag bolts located inside freezer on the frame with a 9/16” ratchet. Remove the two
lag bolts that hold the skid together with a 9/16” socket.
7) If the freezer has the shipping casters or if it is water-cooled, the casters will be in a box located in the
hopper pan. A set of casters includes two casters with locks and two casters without locks. Screw the
casters into the threaded holes and tighten them using a pair of channel locks. After installing the
casters, knock out bottom 4” x 4” of the freezer skid.
* If the freezer does not come with casters, install the stainless steel legs. The legs are located in the
hopper pan on top of the freezer. After installing the legs, use a pallet jack to move freezer into place.
8) Put front and back panels on the freezer.
Step 6 Setting In Place and Making Freezer Connections:
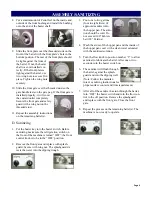
1) Roll the freezer into the desired location. Leave adequate space around the freezer for the removal of
service panels. Remove the left, right, back and lower front service panels.
* After the refrigeration lines are connected, air-cooled freezers cannot be moved.
2) Use a pallet jack or floor jack to lift the front of the freezer, remove the two shipping casters with a
pair of channel locks, and install the stainless steel legs. Make sure the legs are adjusted all the way in,
and screw two of the legs into the frame. Secure them tightly using channel locks. Repeat with the back
of the freezer.
* If the freezer is water-cooled, casters are standard with freezer.
3) Accurate leveling is necessary to ensure proper operation. Place a bubble level on top of the freezer at
each corner to check for level condition. If adjustment is necessary, level the freezer by turning the
bottom part of each leg or caster in or out.
Summary of Contents for Stoelting CC101A
Page 1: ...Model CC101A OPERATORS MANUAL Manual No 513616 Rev 6 ...
Page 2: ......
Page 14: ......
Page 16: ...001 1332808 2 ...
Page 26: ......
Page 30: ......
Page 32: ......
Page 36: ......
Page 37: ......
Page 38: ......

