background image

4

25

VBR334

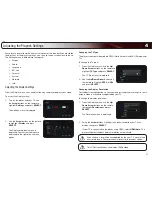
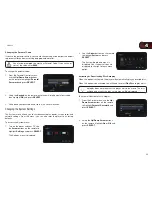
Changing the On-Screen Menu Language

Your player can display on-screen menus and play audio in English, French, or 
Spanish.

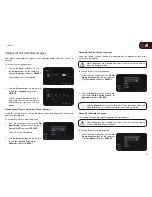
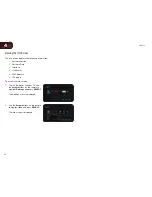
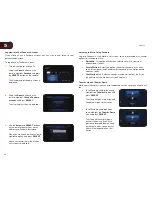
To access the Language menu:

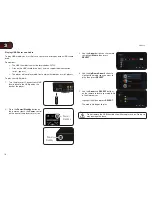
1.  Turn on the player and your TV. Use 

the 

Arrow buttons on the remote to 

highlight 

Settings and press SELECT

 
The Settings menu is displayed. 


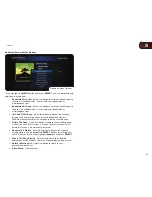
2.  Use the 

Arrow buttons on the remote 

to highlight 

Language and press 

SELECT
 
The Language drop-down menu is 
displayed. Your current settings are 
displayed to the right of each menu 
option.

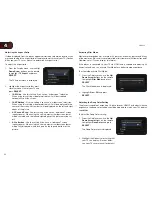
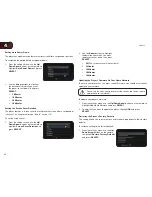
Changing the Player’s On-Screen Menu Language

Using this setting, you can change the player’s menu language to the one you are 
most comfortable with.

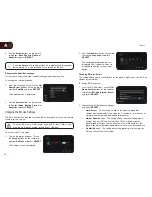
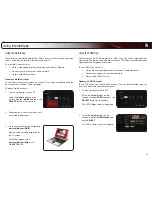
To change the player’s menu language:

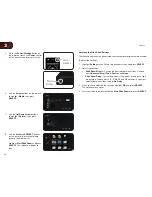
1.  From the Language menu, use the 

Up/

Down Arrow buttons on the remote to 
highlight 

OSD and press SELECT

 
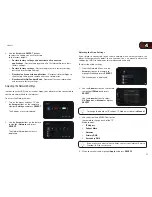
The OSD menu is displayed. 

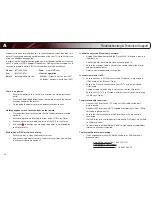
2.  Use the 

Arrow buttons on the remote 

to highlight 

EnglishFrench, or 

Spanish and press SELECT.
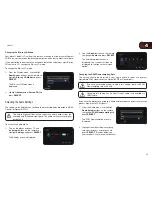
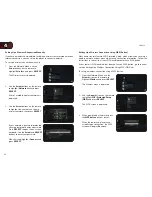
Changing the Disc’s Menu Language

Using this setting, you can change the language that is displayed when a disc’s 
main menu is displayed.

Not all languages are available on all discs. Most discs have only one 
menu language available.

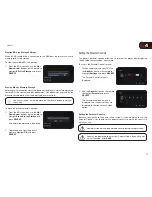
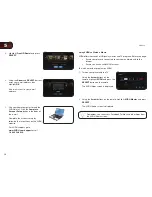
To change the disc’s menu language:

1.  From the Language menu, use the 

Up/

Down Arrow buttons on the remote to 
highlight 

Menu and press SELECT


2.  Use the 

Arrow buttons on the remote 

to highlight 

AutoEnglishFrench, or 

Spanish and press SELECT

Selecting 

Auto for this setting will result in the default menu language 

being displayed. This is determined by the setting on the disc.

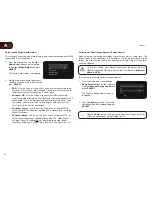
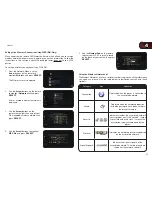
Changing the Audio Language

This setting changes the spoken language on a played disc.

Not all languages are available on all discs. Most discs have only one 
or two audio languages available.

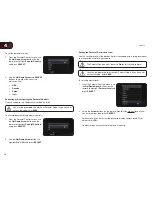
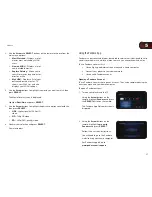
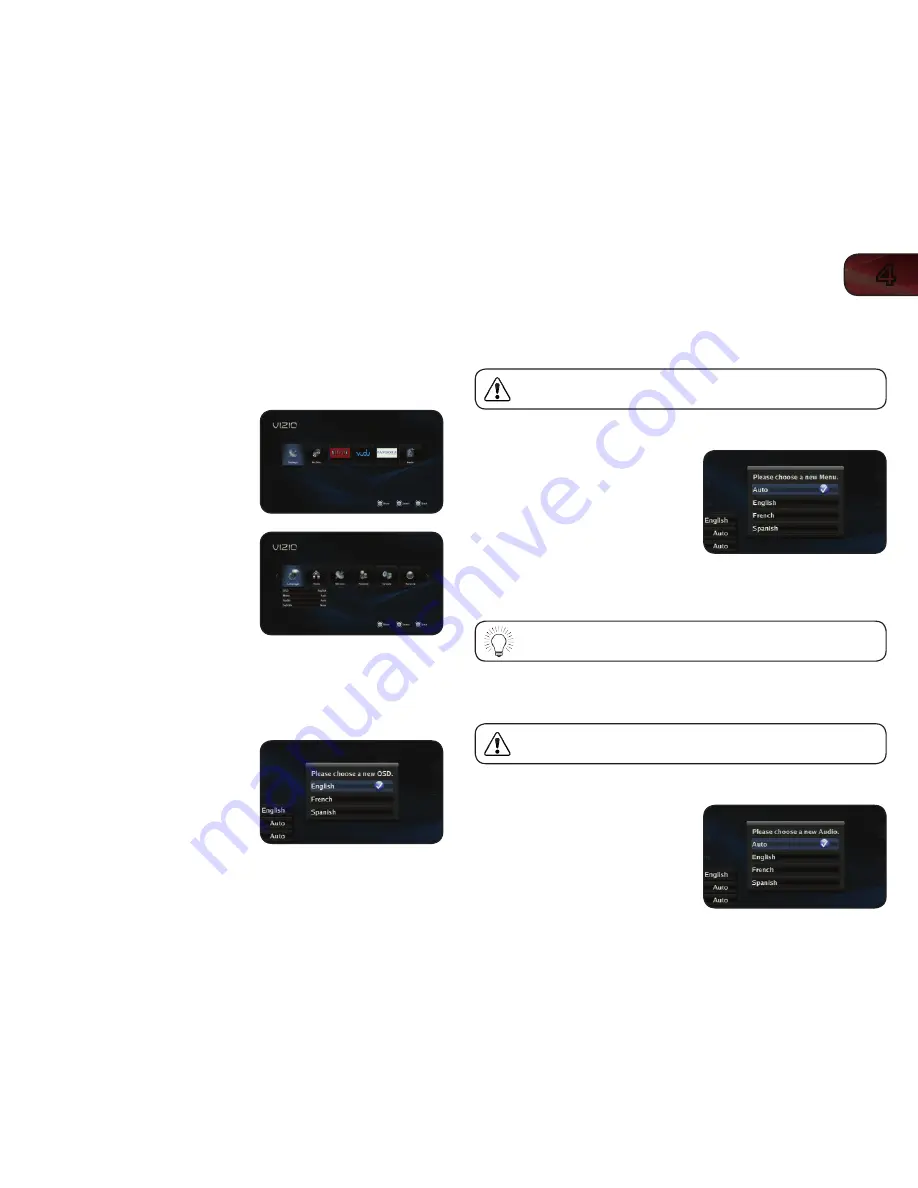
To change the disc’s audio language:

1.  From the Language menu, use the 

Up/

Down Arrow buttons on the remote to 
highlight 

Audio and press SELECT


Summary of Contents for XVT3D474SVBundle

Page 1: ...VBR334 USER MANUAL 3D BLU RAY PLAYER WITH WIRELESS INTERNET APPS...

Page 2: ......

Page 3: ...closed registration card and mail it to VIZIO 39 Tesla Irvine CA 92618 Extended Warranties For peace of mind and to protect your investment beyond the standard warranty VIZIO offers on site extended w...

Page 4: ...of 3D content Children including teenagers may be more at risk of experiencing discomfort while watching 3D content and less likely to report symptoms Monitor children s 3D content viewing and watch f...

Page 5: ...the Display Settings 21 Changing the TV Type 21 Changing the Display Resolution 21 Adjusting the Aspect Ratio 22 Activating Film Mode 22 Adjusting the Deep Color Setting 22 Changing the Blu ray 3D Mo...

Page 6: ...n I press buttons on the remote 40 My Blu Ray or DVD disc does not play 40 I cannot connect the Player to my network 40 I cannot view movies in 3D 40 The picture quality seems low 40 The Internet Apps...

Page 7: ...our finger on one of the lit control symbols Do not push on the controls forcefully make complete contact with your finger and the player will respond Rear Panel Rear Panel USB Connect a USB thumb dri...

Page 8: ...track Rewind Reverse playback Press repeatedly to increase the speed Press Play Pause to resume normal playback speed Play Pause Start or pause playback Fast Forward Advance playback Press repeatedly...

Page 9: ...match the and symbols inside the battery compartment 3 Replace the battery cover Inserting Batteries Use only a good quality battery Inserting the battery incorrectly may result in cracking or leakag...

Page 10: ...stallation ensure your TV has one of the following types of video ports available Required TV Port HDMI Composite AV Component Choosing the Correct Connection Use the table below to choose the connect...

Page 11: ...TV Connection Chart High Speed HDMI Cable Composite AV Cable Component Video Cable Audio Cable 3 Turn the TV on 4 Turn the player on by pressing the Power button on the remote or by touching the Powe...

Page 12: ...he Home Audio Connection Chart below Home Audio Connection Chart COAXIAL COAXIAL OPTICAL OPTICAL 3 Turn the player on by pressing the Power button on the remote or by touching the Power control on the...

Page 13: ...th an optical cable To connect the player to your home audio system with HDMI 1 Ensure both your home audio system and the player are off 2 Connect the player to the home audio system and TV as shown...

Page 14: ...e player detects the ethernet connection Connecting to a Wireless Network To connect to a wireless network 1 Ensure you have A router broadcasting a high speed wireless signal wireless n recommended A...

Page 15: ...ons on the remote The highlighted icon or menu setting will glow light blue To select an icon or menu setting highlight the icon or menu setting and press SELECT button on the remote To go back to a p...

Page 16: ...gain to resume normal playback Fast Forward Increase speed of playback Press repeatedly to increase the speed Speeds are x2 x4 x8 x16 x32 x64 and x128 Press Play Pause to resume normal playback Stop H...

Page 17: ...Repeat all tracks in order Random Repeat all tracks randomly Track Repeat the currently playing track Off Resume normal playback Viewing BD Live Content Your player can access special content from di...

Page 18: ...to the USB port on the back of the player 2 Press the Power Standby button on the remote or touch the Power control on the front of the player to turn it on Power Standby Power Standby 3 Use the Arro...

Page 19: ...e normal playback Play Pause Pause playback Press again to resume normal playback Fast Forward Increase speed of playback Press repeatedly to increase the speed Speeds are x2 x4 x8 x16 x32 x64 and x12...

Page 20: ...sting the Slide Show Settings The slide show settings can be adjusted to make your presentations more exciting To adjust the settings 1 Highlight Settings in the Pictures file browser screen and press...

Page 21: ...ng HDMI select HDMI Auto The player will detect the best display resolution automatically If you choose a resolution unsupported by the your TV you will see an error message The resolution will revert...

Page 22: ...may be cut off 4 3 Letterbox Use this setting if you have a traditional screen nearly square When using this setting movies in widescreen fomat will be fully displayed with black bars on the top and...

Page 23: ...1 Turn on the player and your TV Use the Arrow buttons on the remote to highlight Settings and press SELECT The Settings menu is displayed 2 Use the Arrow buttons on the remote to highlight Audio and...

Page 24: ...r capable of decoding DTS Dolby Digital or Dolby Digital Plus audio Bitstream Mixed Use this setting if you have an Optical SPDIF or HDMI connected receiver capable of decoding DTS Dolby Digital or Do...

Page 25: ...ow buttons on the remote to highlight English French or Spanish and press SELECT Changing the Disc s Menu Language Using this setting you can change the language that is displayed when a disc s main m...

Page 26: ...remote to highlight Settings and press SELECT The Settings menu is displayed 2 Use the Arrow buttons on the remote to highlight Language and press SELECT The Language drop down menu is displayed Your...

Page 27: ...confirmation message is displayed 2 To proceed and clear the player s memory highlight OK and press SELECT Setting the Parental Controls The player s parental controls allow you to prevent the player...

Page 28: ...Controls and press SELECT 2 Use the Up Down Arrow buttons to highlight On or Off and press SELECT Setting the Parental Restriction Level Use this setting to restrict the playback of discs encoded with...

Page 29: ...player to its factory defaults To access the System menu 1 Turn on the player and your TV Use the Arrow buttons on the remote to highlight Settings and press SELECT The Settings menu is displayed 2 Us...

Page 30: ...se the Arrow buttons to highlight the duration after which you want the player to shut down then press SELECT Off The screen saver will not activate 5 Minutes 10 Minutes 20 Minutes 30 Minutes Updating...

Page 31: ...The Settings menu is displayed 2 Use the Arrow buttons on the remote to highlight Network and press SELECT The Network drop down menu is displayed Adjusting the Wired Settings If your player is conne...

Page 32: ...T buttons to enter your password When finished highlight Connect and press SELECT Setting Up a Wireless Connection Using WPS Button Many newer routers feature WiFi Protected Setup which allows you to...

Page 33: ...uttons to highlight WPS Pin and press SELECT 5 Use the Number Pad on the remote to enter your WPS Pin usually found on the back of your router then press SELECT Using the Wireless Network List The Wir...

Page 34: ...te Interface Link Status MAC Address IP Address To access the info screen 1 Turn on the player and your TV Use the Arrow buttons on the remote to highlight Settings and press SELECT The Settings menu...

Page 35: ...navigate to www netflix com VIZIO Sign up using the code displayed on the TV screen For Netflix support go to www netflix com help or call 1 866 579 7113 Using the VUDU App Your player has the VUDU Ap...

Page 36: ...1 888 554 8838 Using VUDU to Watch a Movie VUDU offers thousands of HD quality movies and TV programs Before you begin Ensure your player is connected to your home network and to the internet Ensure y...

Page 37: ...lection and press SELECT Your movie plays Using the Pandora App Pandora is a personalized internet based radio service that is designed to help you discover new music while you listen to music you alr...

Page 38: ...r songs To tell Pandora you don t like a song highlight the Thumbs Down icon and press SELECT That song will never play again on that station and if you have previously thumbed down a song by the same...

Page 39: ...g from playing on any of your personalized stations Pandora will eventually play the song again but not anytime soon Delete This Song Select this option to remove the currently playing station from yo...

Page 40: ...r to my network Unplug the modem router and the Player Wait 10 seconds then turn them back on See Setting Up Your Network Connection on page 14 Ensure the ethernet cable is securely connected to both...

Page 41: ...480i 480p HDMI Component Out Audio CD CD R CD RW MP3 WMA Support 7 1 Digital Audio via HDMI 24 bit 192KHz Audio DAC Dolby Dolby Digital Dolby Digital Plus Dolby Digital TrueHD DTS DTS Digital Surroun...

Page 42: ...cover for example cosmetic damage normal wear and tear improper operation improper voltage supply or power surges signal issues damages from shipping acts of God any type of customer misuse modificati...

Page 43: ...Health and Human Services and also with FDA Radiation Performance Standards 21 CFR Subchapter J IC Statement Operation is subject to the following two conditions 1 This device may not cause interferen...

Page 44: ...on the rights to use copy modify merge publish distribute sublicense and or sell copies of the Open Source Software and to permit persons to whom the Open Source Software is furnished to do so subject...

Page 45: ...for any third party materials or web sites or for any other materials products or services of third parties Links to VIA Services and any associated links to other data servers are provided solely as...

Page 46: ...ED ARE FOR ILLUSTRATION PURPOSES ONLY VIZIO THE V LOGO WHERE VISION MEETS VALUE AND OTHER VIZIO TRADEMARKS ARE THE INTELLECTUAL PROPERTY OF VIZIO INC PRODUCT FEATURES AND SPECIFICATIONS ARE SUBJECT TO...

Reviews: