VXO4831BF
INSTALLATION GUIDE
PAGE 3 of 5
AIR TANK
MOUNTING
Find a convenient mounting location in your vehicle for the air tank. Ensure ports are reachable before drilling
any holes.
Mark the location of holes using the mounting bracket of the air tank as a template, and then drill to size.
Using mounting hardware provided, secure the air tank.
IMPORTANT
: Do not mount on a flexible material.
The installation location of your tank’s accessories depends on your air system’s configuration.
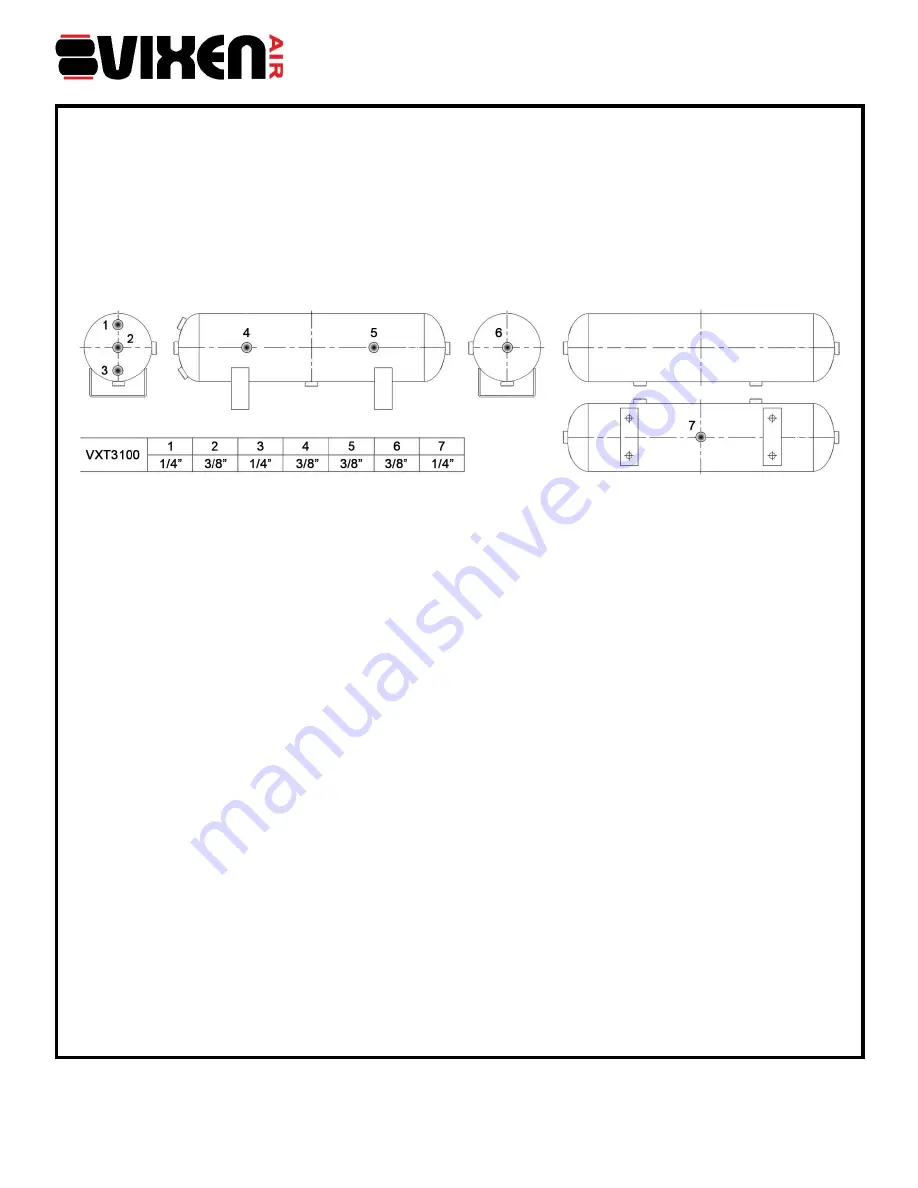
PORT LOCATIONS AND THREAD SIZE (NPT)
PRESSURE SWITCH RATING
The included pressure switch has a rating of 170 PSI ON, 200 PSI OFF. When the air pressure in the air tank
is below the preset ON pressure (170 PSI), the compressor will automatically turn on and will start pumping
air into the tank. When the pressure reaches the cut OFF pressure (200 PSI), the compressor will be
automatically shut off.
DRAIN VALVE
This valve helps you drain the water that can collect in the air tank after long periods of use.
REMOVING CONDENSATION
:
To remove any condensation which has accumulated inside the tank, bleed the tank’s pressure until it ranges
from approximately 5 PSI to 20 PSI.
Remove the drain valve found at the tank’s bottom to drain the water from the tank. After draining the
accumulated condensation, reinstall the drain valve.
IMPORTANT
: Draining the system regularly will extend the life of the air tank.
WATER TRAP
INSTALLATION
Start installation with the bowl detached from the filter body.
Connect the stainless steel braided hose of the compressor to the inlet port of the water trap.
Using the male coupling on the outlet port of the water trap, connect the water trap to the air tank.
When screwing the fittings together, prevent ingress of shavings and sealant to the interior of the unit.
Contaminations in the unit may cause it to fail.
Make sure that all connections to the filter are tight and secure.
Push bowl into the filter body and turn fully clockwise before pressurizing.
OPERATION
Let the filter run with air supply on. Ensure that the pressure to the air inlet of the filter from air line does not
exceed the maximum pressure specified in the instructions.
The filter is equipped with a manual drain. Turn manual drain valve to drain accumulated liquids inside the
bowl. Take care to drain the liquids from the bowl whenever necessary and always keep the liquids below the
baffle.


