


D
D
D
L
L
L
P
P
P
P
P
P
r
r
r
o
o
o
j
j
j
e
e
e
c
c
c
t
t
t
o
o
o
r
r
r
—
—
—
U
U
U
s
s
s
e
e
e
r
r
r
’
’
’
s
s
s
M
M
M
a
a
a
n
n
n
u
u
u
a
a
a
l
l
l
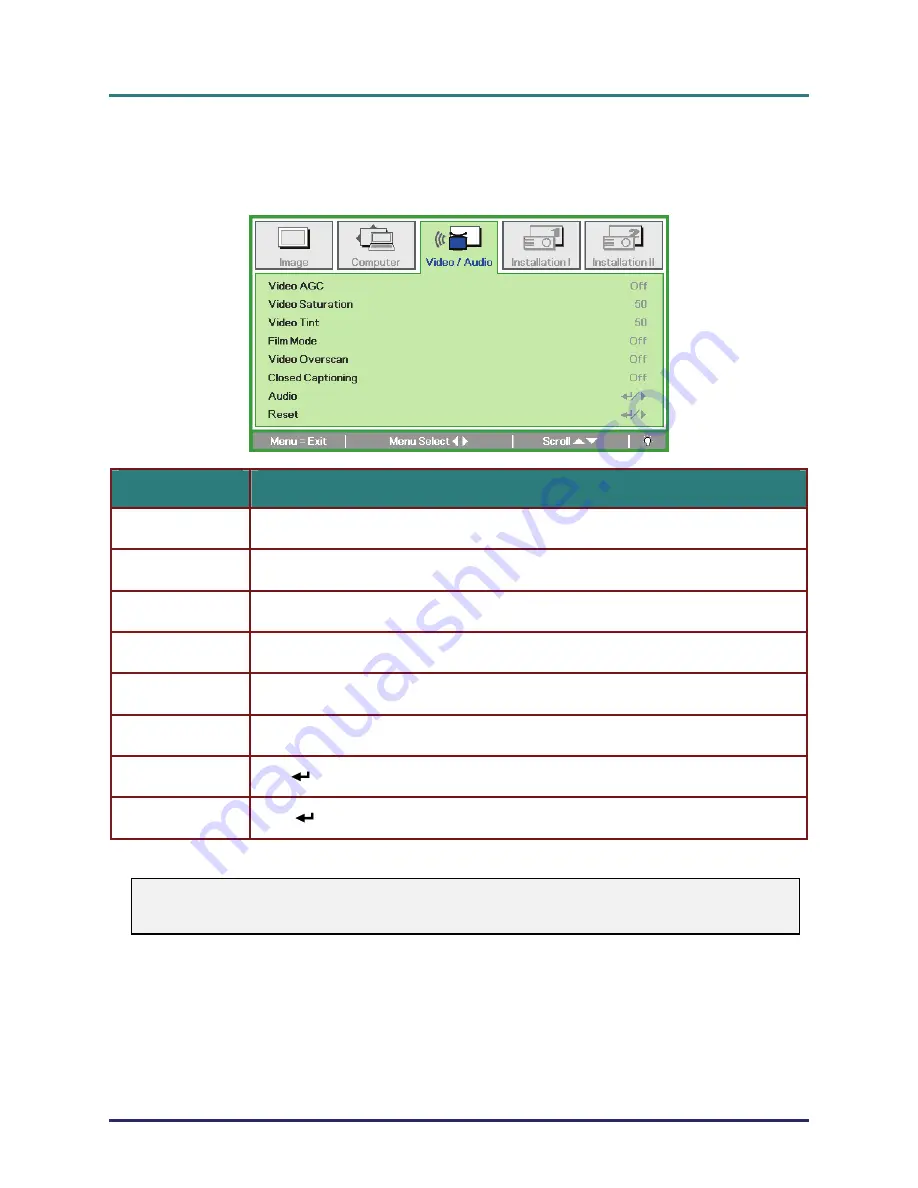
Video/Audio Menu
Press the
MENU
button to open the
OSD
menu. Press the cursor
ユモ
button to move to the
Video/Audio
menu. Press the cursor
メヤ
button to move up and down in the
Video/Audio
menu.
Press
ユモ
to change values for settings.
I
TEM
D
ESCRIPTION
Video AGC
Press the
ユモ
buttons to enable or disable the Automatic Gain Control for video source.
Video Saturation
Press the
ユモ
buttons to adjust the video saturation.
Video Tint
Press the
ユモ
buttons to adjust the video tint/hue.
Film Mode
Press the
ユモ
buttons to select a different film mode.
Video Overscan
Press the
ユモ
buttons to enable or disable video over scan.
Closed Captioning
Press the
ユモ
buttons to enable or disable Closed Captioning
Audio Press
(Enter) /
モ
to enter the Audio menu. See
Audio
on page 27.
Reset Press
(Enter) /
モ
to reset all settings to default values.
Note:
Video jagging may occur when playing interlace video. To overcome this issue, open the
Video / Audio menu and adjust the Film Mode feature.
– 26 –


